Coiled and Ready to Strike
Upgrade your C5-6 Corvette with coilover suspension components from Aldan American
By Cam Benty
Photos by Cam Benty and Gary Nelson

Unquestionably, the Corvette is an amazing performance car right from the factory. But as all car enthusiasts know, there is always room for improvement.
But why would you even think to change a Corvette suspension? That’s because Chevrolet factory engineers are tasked with building a suspension than is everything to everyone – a compromise of sorts. How can one factory suspension be right for highway cruising and performance?
The Challenge
Corvette suspensions incorporate a transverse leaf spring suspension design. The C5-C6 Corvettes utilize a fiberglass leaf spring, front and rear. This tried and true system allows for a very simple suspension design – but with limited tunability. That means the same guy who takes his Corvette to the golf course on Saturday, has the same suspension set up at the Sunday autocross. With the new Aldan American Corvette suspension upgrade there is a huge improvement in tunability by installing coilover and removing both leaf springs.
Aldan American has developed suspension that can be tuned for the demands of the driver. Corvettes equipped with this suspension have the ability to adjust the firmness (compression and rebound settings with double adjustable units) by turning a few shock-mounted knobs to increase compression or rebound settings. In essence, Aldan American is the perfect solution that fits all needs.
It is important to note that especially for the disassembly and reassembly stages, consulting a factory service manual is always a good thing. With article of this type, we can only give a cursory overview of the steps involved in taking apart and reassembling our suspension. This can be especially important when working with springs under compression as injury can occur. And of course having parts torqued to the correct tightness before you hit the road is imperative.
The Aldan American Kit
The Aldan American single and dual adjustable suspensions allow the Corvette owner to tune on the spot for the challenge a hand. Looking for a relaxed ride to dinner with the wife – soften up the compression and rebound settings. Looking to take on the local track champion with your daily driver, crank up not only the firmness of the suspension but drop the overall height of the car by up to two inches below factory settings. Lowering your car’s overall height will drop the roll center and deliver improved vehicle handling. Best of all, these change take only a few minutes to complete converting your Corvette from a pussycat into a tiger.
The Aldan American’s double adjustable coilover system starts with a pair of coilover units made up of highly tunable, aluminum-body shocks and variable rate coil over springs. Everything you need to install these units is included – new high strength hardware, mounting brackets and adjusting equipment just to hit the highlights. In our case, we added the optional thrust washer kit that helps when adjusting vehicle ride height.
Of critical importance with this installation is removing the original factory leaf spring from the equation. The Aldan American suspension becomes your Corvette’s full supporting suspension with four highly advanced coilover units stationed at the four corners of your vehicle.
Each coilover has a number of adjustment settings, with these double adjustable unit there are six adjustments for compression and 11 “clicks” of adjustment for rebound (single adjustable coilovers only allow for compression adjustment in front and rebound tuning up in the rear) at all four corners. That gives the owner an amazing array of settings in which to experiment with to achieve a suspension that delivers their concept of true optimum handling.
Our 2006 Corvette C6 was a great candidate for our installation with over 70,000 miles of “adult” road use. We had already installed the single adjustable Aldan American coilovers on this car (adjustable for compression settings only) so now the owner wanted to try on the double adjustable system. The result of our “upgrade” to double adjustable units greatly increased handling versatility both in terms of firmness for handling and comfort levels not possible with the factory parts.
The best of all worlds? Sure sounds like it to us.
1) This 2006 Corvette was in terrific shape having a received a few owner installed Z06 options including oversize tires and wheels, brake ducting, performance exhaust and other nice upgrades.
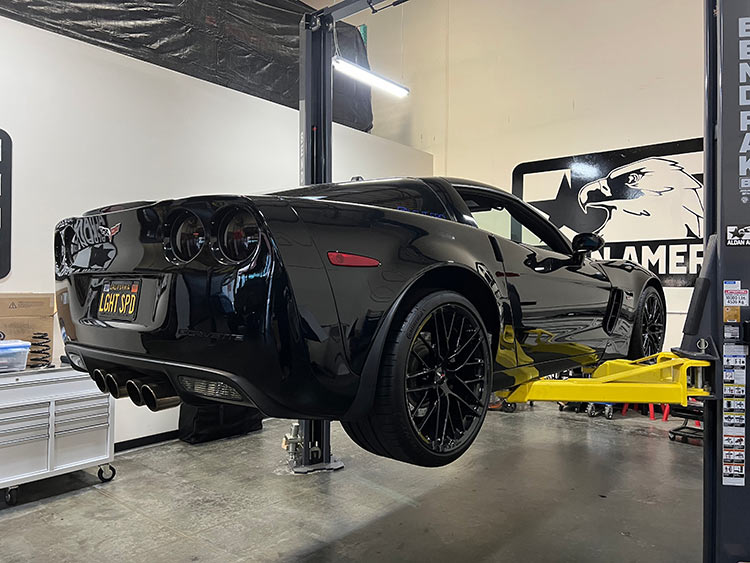
2) The Corvette had already experienced a set of single adjustable Aldan American Coilovers so it was time to try on the double adjustable system. Installing this system on a vehicle that had stock or even conventional shocks would follow the same methods.
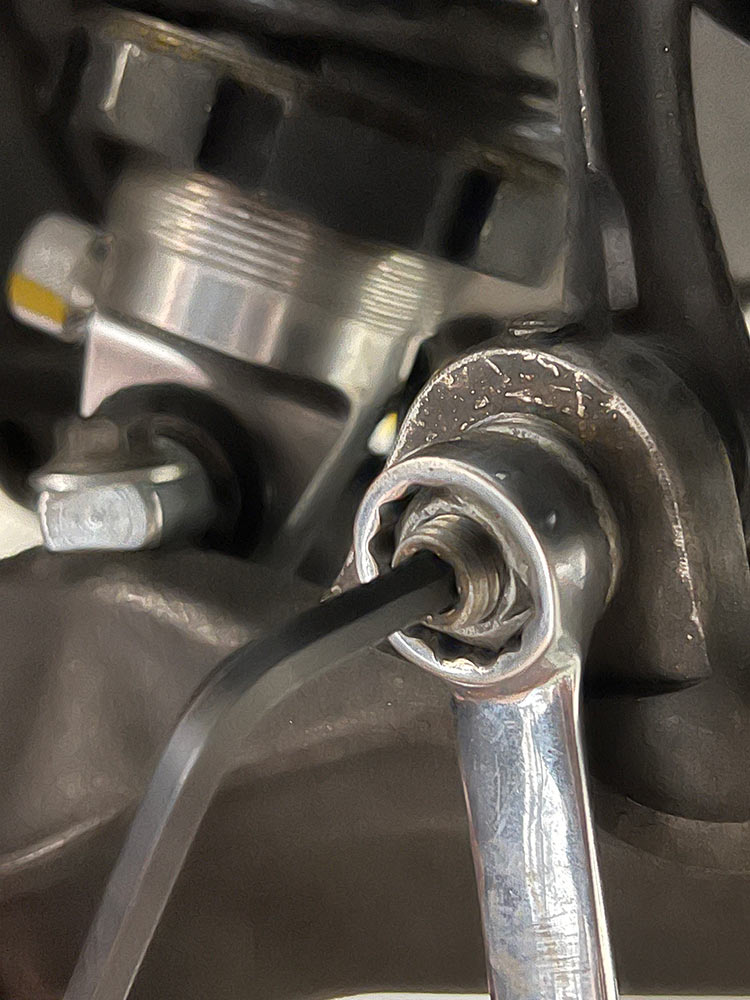
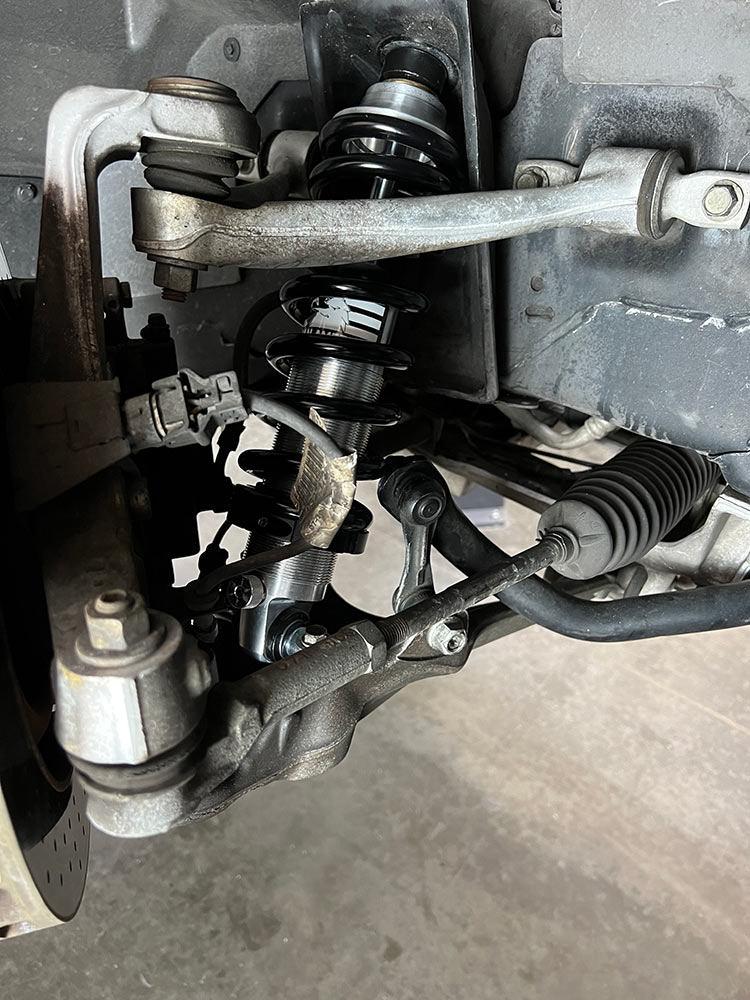
3) Starting with the front suspension, we disconnected the sway bar link. To do so we used a box end wrench and an Allen wrench in this manner.
4) Next, we disconnected the shock mounting bolts from underneath the A-arm and pulled it up and away from the suspension. With the car on a lift with the suspension relaxed, the shock will slide out easily from the bottom mount.
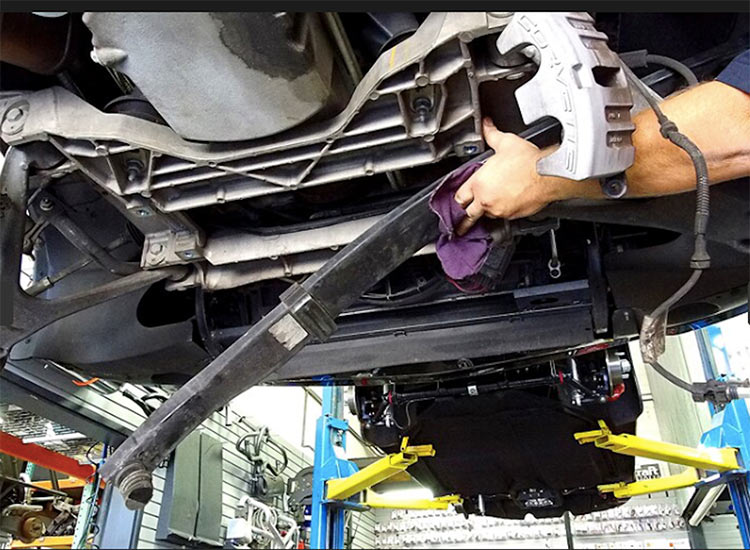
5) Next we removed the bolts and covers that retain the transverse leaf spring. Make sure to support the wheel spindles as the leaf spring is under pressure and with the shock/coilover no longer hooked up the technician needs to release that pressure slowly with a jack.
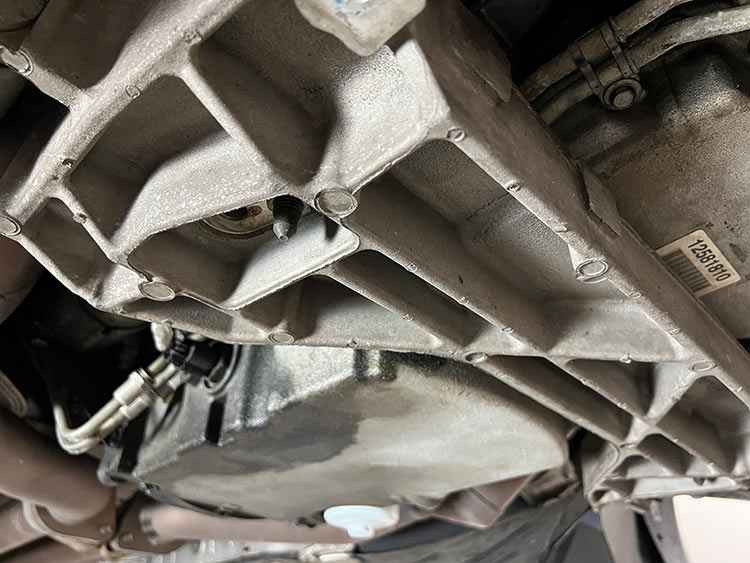
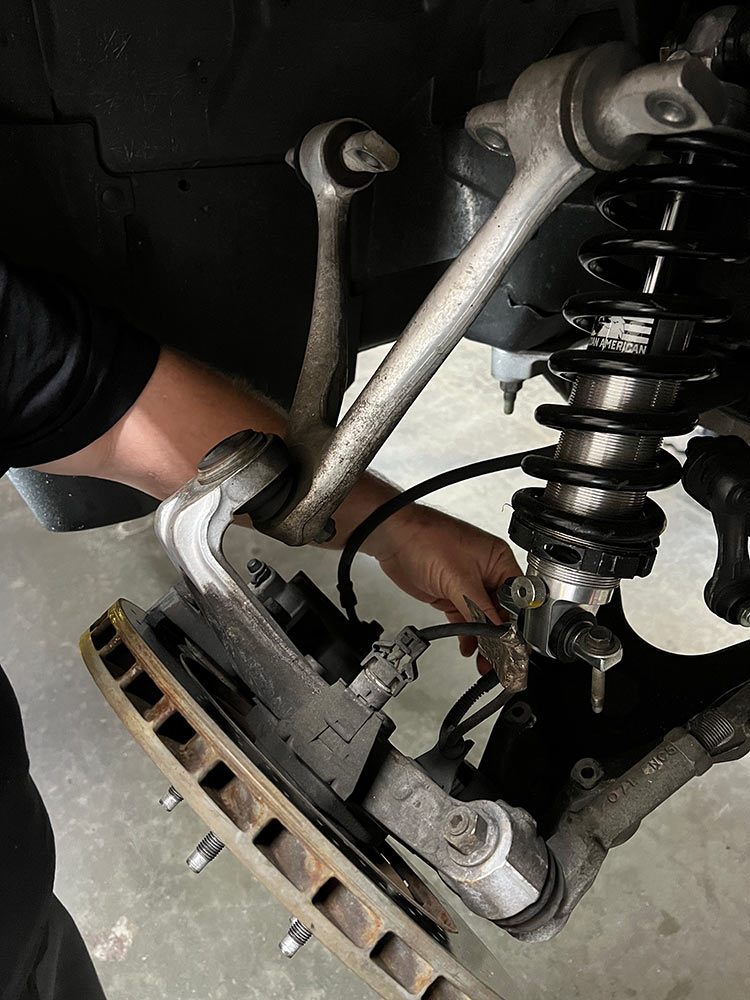
6) For reference, this is what the front leaf spring area should look like after the spring is out. It is critical that you remove this spring or the spring rate achieved by combining the Aldan coilovers and the factory leaf will be enormous – and deliver horrible ride and handling. Remember – it’s one or the other – not both.
7) We removed the upper A-Arm mounts at the chassis. Each mount requires the removal of two bolts per side to pull the A-arm down and out of the way. Make sure to retain the washers that fit behind these bolts as they are specialized for this placement. After the A-Arm is out, the mounting bolt for the top of the shock/coilover will now be accessible.

8) To finish the prep stages, we unbolted the coilover/shock at the top. This nut is visible on the topside of the shock-mounting tab. It should be noted that we removed the upper A-Arm in this case since the leaf spring was already out and then moved to take out the coilover from the top.
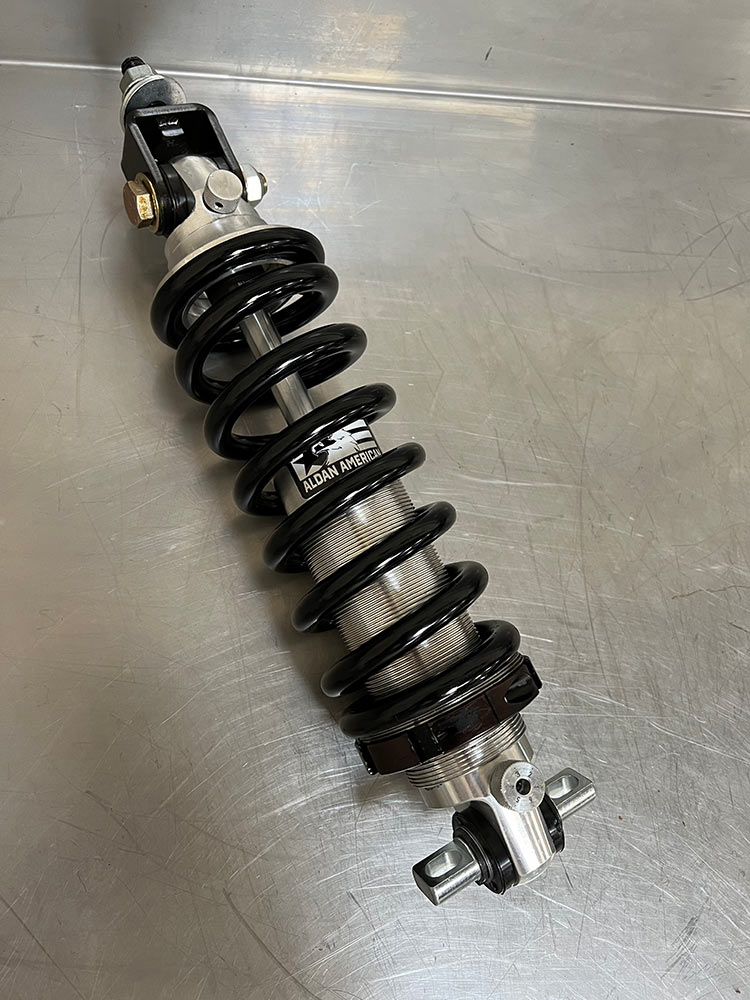
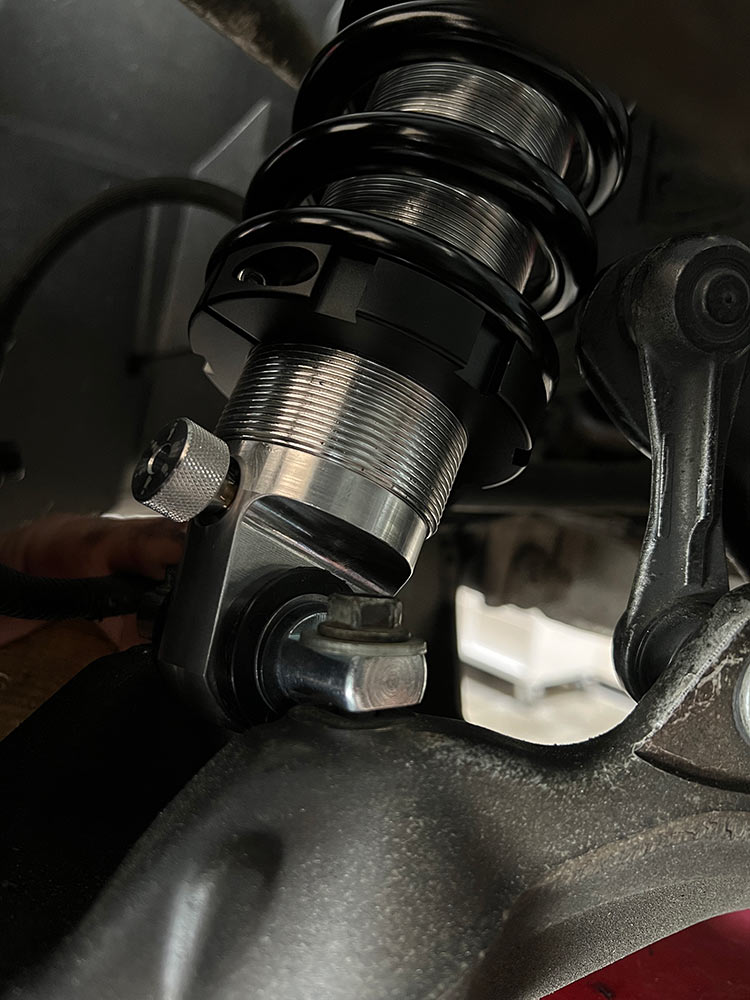
9) A thing of beauty, the Aldan American double adjustable coilover features an aluminum shock wrapped with a powder-coated spring. Note the knobs at the top and bottom, the upper knob for rebound adjustments and the bottom knob for compression settings.
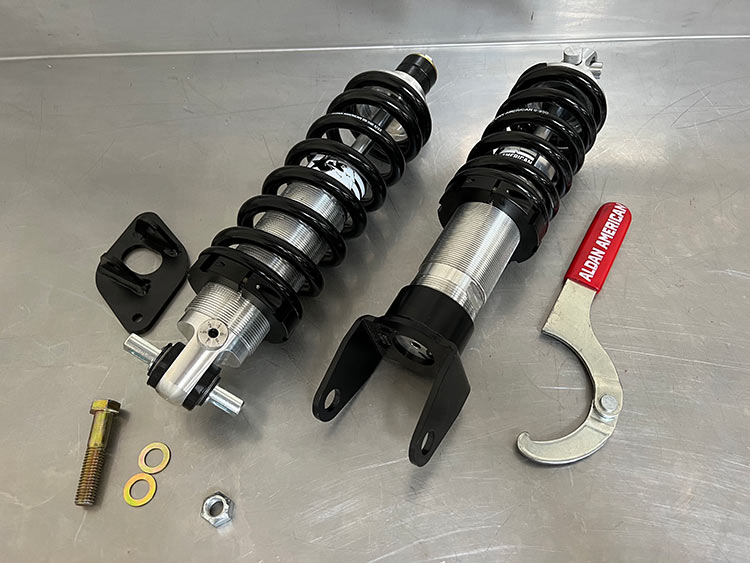
10) The full coil over kit for C5-C6 Corvette includes both of these coilovers, brackets for mounting, hardware and adjustment wrench.
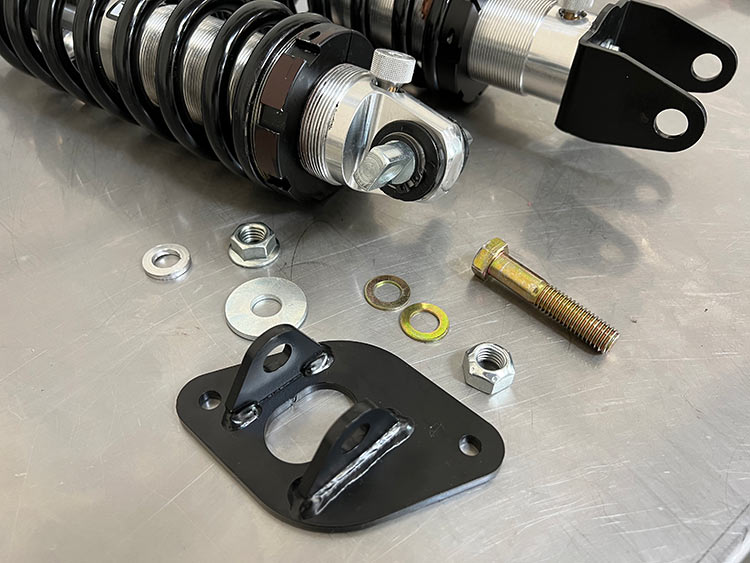
11) The lower coilover mounting brackets make installation very easy without the welding or major modifications.
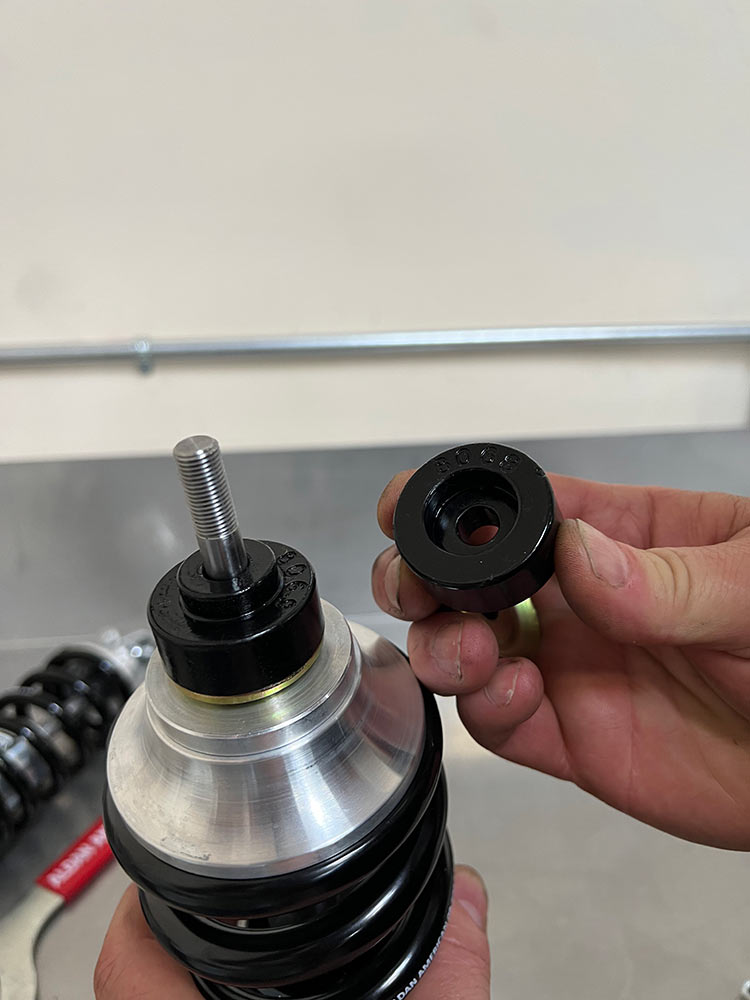
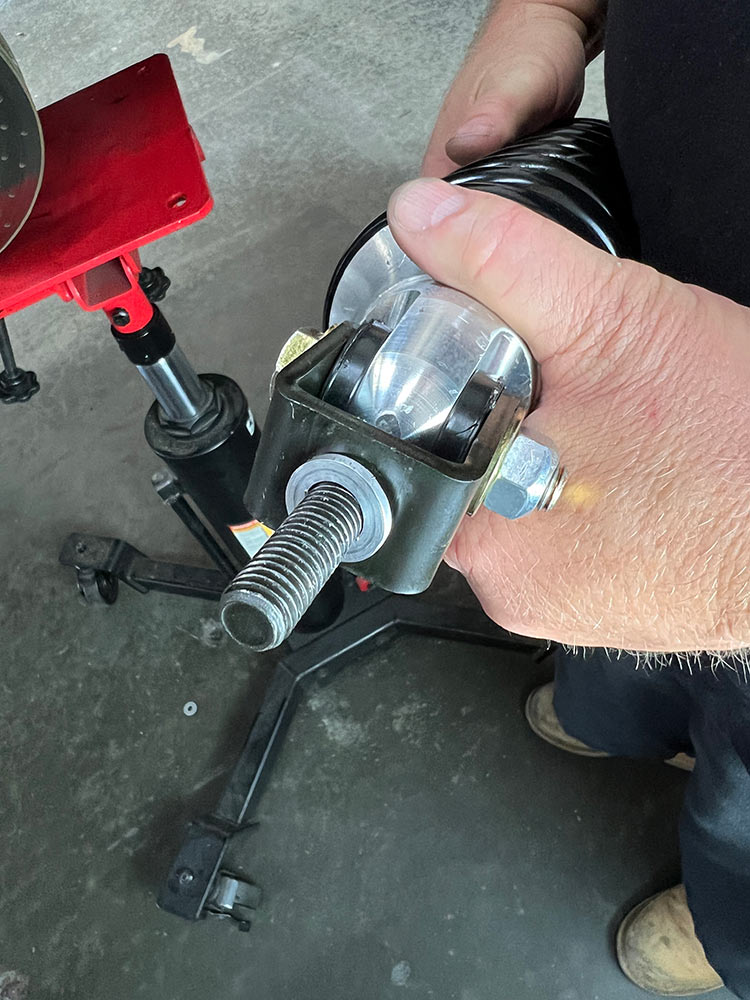
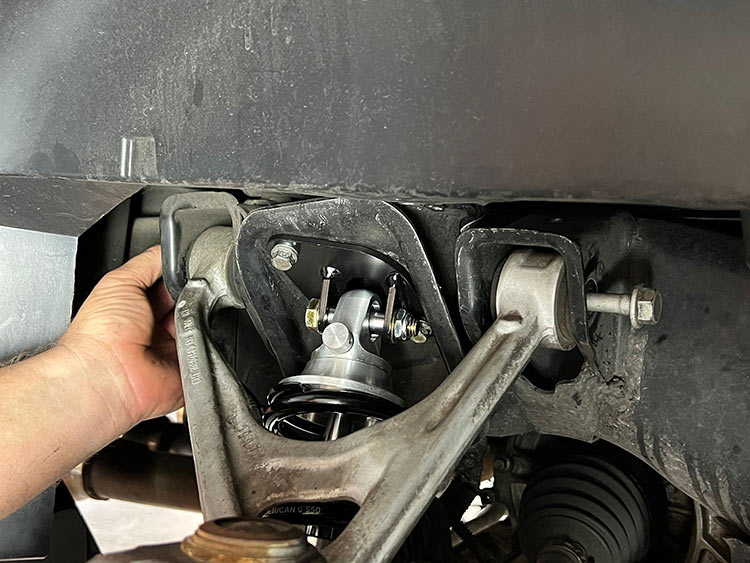
12) The coilover rubber bushings used to cushion the top of the coilover fit perfectly into the opening in the upper mounting tab.
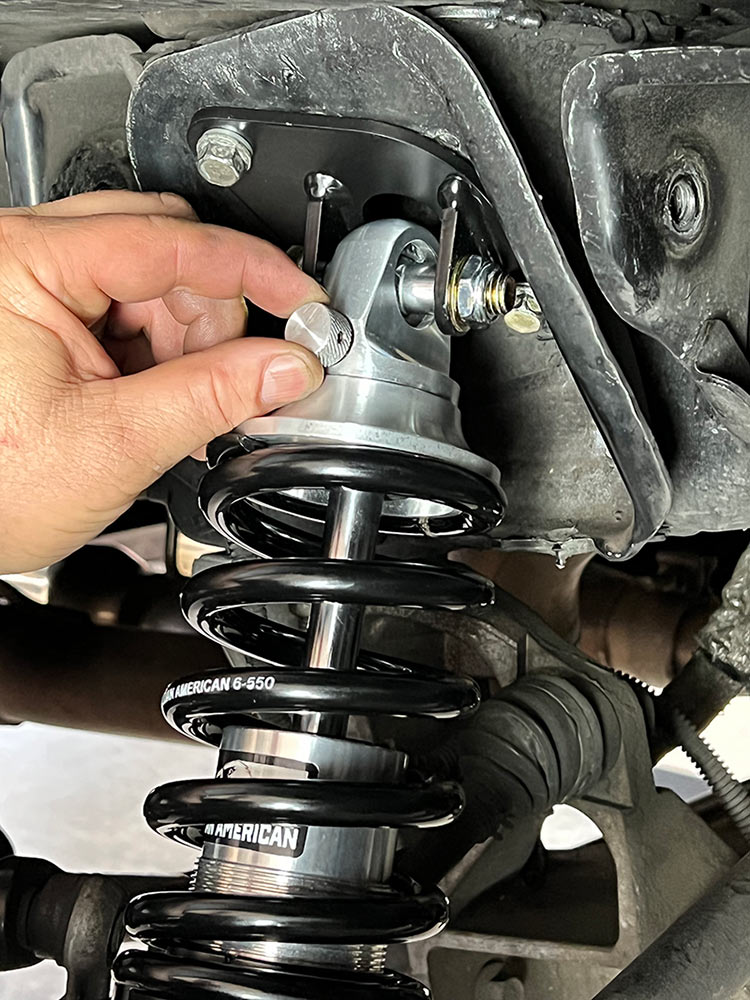
13) Make sure that the bushings seat fully into the tab and loosely spin on the supplied hardware to get the coilover to hang in the shock tower. Note that the adjustment knobs are pointing outward so they can be accessed once the car is on the ground.
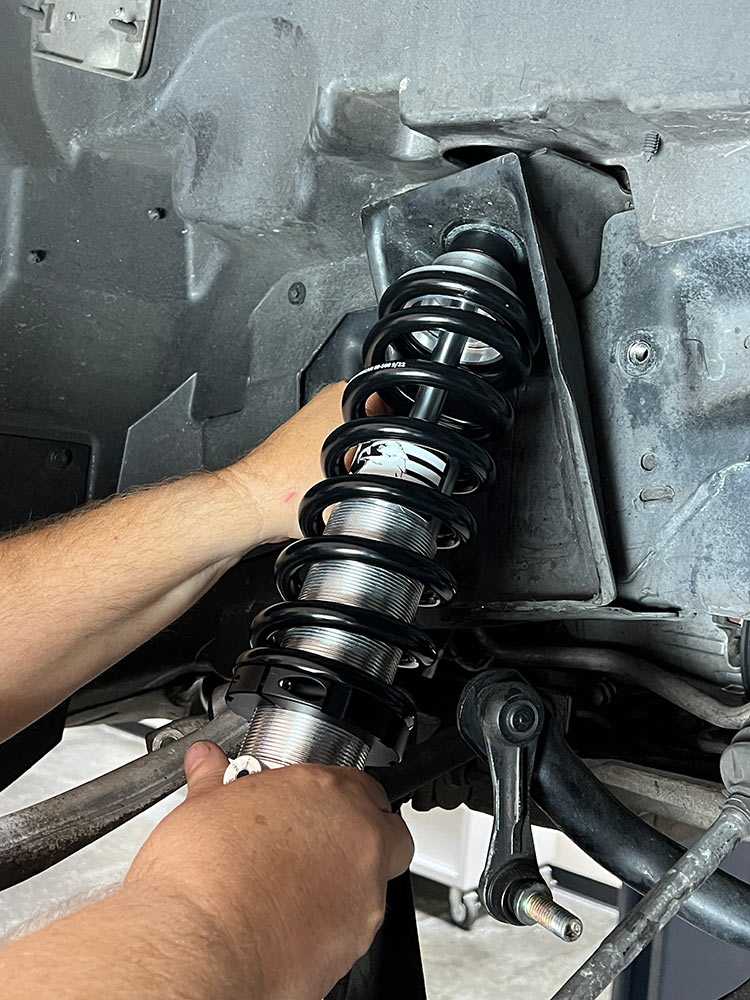
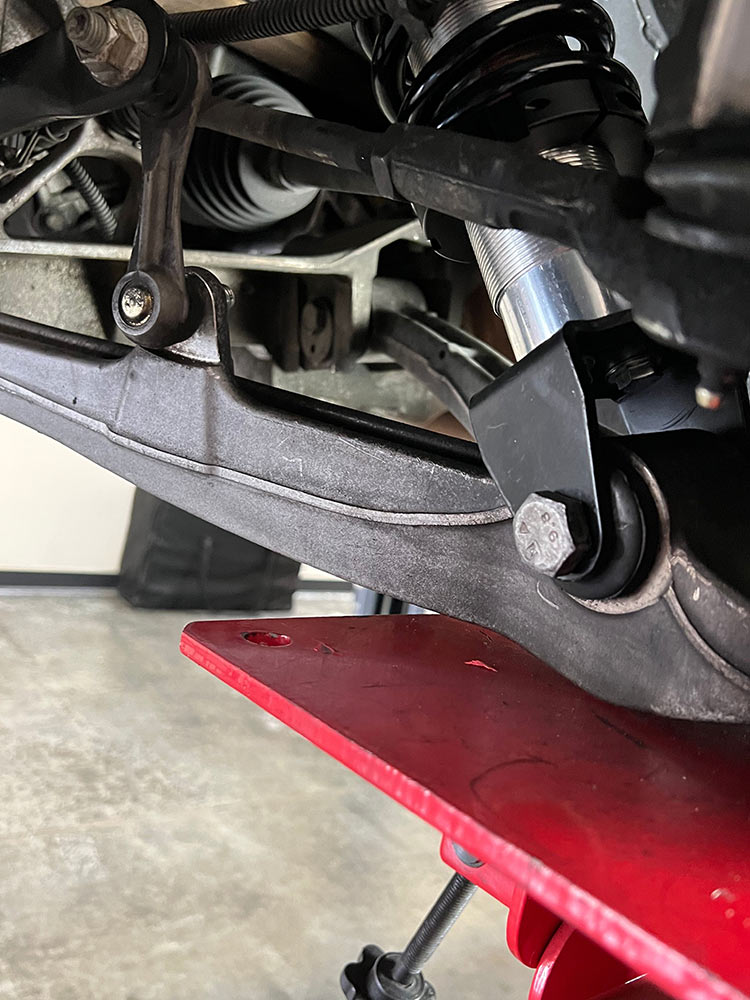
14) With the bottom of the coilover lined up with the boltholes in the lower A-Arm, compress the coilover with a jack located under the disc brake. Make sure that you do not lift the car off the jacks as you do this.
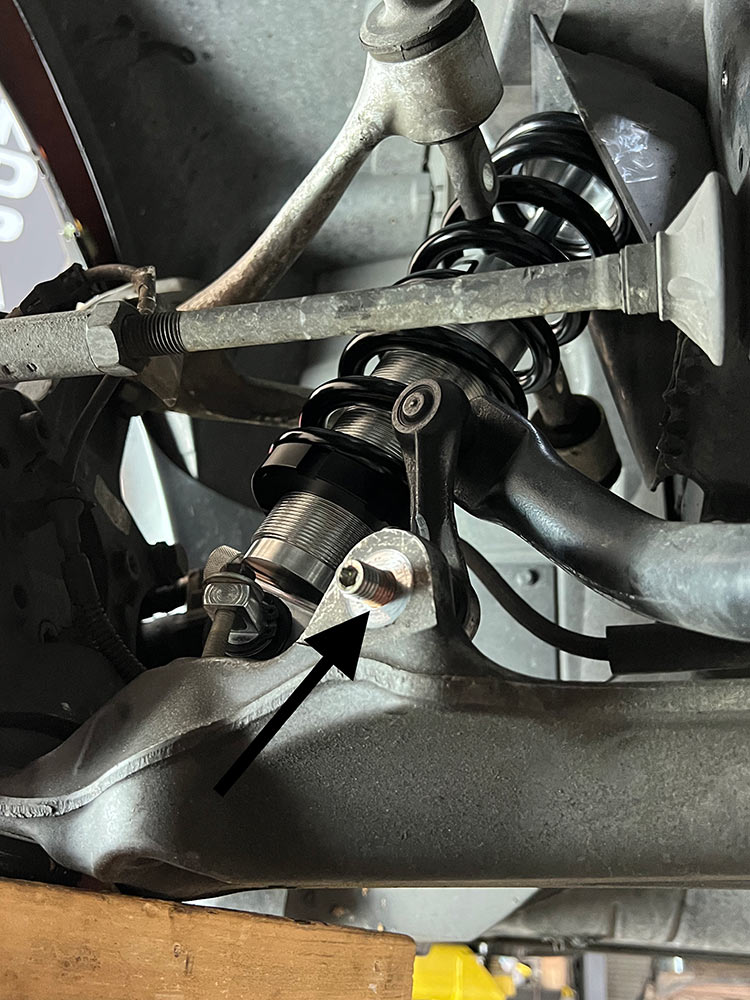
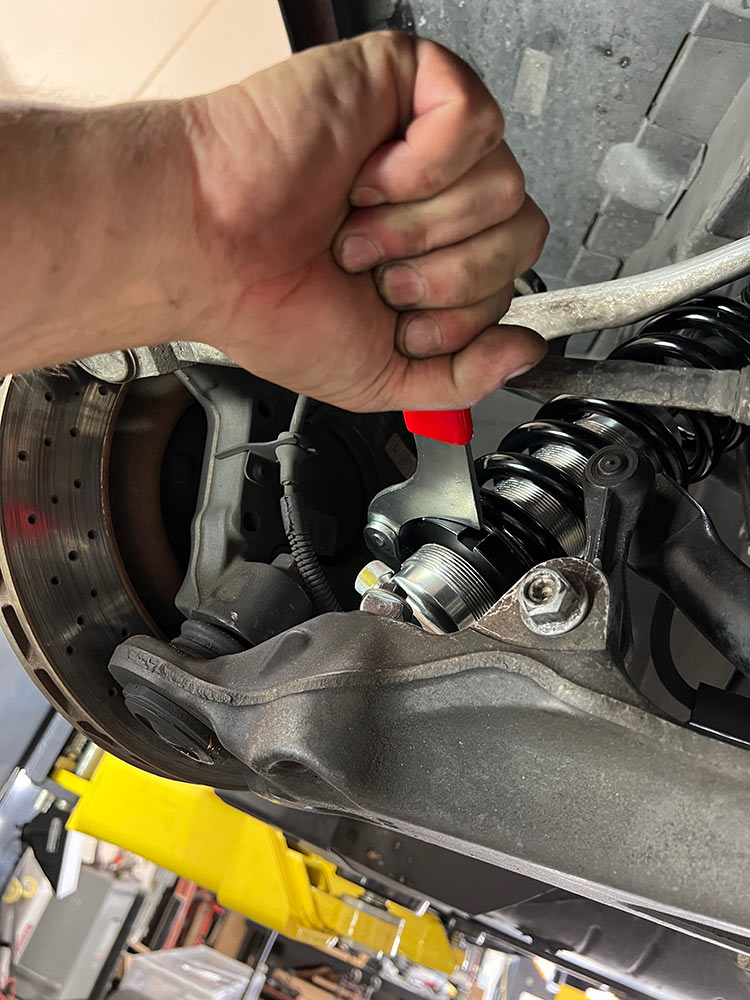
15) As you are compressing the shock up into position, watch the sway bar link. It is easier to slip the threaded link end of the bar into position in the A-Arm (arrow) during this process. Once it is in place, continue to compress the coilover while lining up the coilover attachment bolts.
16) Take a note of these small washers that are located under the retaining bolts. These washers allow the bolts to move in the slotted holes in the coilover T-bar mount.
17) Reinstall the upper A-Arms in this location, the same position as before – and use the same bolts in the same holes they exited if possible.
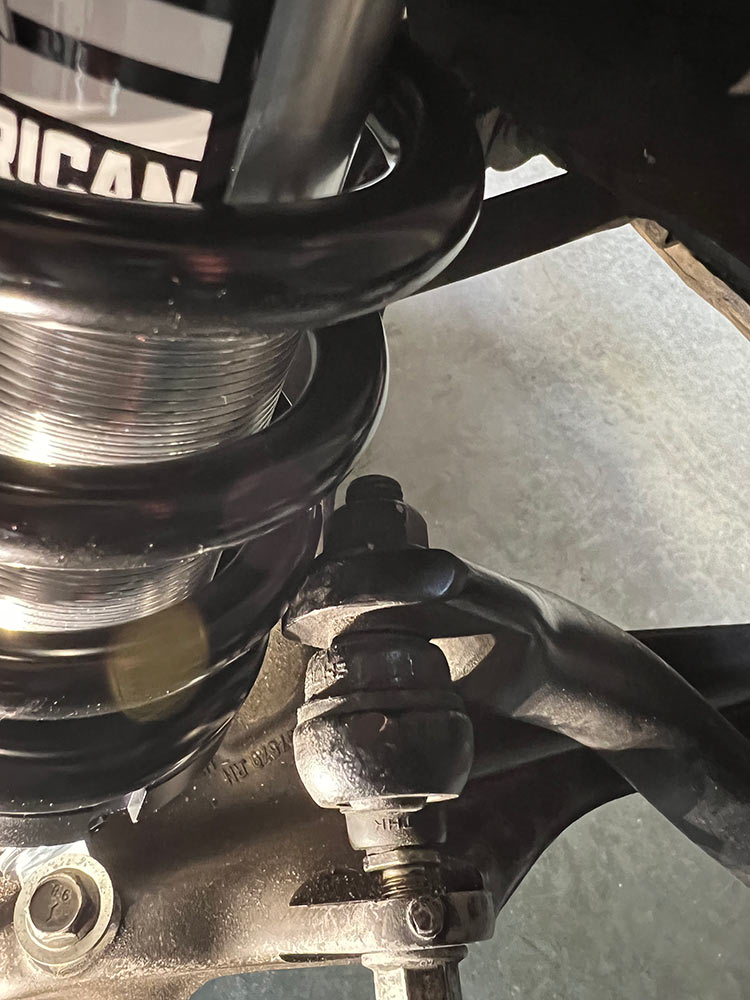
18) The only unique operation required with this application is that the sway bar end does interfere with the coil over in once place. For that reason they recommend grinding 1/4-inch from the sway bar link at this point to achieve adequate clearance.
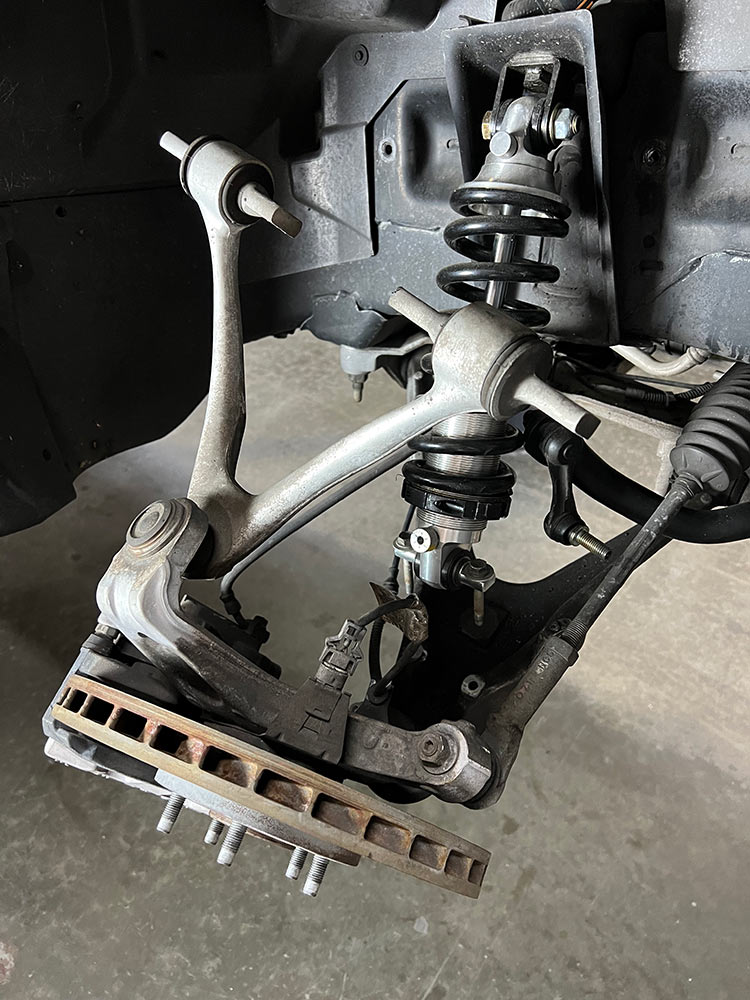
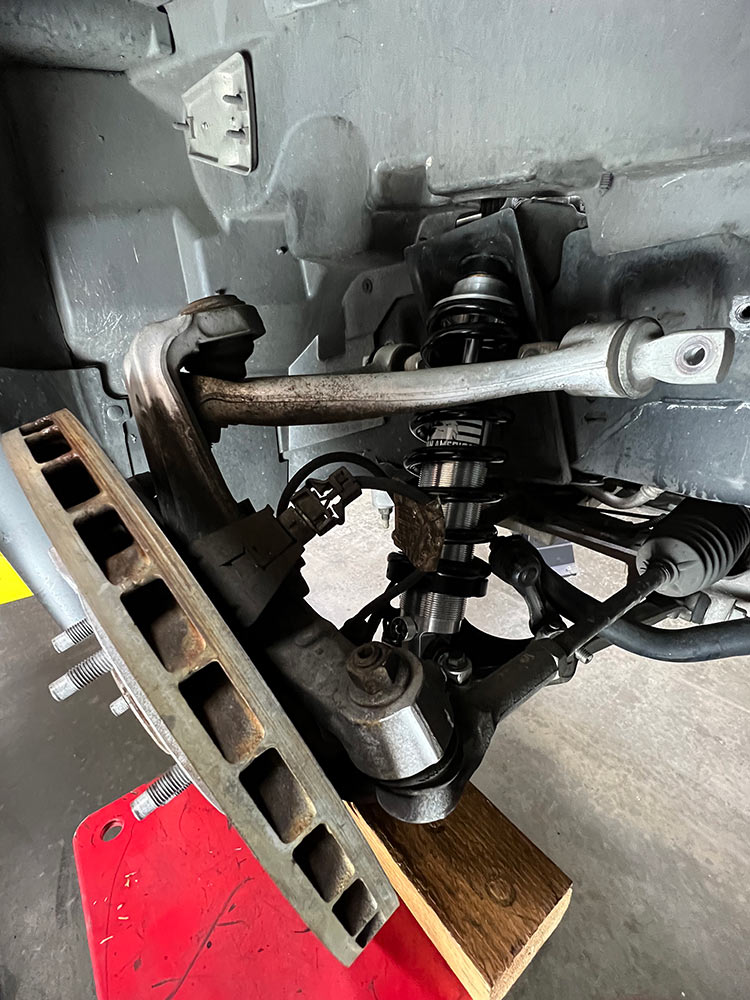
19) The installation should look like this when complete. Remember to torque all fasteners to the factory Aldan American spec before dropping the car back to the ground. The lower compression knob setting should start at #3 as a mid-point for firmness. The upper knob should be turned counterclockwise until it stops then six clicks back to set it for the middle of the range. These starting positions are a great place to start the process of dialing in the suspension to your needs.
20) Moving to the rear suspension, we started by installing the Aldan American-supplied lower mount bracket to their coilover shock. Torque the bracket hardware to 35 ft. lbs.
21) Begin by removing the lower shock mount while supporting the rear spindle system. Note that the rear transverse leaf spring has already been removed from this car in a similar fashion to how the front leaf was removed. Take care as the rear leaf is under tension and that tension must be released slowly to avoid injury or damage. Again, we do advise checking a factory service manual for your model year Corvette to ensure that you assemble the suspension correctly and tighten the fasteners to the proper torque specs.
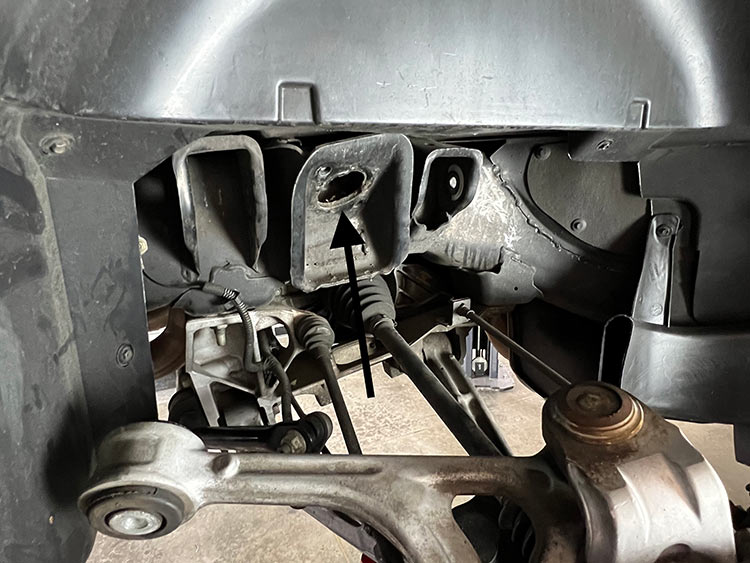
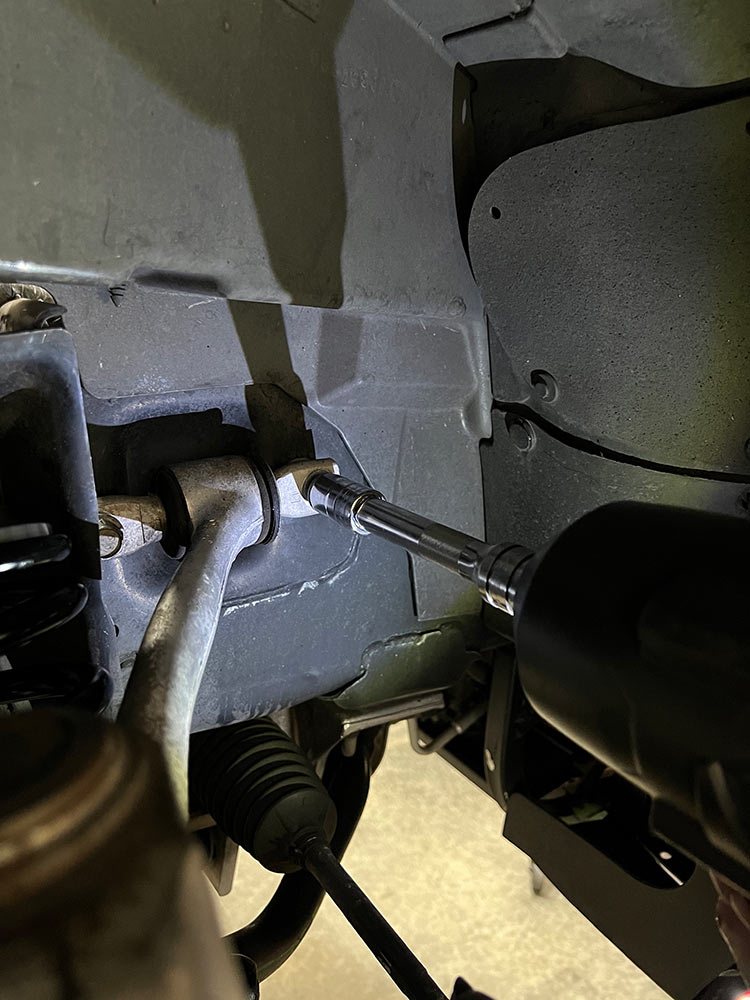
22) The rear upper A-Arm mount connects to the chassis with two bolts. These bolts need to be removed to have access to the shock mount. The shock mounts will reveal this opening (arrow) which will serve as the new mounting location for the Aldan American coilover using the supplied bracketing system.
23) This bracket is designed to use the factory shock bolt up locations. Using the supplied hardware, the bracket bolts to this location and serves as the upper mount for the coilover.
24) This is a good time to dial in the initial rebound settings for the shock. We started by turning the knob as far as it would go in the counter clockwise direction and then six click back to set it in the middle range, similar to what we did up front. Next, we reinstalled the upper A-Arms in their original location using the factory bolts.
25) We located the bottom of the coilover in the original shock mount holes using the Aldan American bracket shown earlier.

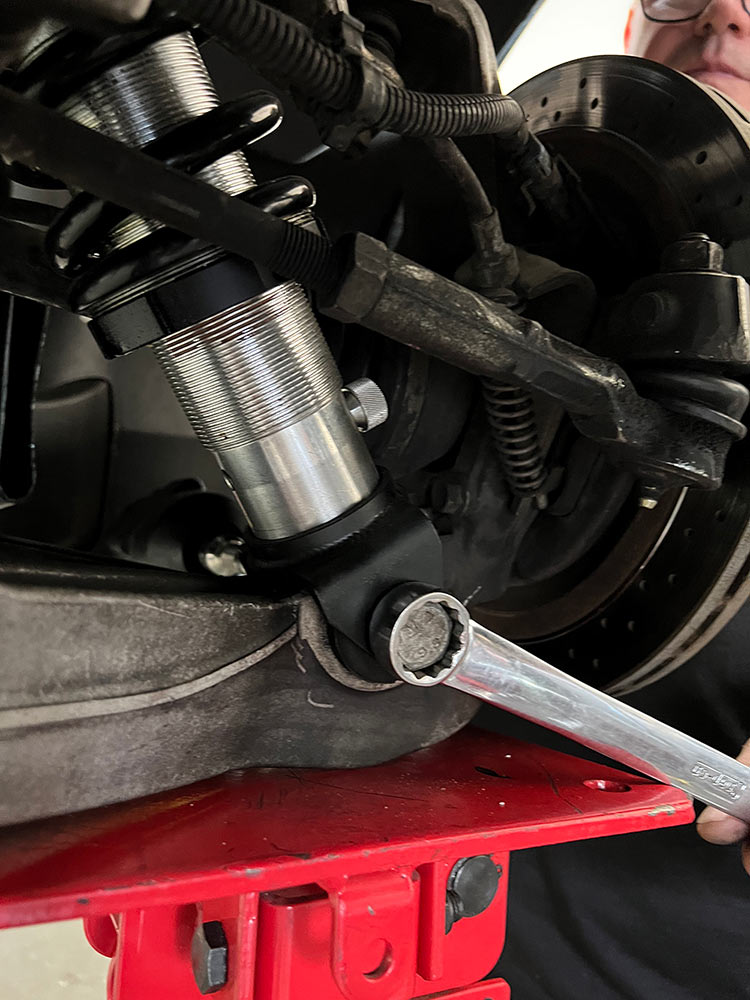
26) Torque the upper A-Arm bolts to 55 ft. lbs and the lower shock mount bolt to 75 ft. lbs.
27) Adjustment of ride height is completed by using this Aldan American wrench and turning the lower spring mount up or down dependent on whether you are raising or lowering the car. We achieved 2-inches of suspension height range in manner. Take care when doing this to make sure your tires and wheels do not come in contact with other suspension parts or the fenderwell. That would be a disaster to the car and could cause an accident.

28) Our Corvette looks ever better lowered for better cornering ability. Its not the best of all worlds, great on the highway like this but ready for any impromptu invitation to autocross or Solo II competition.