Modern Handling Tech for your First Gen Camaro/Firebird
Aldan American Coil Over Conversion gives 1967-69 Camaros/Firebirds total suspension tunability
By Cam Benty
Photos by Cam Benty and Gary Nelson
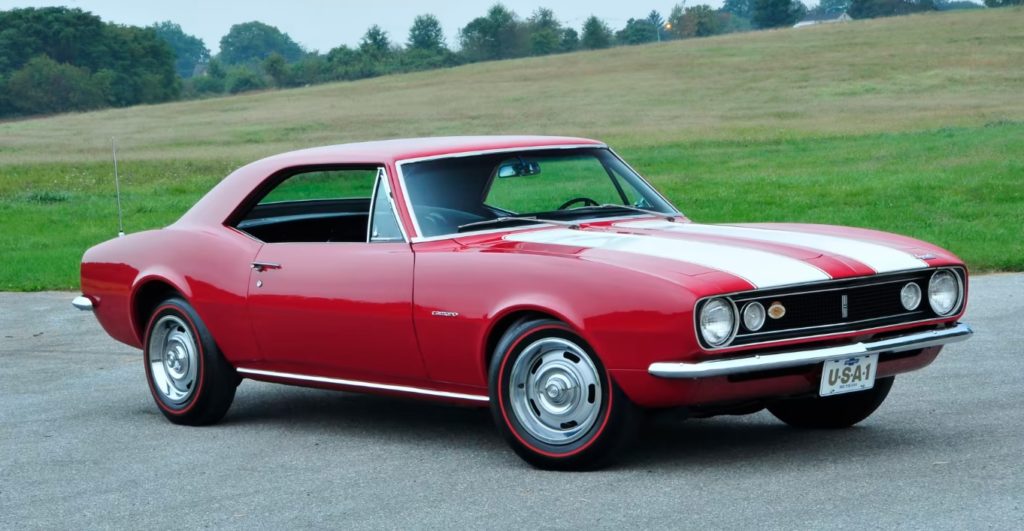
Few cars in American automotive history had the impact of General Motor’s first Gen Camaros and Firebirds. While Ford’s Mustang had a three-year head start into the classic “pony cars wars,” the 1967 Camaros and Firebirds drew an immediate following with performance fans. Offered with a wide array of engine options, these cars were arguably better handling than the Mustangs with more diverse engine offerings and markedly different styling. That same enthusiasm for the first Gen F-Bodies (1967-69) is alive and well today with cars, such as the one shown here, in high demand.
But while these classic Camaros and Firebird were considered great driving cars for their time, they leave a lot to be desired in terms of current day handling feel and ride. Enter Aldan American with their new coilover conversion package. Using nitrogen-charged coilover shock absorbers, linear rate springs and ride adjustability for both vehicle height and shock stiffness, Aldan American has fixed many of the key complaints noted by modern day buyers with a solution that won’t break the bank.
Aldan American 1967-69 Camaro/Firebird Coilovers
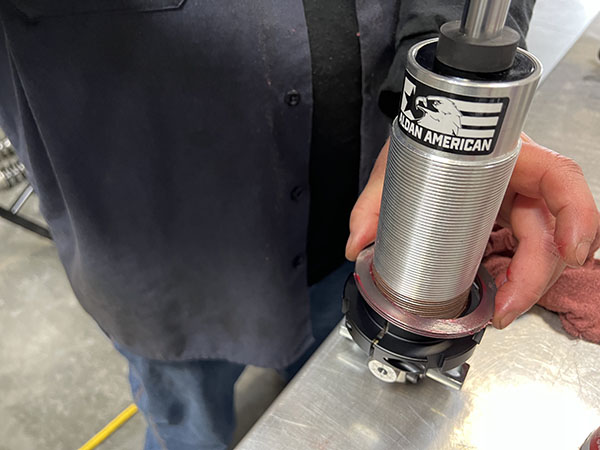
At the center of this upgrade are Aldan American’s nitrogen-charged coilovers that can be tuned for compression (single adjustable design) or compression and rebound (double adjustable design) stiffness with the turn of a knob(s) located on the coilover body. Paired with cold wound, high-tensile Chrome Silicon steel coil, progressive rate springs (they increase in stiffness as they are compressed through cornering), this coilover conversion allows for a comfortable ride delivering great highway cruising comfort. If you are looking for a stiffer performance-oriented ride, turning the adjustment knob(s) a few clicks will quickly do the trick. For Slalom or autocross competition, simply stiffen the shock setting even more to help deliver improved tire contact with the ground for amazing track times.
Aldan American is a leader in advanced design coilover conversion kits for a wide range of applications. But the story of their technology does now stop with cool shocks and quality springs. Aldan American also offers differently rate springs to fit your requirements and the ability to quickly lower the vehicle ride height a full two inches dependent upon your tires-to-fender clearance.
This adjustability allows you to lower the roll center for the vehicle, the axis on which your car turns. The lower the roll center, the quicker the turn can be completed. By using Aldan American’s optional adjustment wrench, you can turn the lower spring mount collar on the shock body after the vehicle has been safely elevated.
The Build: 1967-69 Camaro/Firebird Coilovers
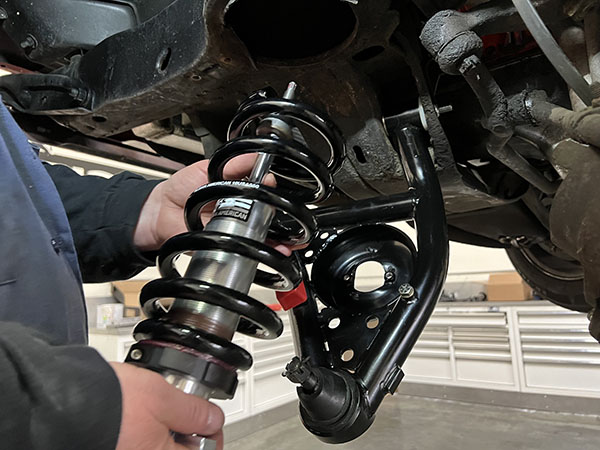
We installed the Aldan American Coil over kit on the front suspension of our 1967 Camaro using one of the newest conversion kits from Aldan American (a smooth body adjustable rear shock is also from Aldan American but was not used during this installation). Our vehicle was surprisingly still suspended using original parts as installed from the factory aside from general maintenance components that had been installed over the last 55 years. The suspension was structurally sound. All car owners should perform an inspection on vehicles of this age before you install any modification. No modern suspension upgrade system will perform as designed if a vehicle’s structural parts or hardware are broken or damaged from wear, customization or accidents.
The Aldan American double adjustable coilover conversion kit shown here features six levels of compression damping (lower knob) and 20 levels of rebound adjustment (upper knob). We set the compression setting at #1 as a starting point and the upper level at 10, the middle point in the rebound range. Once you have a chance to drive your car and really test the suspension on the road or in competition, you can make adjustments to fit your requirements.
In all, the installation of the Aldan American coilover kit took about three hours including the installation of the aftermarket A-arms and front sway bar from Performance Online (POL). In addition, our kit mated perfectly to the suspension using the new high quality hardware supplied by Aldan American. With regards to the fasteners, we torqued the bolts and nuts to the prescribed tightness values noted in the instructions, generally 55 lb. ft. of torque for 1/2-inch diameter shank bolts and 35 ft. lbs. for 3/8-inch bolts. We also inserted new cotter pins in all castle nut connections to make sure everything was safely in place.
Camaro Install Video Guide:
1967-69 Camaro/Firebird Install Walkthrough Steps:
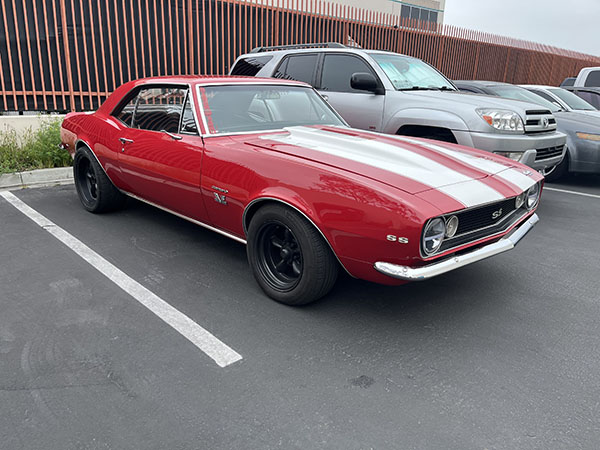
We bolted in our Aldan American Camaro/Firebird conversion kit on this classic 1967 Camaro. Our car was equipped with virtually no aftermarket suspension parts making it a great candidate for this high tech upgrade.
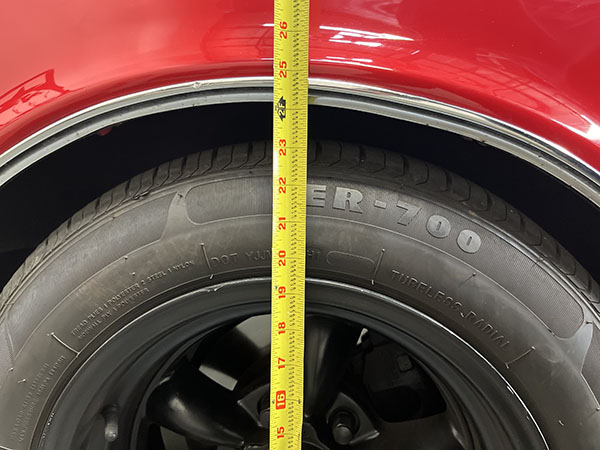
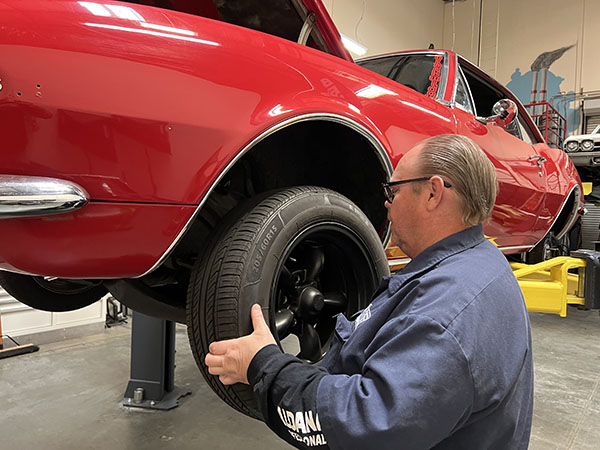
Before we started in, we took measurements as to the ride height of the body at rest. We noted that from the fender lip to the ground, we had right at 24-inches of clearance.
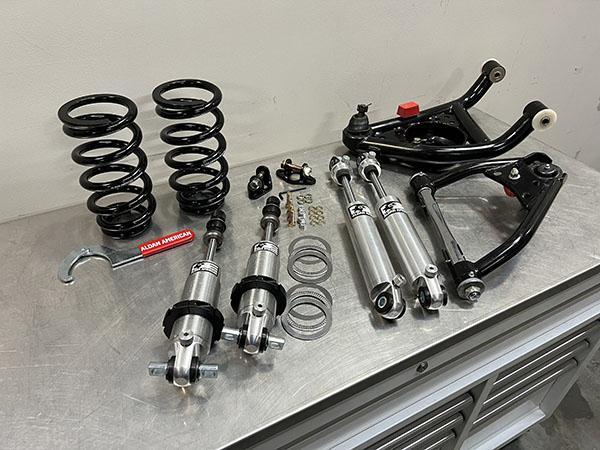
The completed Aldan American coilover conversion kit includes all of these parts including front coilovers (shock bodies with black collars) and the rear suspension smooth body shocks, the latter of which we did not install at this time. The black Performance Online A-arms are not part of the Aldan American kit but a nice upgrade that will deliver excellent strength. In addition, they feature high quality polyurethane bushings with lubrication fittings and brand new ball joints.
Aldan American’s Gary Nelson, the designer of this system, was a host for this installation. First step – remove the tires and wheels and inspect them for excessive wear or damage.
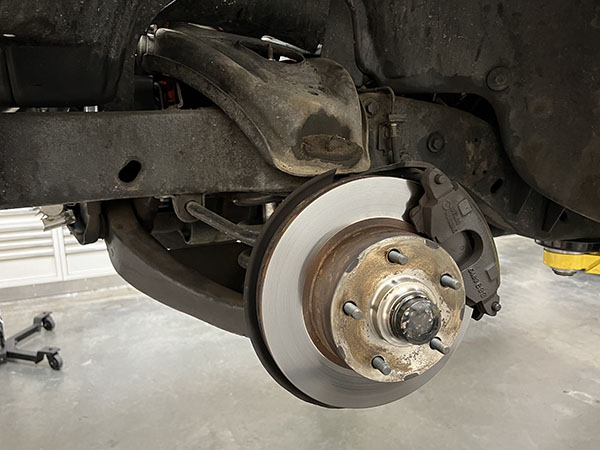
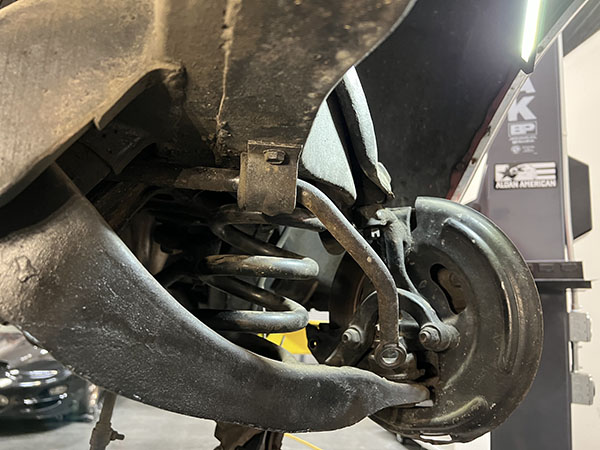
As advertised, the front suspension was very original with factory disc brake rotors. The upgraded brake caliper (from a later model Camaro) added to braking efficiency and was compatible with our intended upgrade.
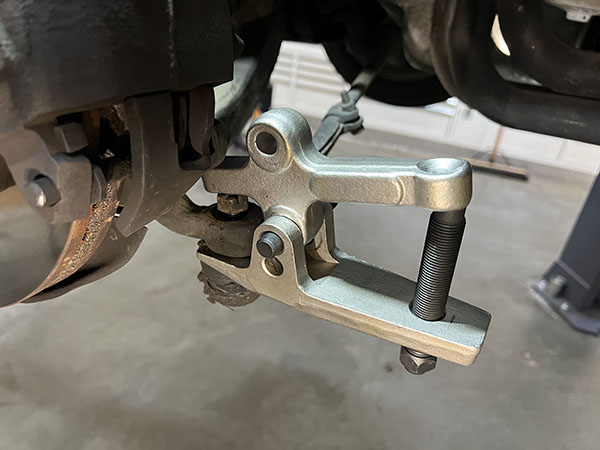
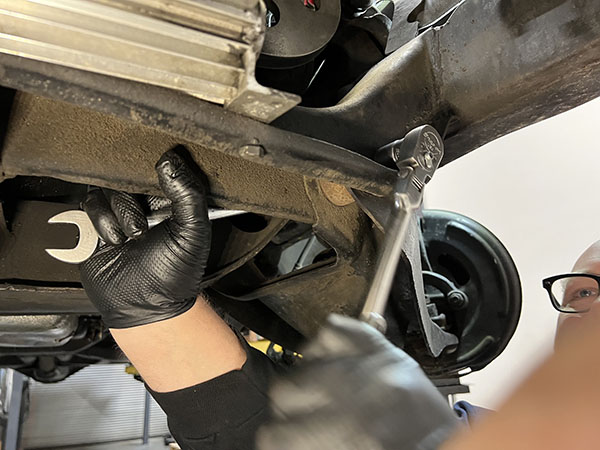
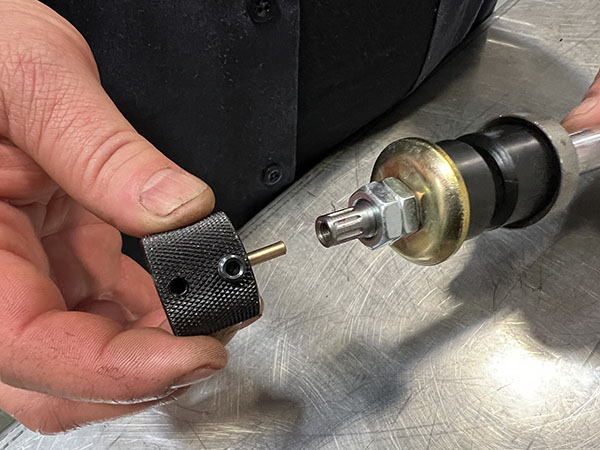
We began disassembly of the suspension by disconnecting the front tie rod end. This cool tool allows you to disconnect the tie rod end without damaging the joint or the rubber boot.
Next we removed the sway bar end link that holds the sway bar end to the lower A-arm. As we are installing a new Sway bar from Performance Online, this part will not be reused.

If we were keeping the original Sway bar we would have needed to replace this end link. Not only where the rubber bushings cracked and worn but the threaded rod was wearing through in several places. If your end link looks like this – and many do – toss it and replace with new.
The factory sway bar mounts to the end link and attaches in the center to the frame with these straps. Remove these two strap bolts on either side to release the bar.
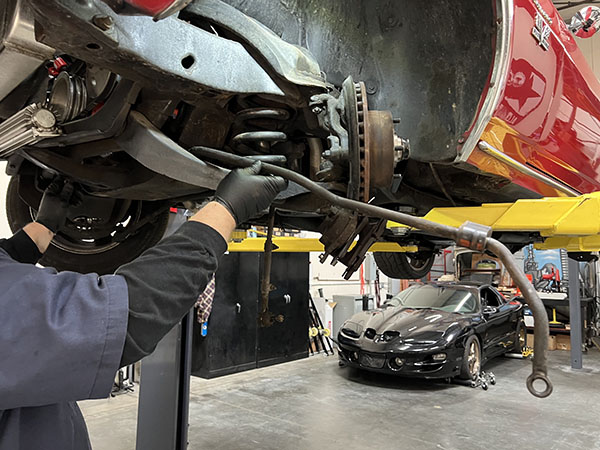
The Sway bar winds out through the chassis in this manner. If you bar does not come out as shown, you may have to remove one of the lower A-arms to provide clearance.
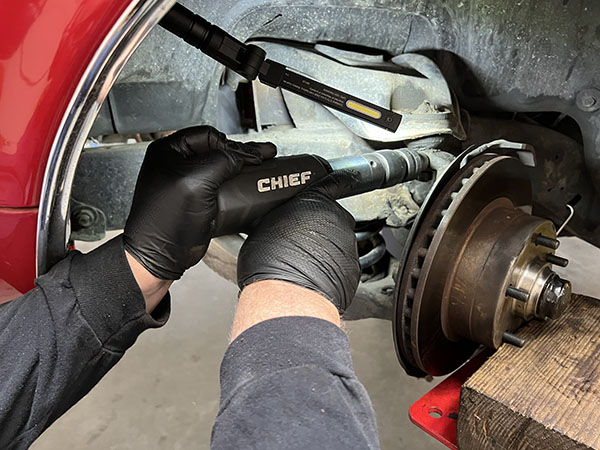
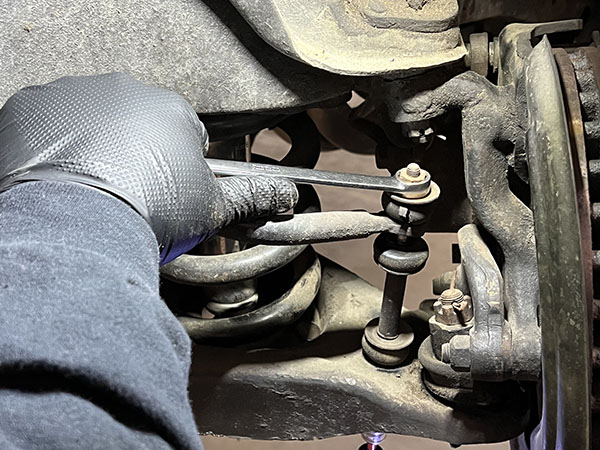
After removing the cotter pin and loosening the ball joint spindle nuts, we used an air impact to “rattle” the ball joint loose. Do not just a pickle fork, as it will damage not only the boot but the ball joint as well – which is critical if you are reusing this Ball Joint/A-arm.
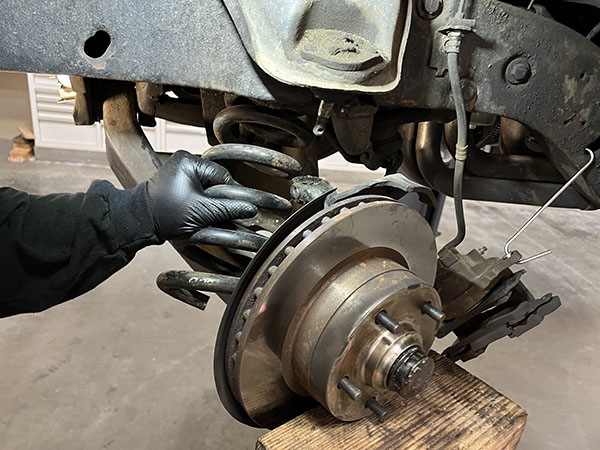
With the A-arm separated from the ball joint, we lowered the lower A-arm and released the spring. If your spring is under tension, we recommend a spring compressor to control the spring’s energy. Springs can be very dangerous so be careful here.
Since we were replacing the factory A-arms with new ones from Performance Online, we removed the lower A-arm. This A-arm is held to the chassis with two bolts that can be reached with socket wrenches and extensions through holes in the frame.
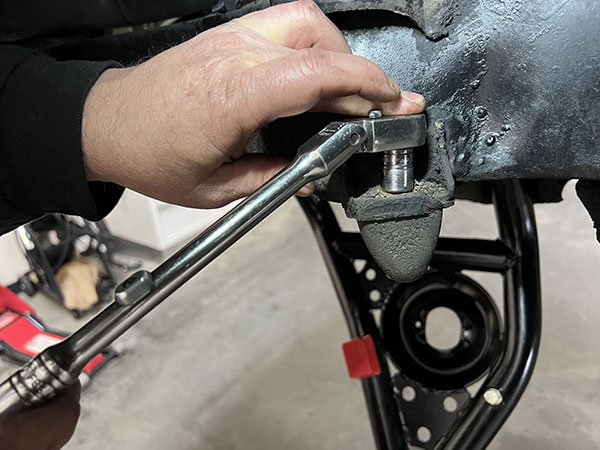
The upper A-arm mounts to the frame with two bolts that pass through a bracket on the topside of the chassis. When taking out the upper A-arm take note of the number shims used at the mounting tab. These shims are used to set front end alignment. Your front end should be realigned once all of the parts are back in position to achieve the best handling performance.
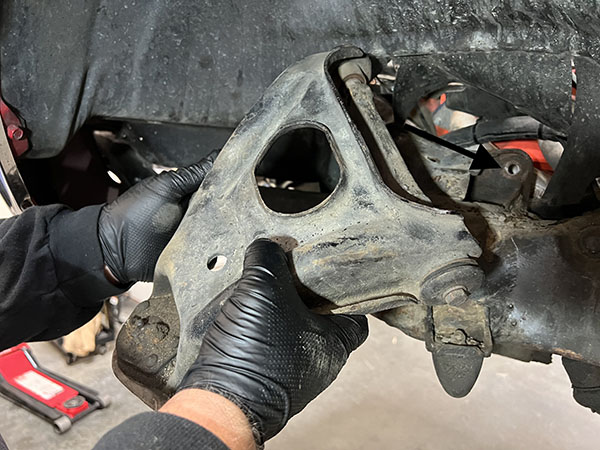
After taking count of the number of alignment shims used front and back and removing the two bolts that hold the upper A-arm to the frame (arrow denotes receiving hole for attachment bolt) this part can be removed through the inner fenderwell.
Especially with suspension components, using new hardware that is of the proper strength is important to performance and safety. We used these Grade 8 strength bolts with our new Performance Online A-arms. For all Aldan American related parts, new hardware is provided as part of the kit.
Our New A-arms bolt to the chassis in this position. We torqued both A-Arm bolts to 55 ft. lbs. as instructed by Performance Online.
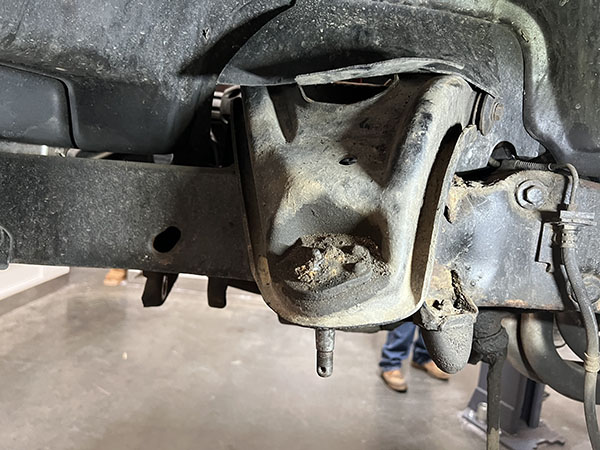
With the new A-arms, this bump stop will not be required so it was removed.
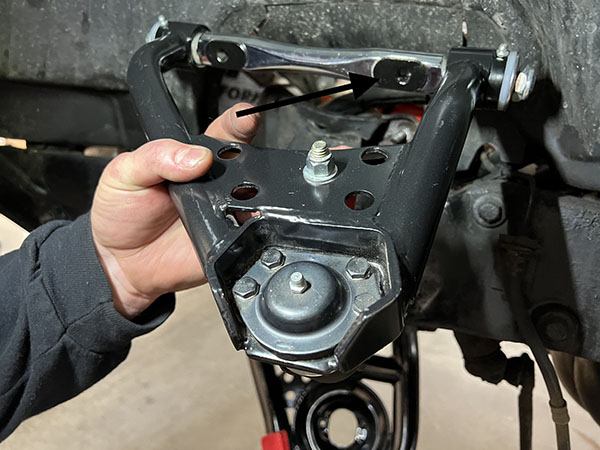
The Performance Online upper A-arm fits into the same position as the factory original we just removed. Note that there are two black floating slugs (arrow) in the rear crossbar allow for additional caster when the front-end alignment is done.
This close up view shows the shims (arrow) reinserted into the space between the frame tab and the A-arm. Again, once all parts are in place, the vehicle’s front end must be realigned on an alignment machine.
This optional reinforcement plate fits into the bottom of the lower A-arm like this. With the Aldan American coilover conversion eliminating the factory coil spring, it is suggested to have this plate for added support.
With the Performance Online A-Arms we had to drill out the attached nuts for larger hardware. The larger diameter hardware, supplied by Aldan American, delivers added strength within the A-arm and coilover mount.
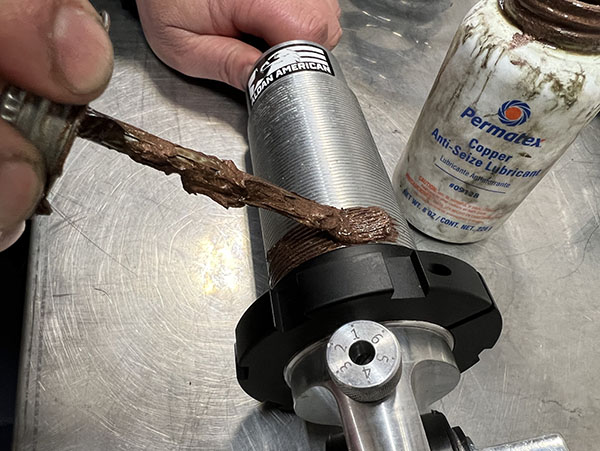
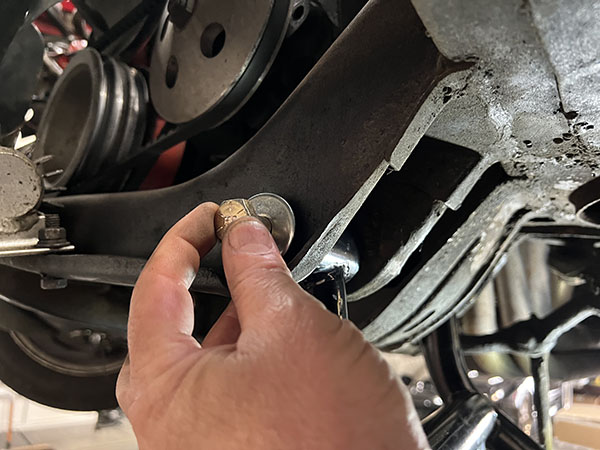
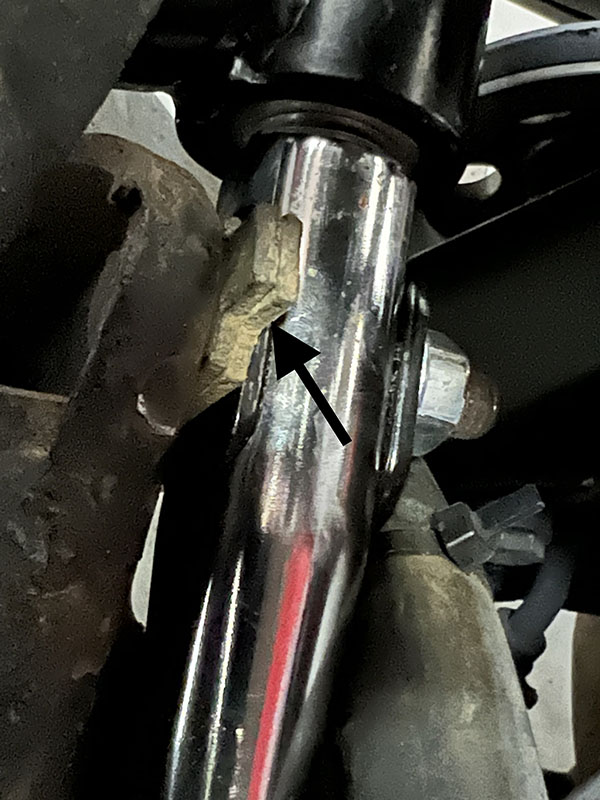
To help the ride height adjustment collar rotate on the shock body, we applied copper anti-seize lubricant on the threads.
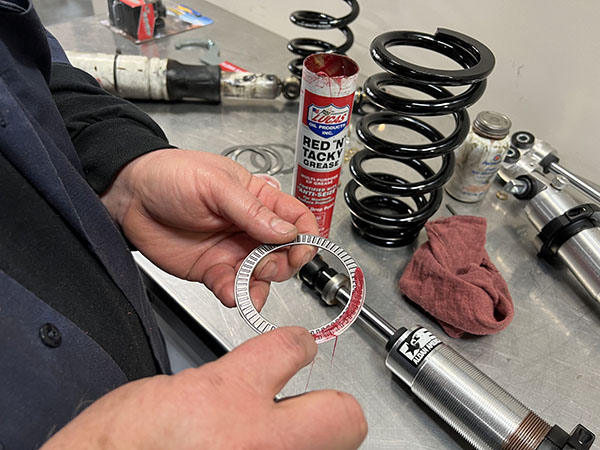
This optional bearing and washer kit is lubricated with Red and Tacky grease to help the pieces turn after installation.
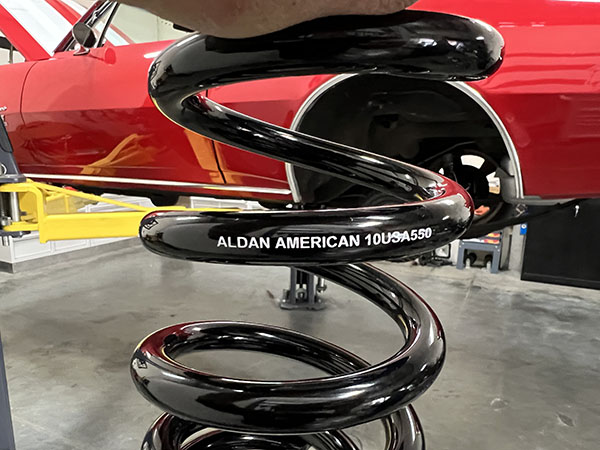
Every Aldan American spring is embossed with details as to its characteristics. This spring is designed for 10-inches of free length and a 550 lbs. per inch compression rating.
After lubrication, the optional washer and bearing kit is placed on top of the spring collar on the shock body.

Next the spring is lowered down over the shock with the small end of the spring locating on the top of the shock mount collar.
With the double adjustable shock system, unscrew the knob that sits on the stop of the shock. The knob will be reinstalled after the top of the coilover mount is in place.
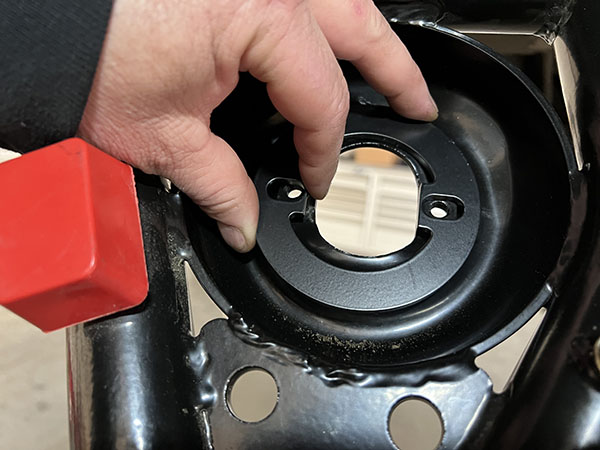
We installed the coilover unit by poking the end stuffing it through the mounting hole in the upper frame mount.
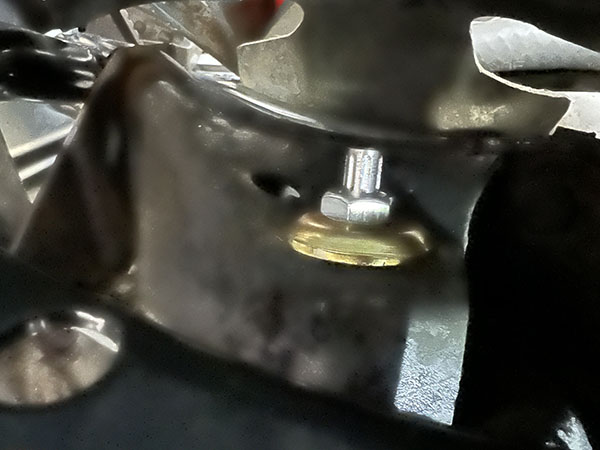
In our case, the stud did not go through enough with the bushing in place so we installed the retainer and nut so that they coilover would hang in the spring pocket.
Next we laid the reinforcement plate in the Lower A-arm spring pocket and located the bolts through the bottom of the shock T-Bar, the reinforcement place and the lower A-arm mounting holes.

The bolts that connect the shock T-bar mount to the lower A-arm used a special washer (arrow) that is supplied by Aldan American. It should be noted that we had to use a longer, not supplied, bolt for this because of the increased thickness of the POL A-arm at this point. Make sure the fasteners you use are Grade 8 or better.
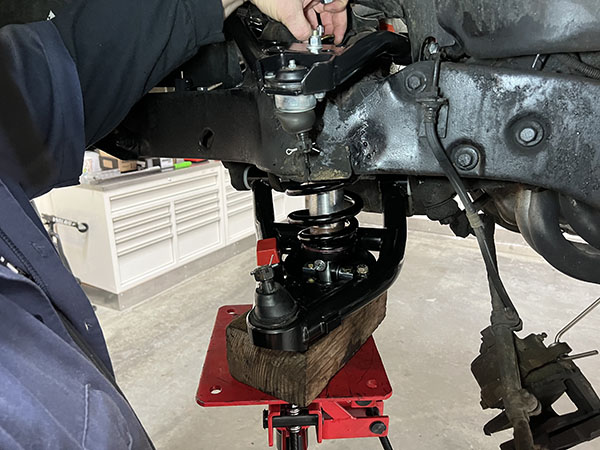
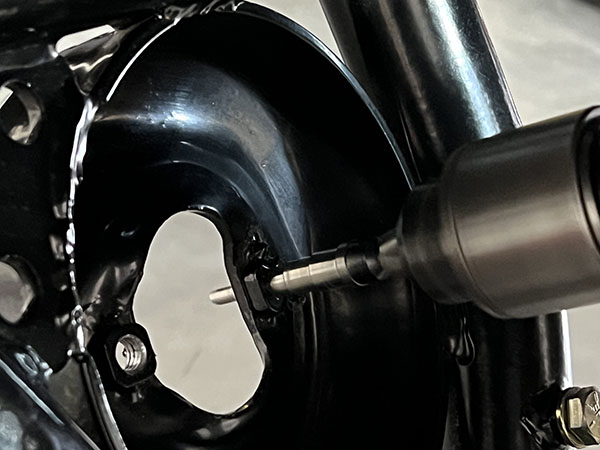
We carefully compressed the coilover by using a jack under the lower A-arm. As we compressed the coilover, the top shock mount stud will increase in length through the A-arm mounting hole. Take care to make sure the bushing nipple is center in the hole.
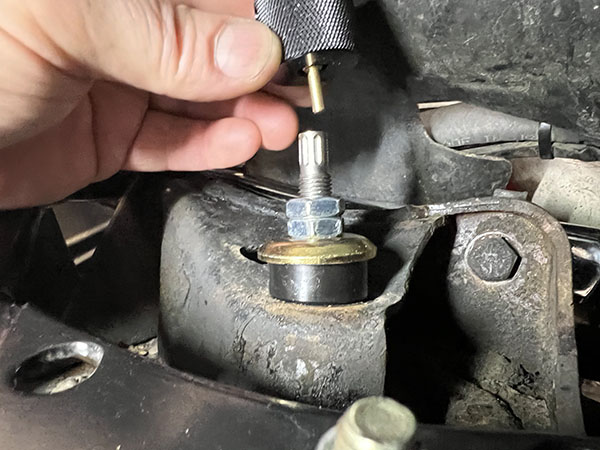
As mentioned, as the coil spring is compressed, the coilover stud will push up through the shock mount hole and allow you to now install the bushing along with the retainer and double nut system that locks it in place. With the jam nuts in place, you can reinstall the adjustment knob, which screws into the top of the coilover. Once the knob has bottomed out we turned the knob counter clockwise until it stopped and then back 10 clicks clockwise to reach the center of the stiffness range.
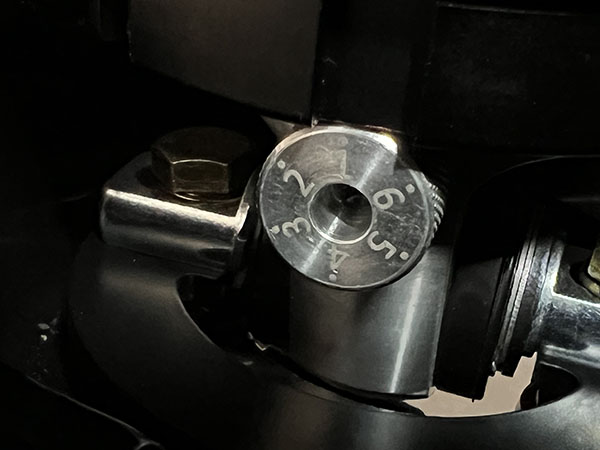
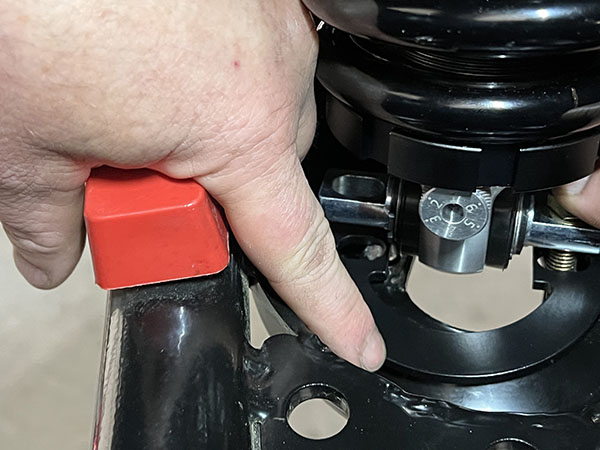
The compression knob at the bottom of the coilover is set to #1 as a starting point. Further adjustments can be made once you drive the car. If the compression adjustment is too soft, turning the knob to another number will increase the stiffness maxing out at #6.
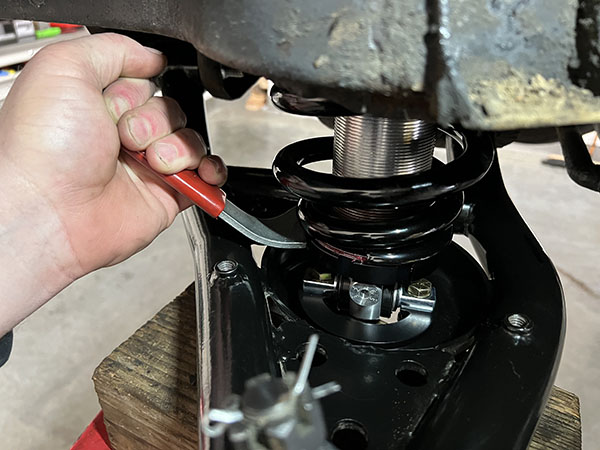
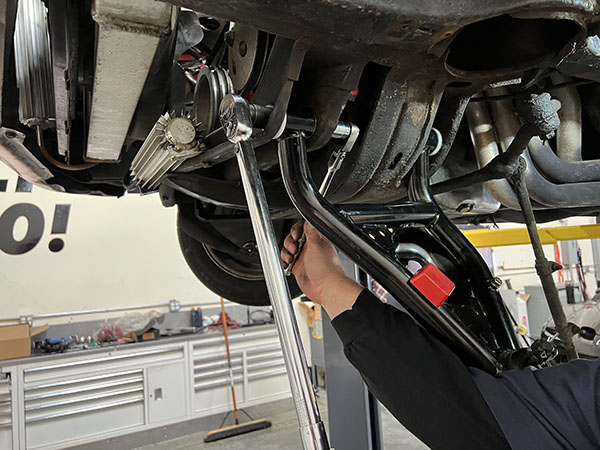
Aldan American supplies an adjustment wrench that allows you to raise or lower the ride height of your vehicle. As a general rule here, the wrench will allow you to lower the ride height as much as two inches. The wrench (Engineer Gary bends his wrenches for easier use around suspension components) fits into the grooves in the spring mount collar. Remember, if your tires contact the frame or fenders, you will need to raise the height of the vehicle or change your wheel/tire combination.
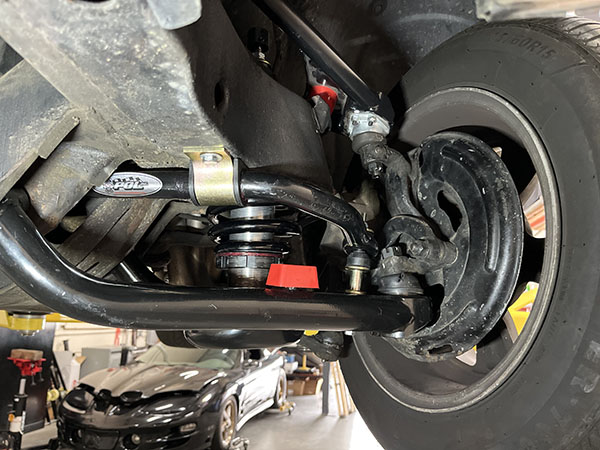
The new POL front sway bar fits in the same location as the original sway but is much larger in diameter, which will reduce body lean and overall understeer when cornering. These parts come with all hardware and more efficient end links.
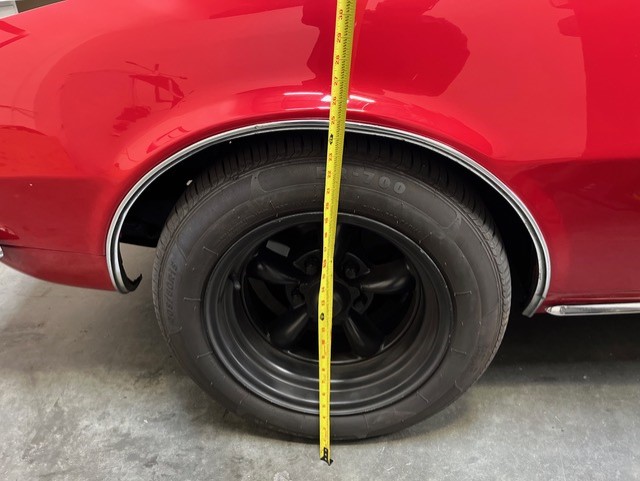
The tire sizes on this Camaro were at the limit in the amount of lowering we can crank into the car. In the front we did drop the height about an inch but that was about the limit.

Our Camaro looks great with the new slightly power suspension but the real beauty is under the skin. We now have a fully adjustable front suspension for not only ride height but also compression and rebound stiffness – things that 55 years ago, General Motor Engineers could never have imagined.