This A-Body with Attitude Gets Aldan American Coilovers
Turn your 1964-72 GM A-Body into a handling machine
By Cam Benty and Gary Nelson
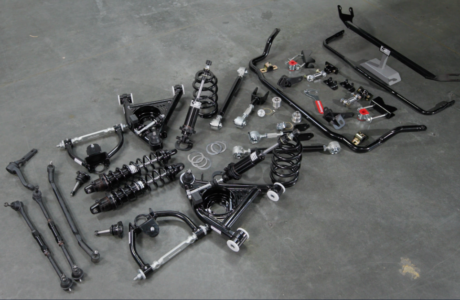
Aldan American coilover suspension kits for GM A-Body vehicles are a complete upgrade that takes a 60+ year old GTO chassis from dinosaur to adept cornering monster.
Muscle cars have changed a lot over the last five decades. Arguably, the original, the one that started it all, is considered to be the 1964 Pontiac GTO. A joint effort between Pontiac Chief Engineer John DeLorean and Marketer Jim Wangers, they took the basic Pontiac Lemans “A-Body” chassis and dropped in a huge 389cid engine along with some supportive high performance parts. They called it the GTO, stealing the name from the famous Ferrari model of illustrious racing fame. Up until that time, the big inch 389 Pontiac engine had been reserved for full size cars only. In the end, the new GTO turned out to be pure magic.
Since 1964 that original public enthusiasm for muscle machines has never waned. In fact, the excitement for high performance American muscle is on a high these days and so is the desire for owners of these cars to improve the handling and ride comfort of these “classic” cars.
Aldan American 1964-72 GM A-Body Coilovers
Aldan American’s coilover kit for 1964-72 General Motors A-Body chassis covers the GTO/Lemans models and also the Buick Skylark/Gran Sport, Olds 442/Cutlass and Chevrolet Malibu/Chevelle. For our purposes, that means that Aldan American suspension upgrades shown here will fit on all of these cars regardless of the powertrain used be it Pontiac 389 or Chevrolet 454 displacement engine. Of note is that for the heavier larger displacement engines, a differently rated coil spring is suggested to handle the increased weight. When ordering, buyers should let the Aldan American ordering desk know all aspects of the car’s equipment.
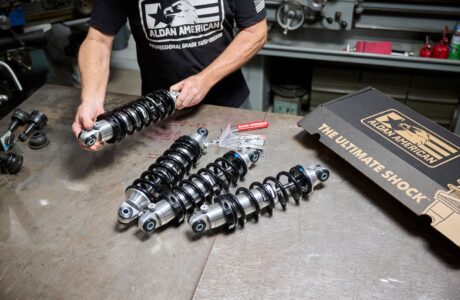
The heart of the Aldan American coilover upgrade is the coilover itself. This highly adjustable coilover is available with either single or double adjustable shock valving. If you only require compression valving adjustment you can opt for the single adjustable design but for those looking for full tunability, a double adjustable coilover is available with allows for adjustment of both compression and rebound settings. With adjustment knobs positioned either at the bottom of the shock housing (compression) or on top (rebound) these coilover can be instantly adjusted for on-road comfort or performance driving.
In addition to the Aldan American coilover kit, we installed a rear shock tower brace to reduced flex at the point where the rear coilovers mount to the chassis. Reducing flex helps keep tire alignment steady and avoids, in this case, rear axle steer, which can be detrimental to overall handling ability.
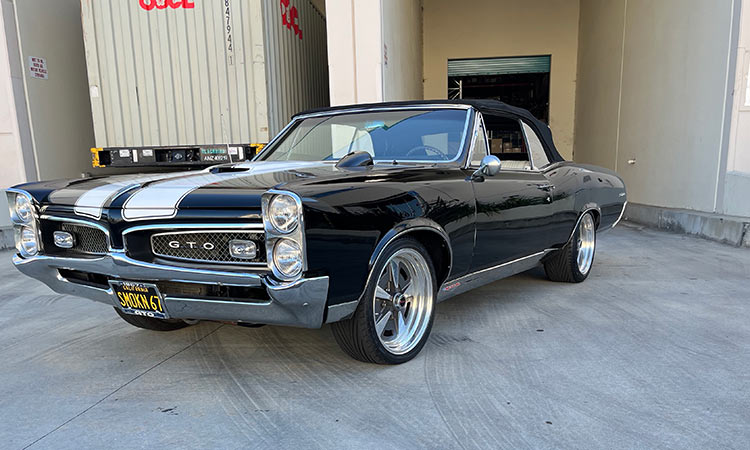
The Build – 1967 GTO Guide
Our test case, a very nice 1967 Pontiac GTO, had seen some modifications over the years, something that is commonly the case with these 60+ year-old vehicles. While the front suspension was very similar to the original configuration (except for the addition of oversized disc brakes and 19-inch wheels), the rear had been outfit with a Moser high performance rearend. When we first attempted to install the A-Body lower coil spring mount, it would not fit. Luckily we discovered that the Aldan American 1978-88 G-body lower shock mount fit perfectly. Had that not been the case, we would have had to modify the bracket for this application. If your vehicle is equipped with the original factory rear-end housing, the original A-body mount will fit perfectly.

In the end, we installed all of the Aldan American components with literally no trouble following the instructions supplied with the kit. In total, it took about three hours to complete the swap using simple hand tools. We do recommend using a spring compressor to keep the spring contained during removal to avoid it flying out. In our case, the springs became lose when the original shocks were disconnected so we had it easy.
So follow along as we demonstrate the upgrades to our 1966 GTO. The difference in the final drive comfort was significant improved and the ability to tune for local slalom or other competitive events was amazing. Truly tunable suspension with the click of a dial. John DeLorean would have been impressed.
Install Walkthrough Steps:
This prime example of classic American Muscle was perfect for demonstrating the installation of Aldan American’s A-Body coilover suspension upgrade. Their A-Body kit fits 1964-72 General Motors A-Body configurations, with a system for 1964-67 models and another slightly different one for 1968-72 vehicles.
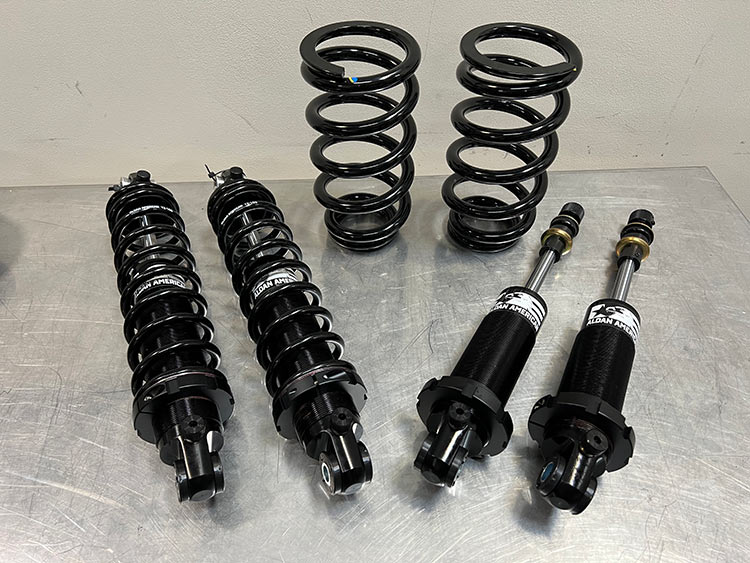
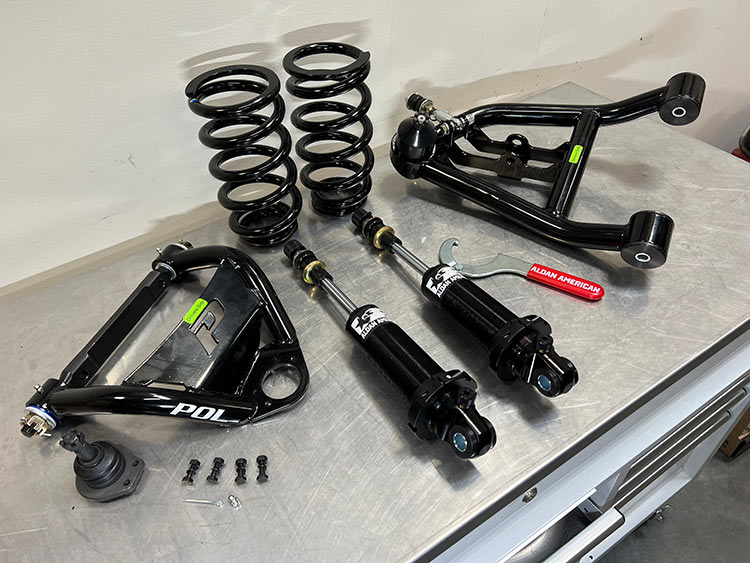
Aldan American has created this complete kit, which includes double adjustable shocks and springs, to greatly enhance the cornering ability of this GTO. The rear shocks come assembled (pair on the left) while the front coilovers must be assembled before hand. The front coilovers feature six points of compression adjustment and 20 rebound settings. The rear coilovers have the same six points of compression adjustment but with 11 rebound settings.
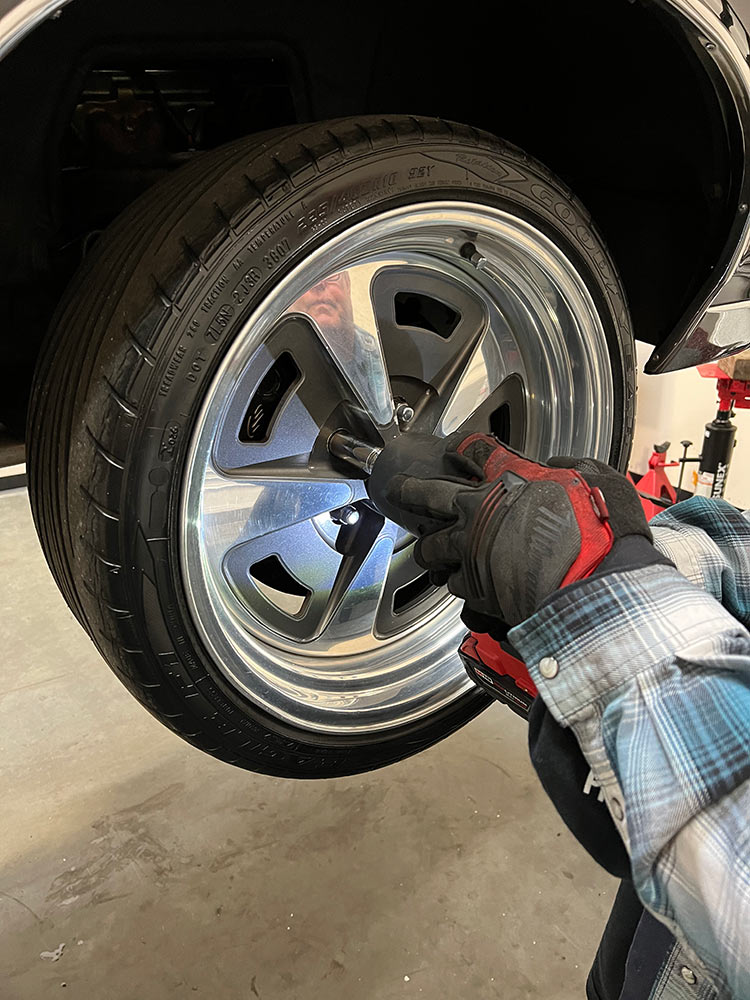
Our test vehicle was upgraded with a set of 19-inch diameter aftermarket wheels and high performance tires. The oversize wheels (factory wheels were 15-inches in diameter) were needed to clear the oversize Baer brake kit.

With the wheel and tire removed, we reviewed the condition of the Baer oversize aftermarket brake rotors and caliper. A set of aftermarket shocks had also been installed however that part would be replaced when installing the Aldan American coilover kit.
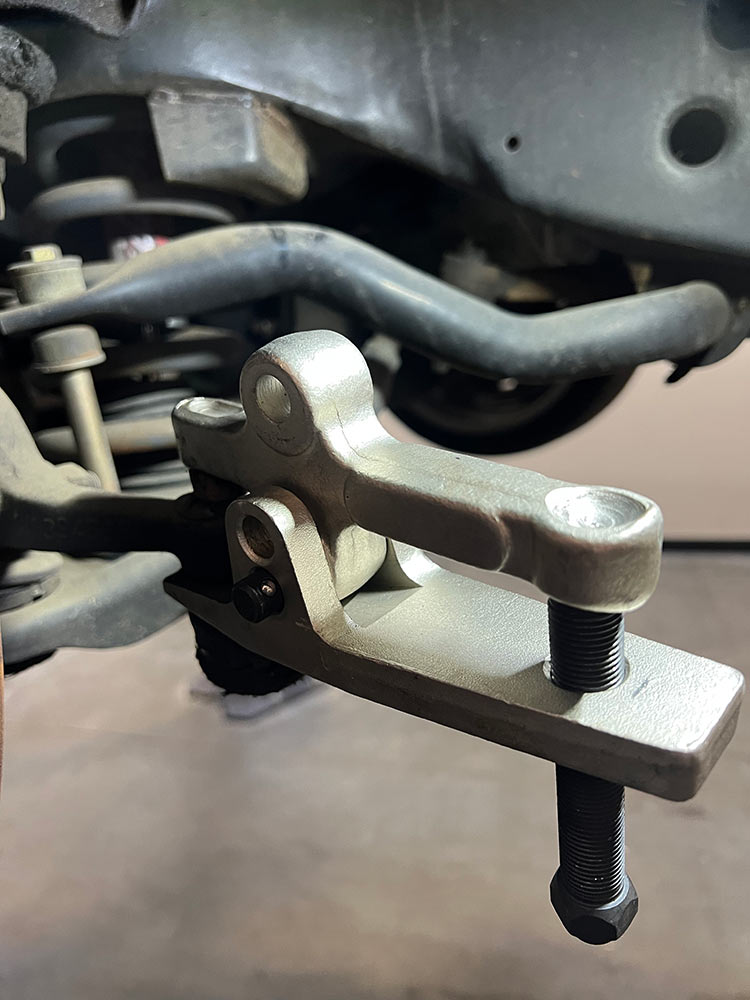
This handy little tool is great for disassembling the tie rod end from the spindle without inflicting and damage on the internal pivot. Never hammer on the nut, stud or arm or you will need to replace the tie rod end.

With the tie rod out of the way, we inspected the suspension for wear or damage. In our case, other than dirt, the suspension was in great shape.

Next we disassembled and removed the sway bar end link. These parts will not be reused with the new Aldan American and Performance Online parts.
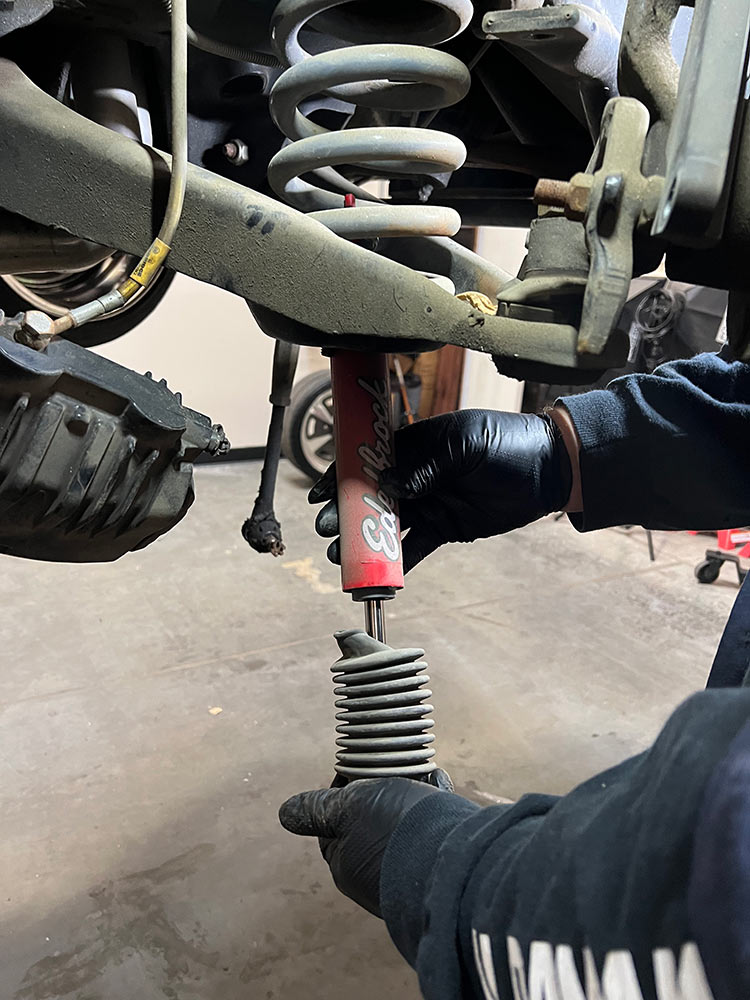
We removed the shock by removing the two bolts that attach it to the lower A-Arm and then removed the two nuts that hold the shock mount stud to the upper A-Arm. The shock slides out from the bottom.
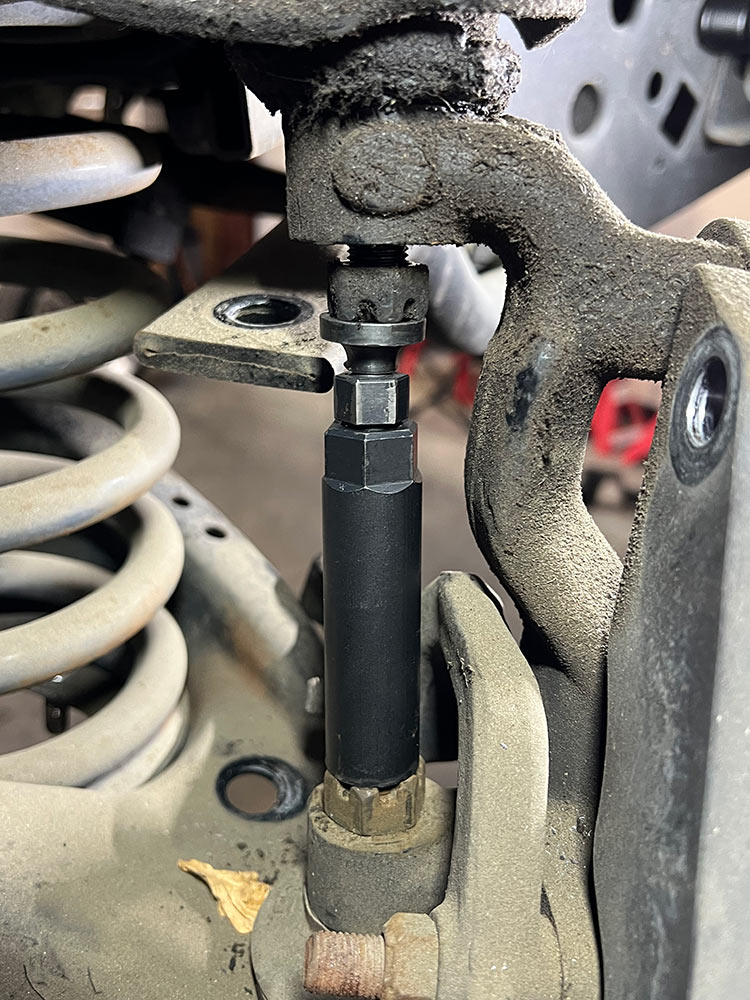
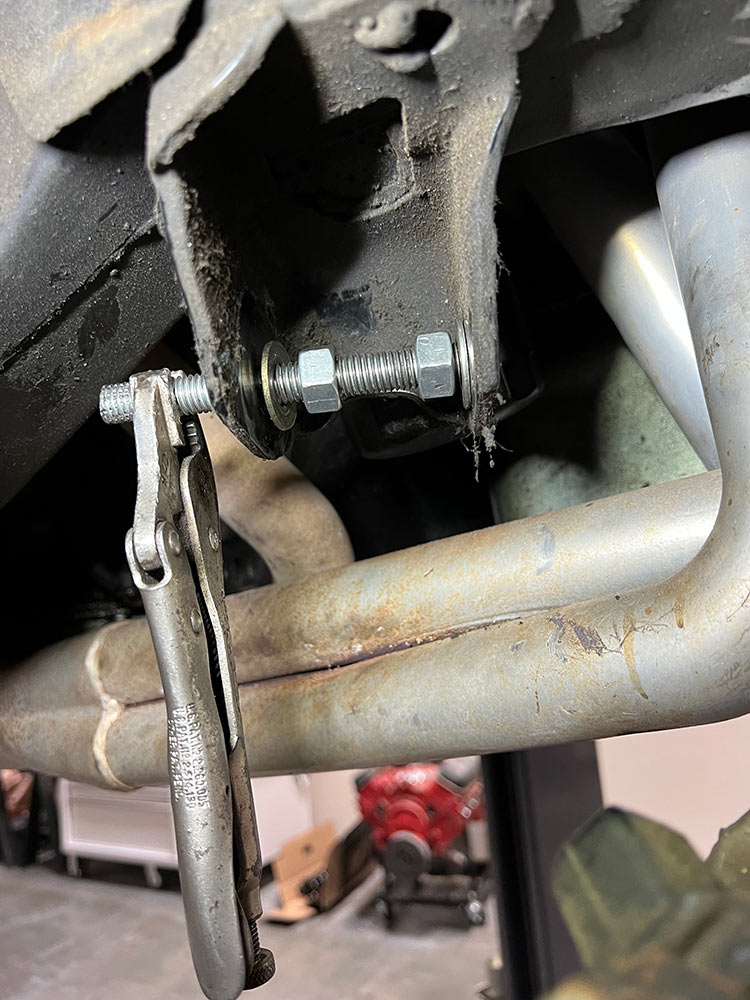
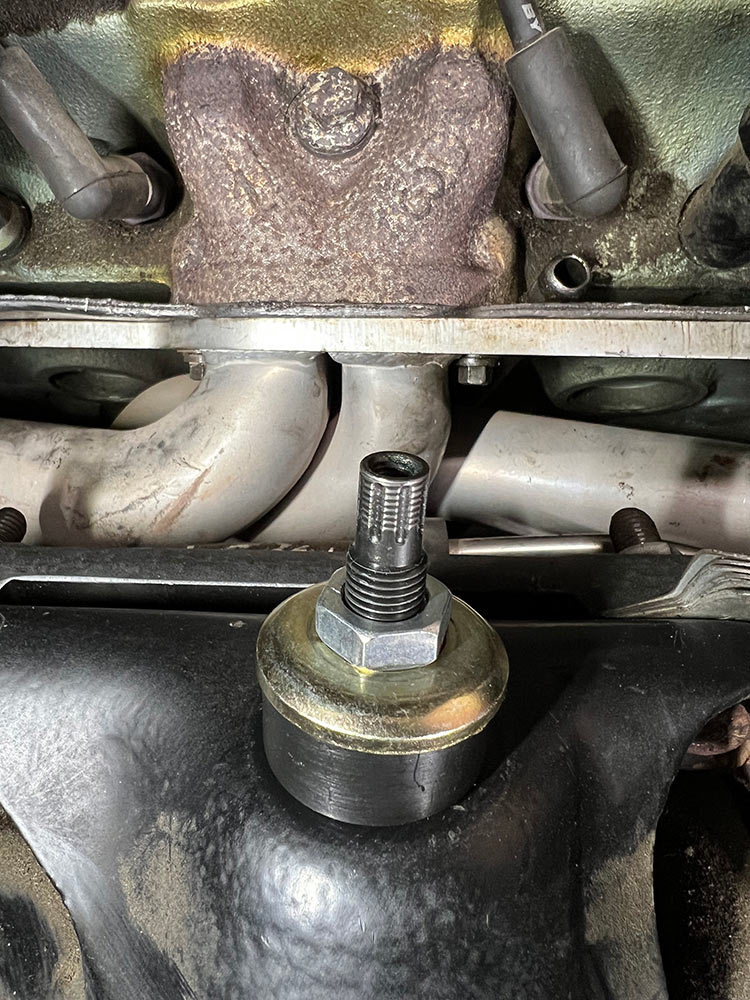
This cool tool is placed between the ball joint studs. After removing the cotter pin that holds the castle nuts in place and backing off these nuts, the tool fits in this location. But turning the center expansion nut in the tool, it expands and presses the tapered ball joint studs out of the spindle.
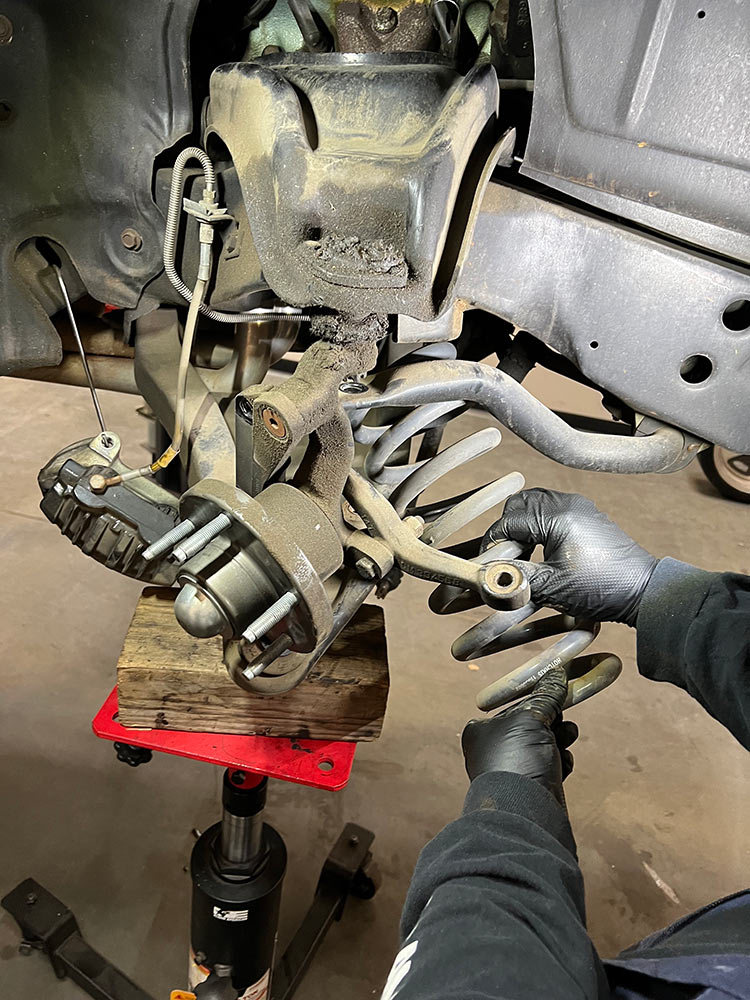
With the bottom of the spindle supported with a jack, you can fully disassemble one of the ball joints to make room to remove the spring. If the spring is under tension we recommend using a spring compressor to help control the energy in the spring. Be careful not to let the spring come loose as it can cause injury.
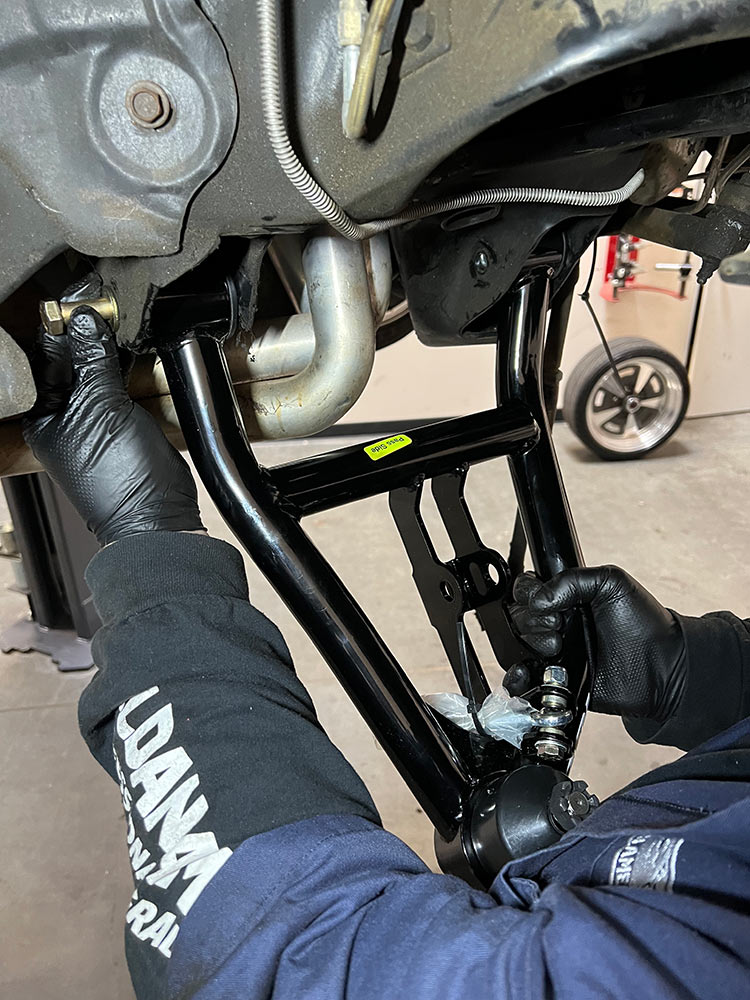
This is the complete kit for the passenger side of the front suspension using not only the Aldan American coilovers but also the new Performance Online (POL) upper and lower A-Arms for our GTO. Note two things here: first, the bottom of the shock uses a single bolt system to mount to the lower A-Arm rather than the traditional double bolt design and second, that the all-important Aldan American coilover adjustment wrench is included with every kit. This wrench allows you to lower or raise the overall vehicle height once all parts are in place.
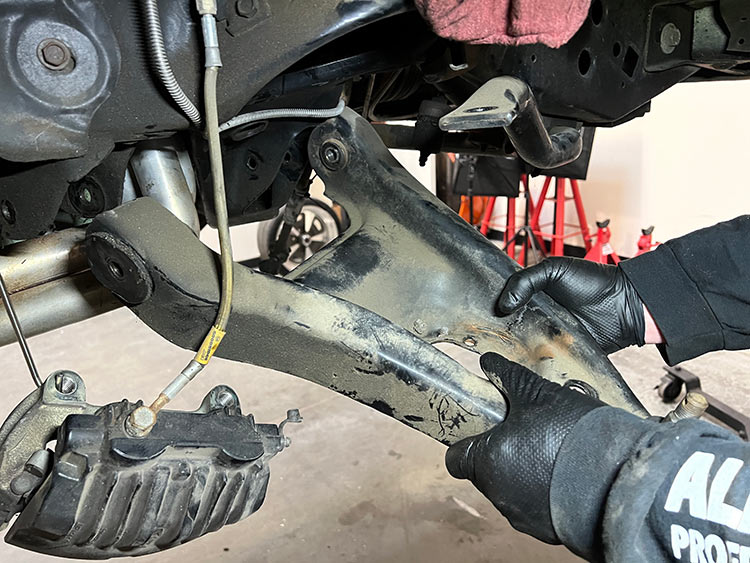
To remove the lower A-Arm at this point is relatively easy and requires only the removal of the lower attachment bolts. On this car we did have one issue – the header tube design did not allow us to remove the A-Arm mounting bolt without first loosening the header completely. These kinds of added difficulties are common with cars of this vintage.
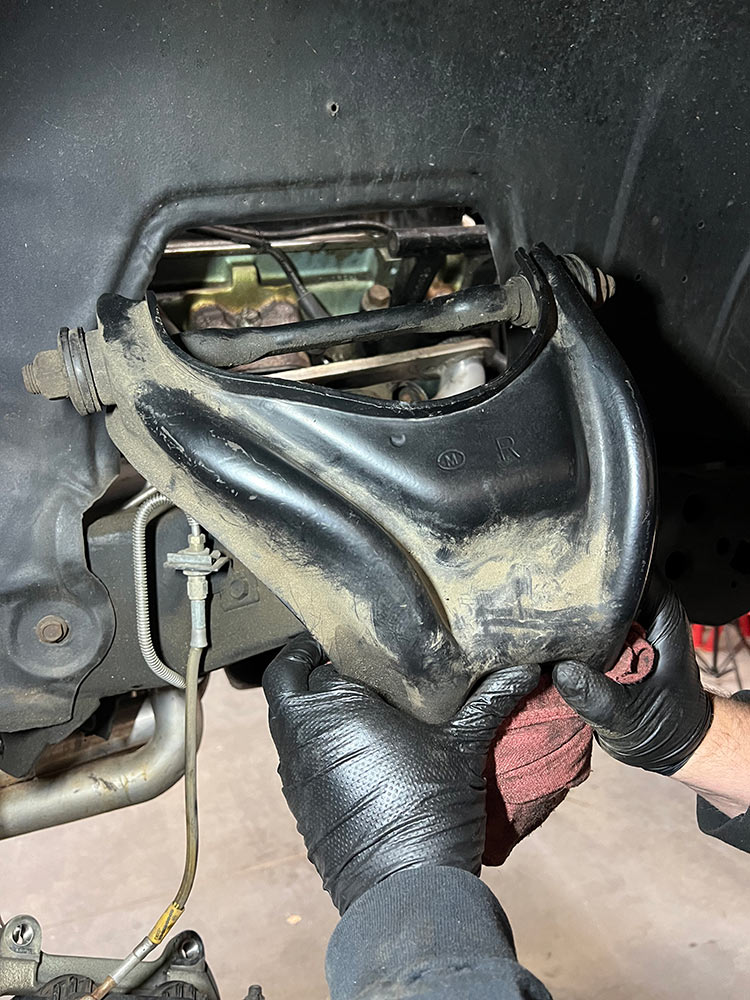
The upper A-Arm required the removal of two bolts that hold it to the chassis on the engine-side of the fenderwell. Before removing this part, note the number of alignment shims in place so you can reinstall the same number of shims on the new A-Arms. Regardless, the car will need a full alignment when finished however.
This homemade tool allows you to expand the lower A-Arm mounting receiver slot for the new A-Arms. It is common for this receiver to be smaller than required for new parts. By inserting this threaded rod along with oversize washers and nuts, the receiving mount can be widened by turning the internal nuts, which press the washers outward making enough room for the new A-Arm.
To hold the new A-Arm in place we used the new hardware supplied by POL. Never reuse the old hardware if at all possible.
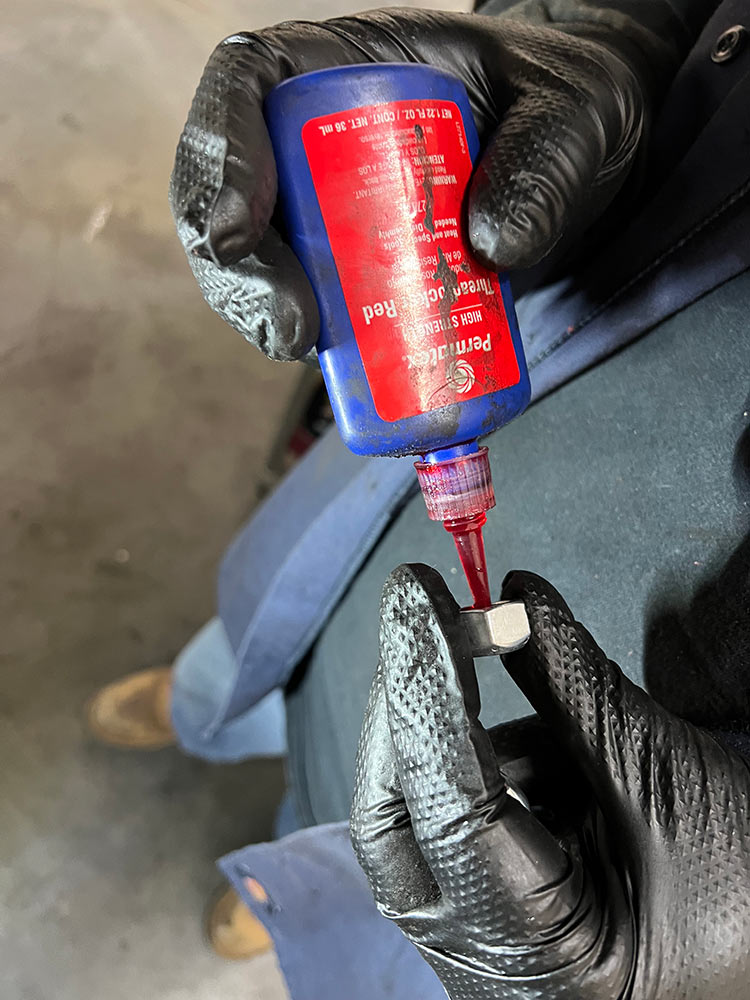
To ensure that the nuts on the A-Arm attachment bolts stay in place, we used some Permatex RED thread locker before tightening.
The POL upper A-Arms were installed in the same way that the original A-Arms came off using new hardware, of course.
It is critical to torque all suspension bolts per the factory specs for obvious reasons. With our lower A-Arms, we torqued the attachment bolts to 75 ft. lbs.
Before torquing the upper A-Arm bolts in place, we inserted the alignment shims in the same configuration as they came out. Torque the upper A-Arm mounting bolts to 45 ft. lbs.
The folks at POL include new upper ball joints and complete hardware with their A-Arms. This design allows for easy replacement of the ball joints when they wear out.
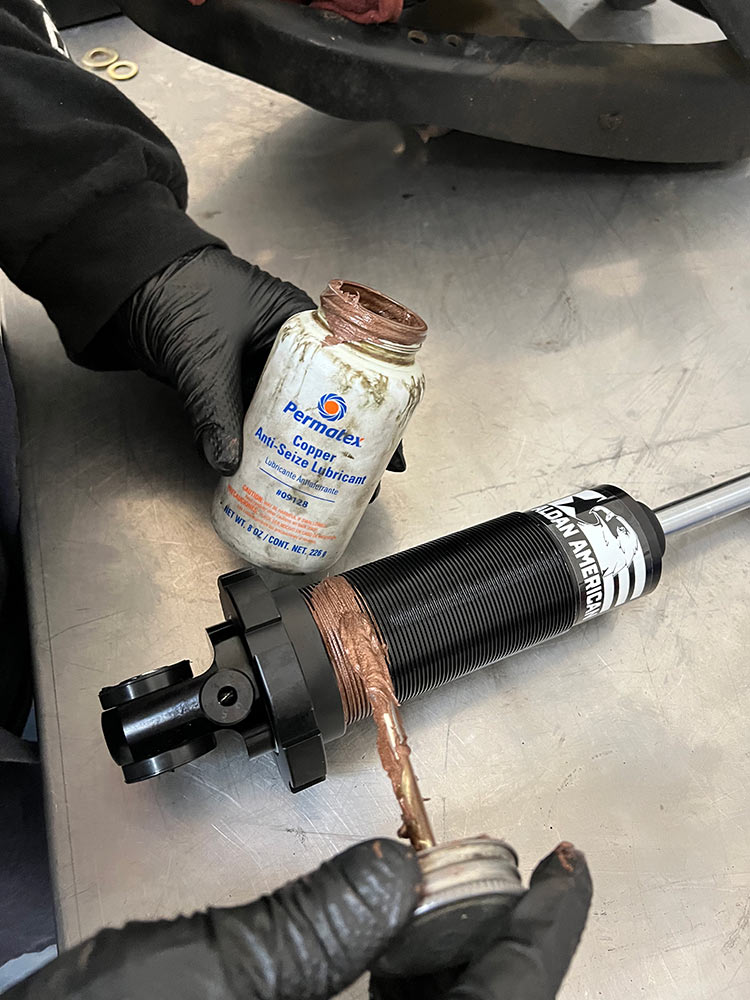
Versatility is the key to the Aldan American coilover system. We applied Copper Anti-seize lubricant on a few threads of the Coilover body to make certain that the lower coil spring mounts will rotate when we are making vehicle height adjustments after the coilover is fully installed.
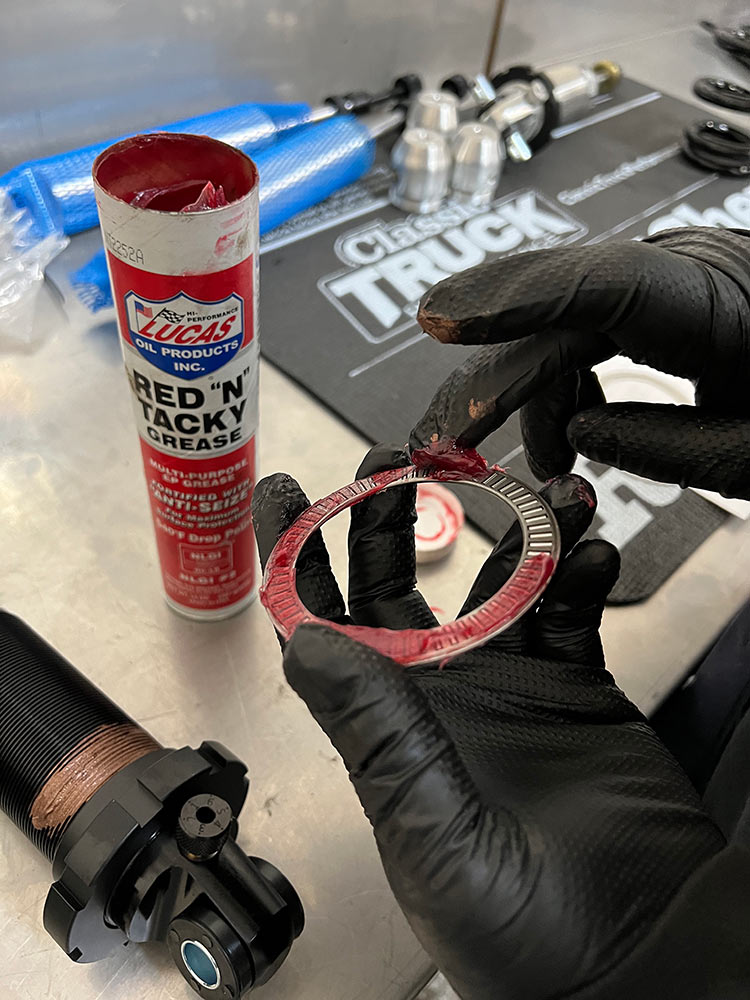
This optional thrust washer and bearing package also helps to make it easier to adjust vehicle height. We thoroughly lubricated the bearing with Red & Tacky bearing grease before sliding the three parts onto the coilover body.
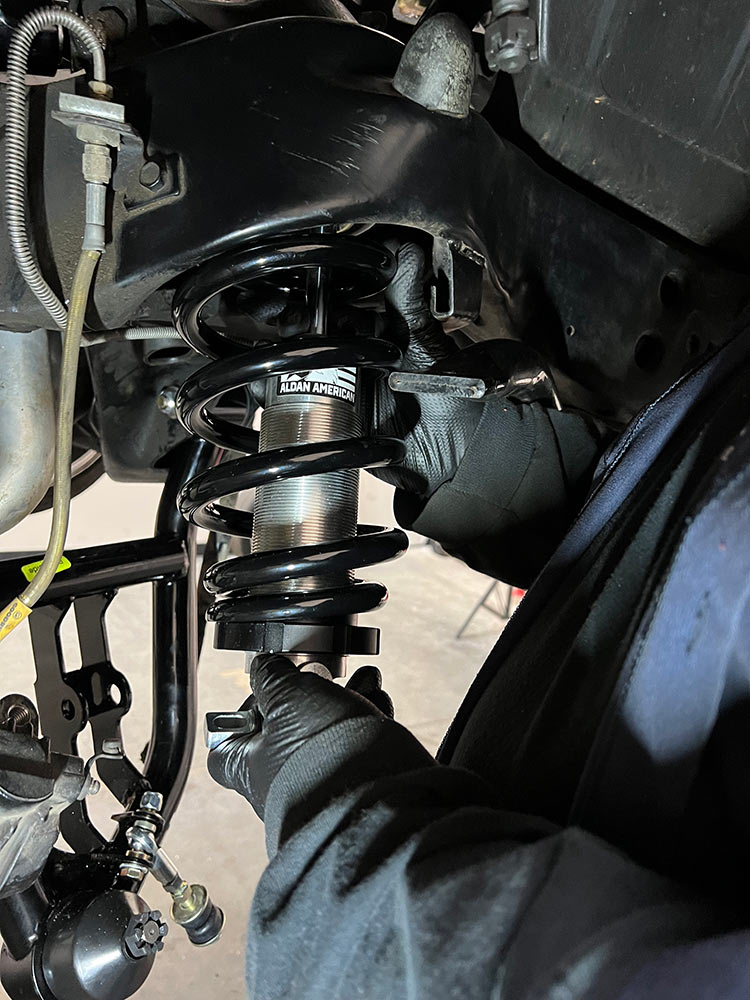
After slipping the coil spring over the shock body, we fit the coilover assembly up into the spring pocket like this. The threaded rod on the top of the coilover will protrude through the upper shock mount. Install the rubber bushing, retainer and nut on the stud to hang the coilover in place for now.
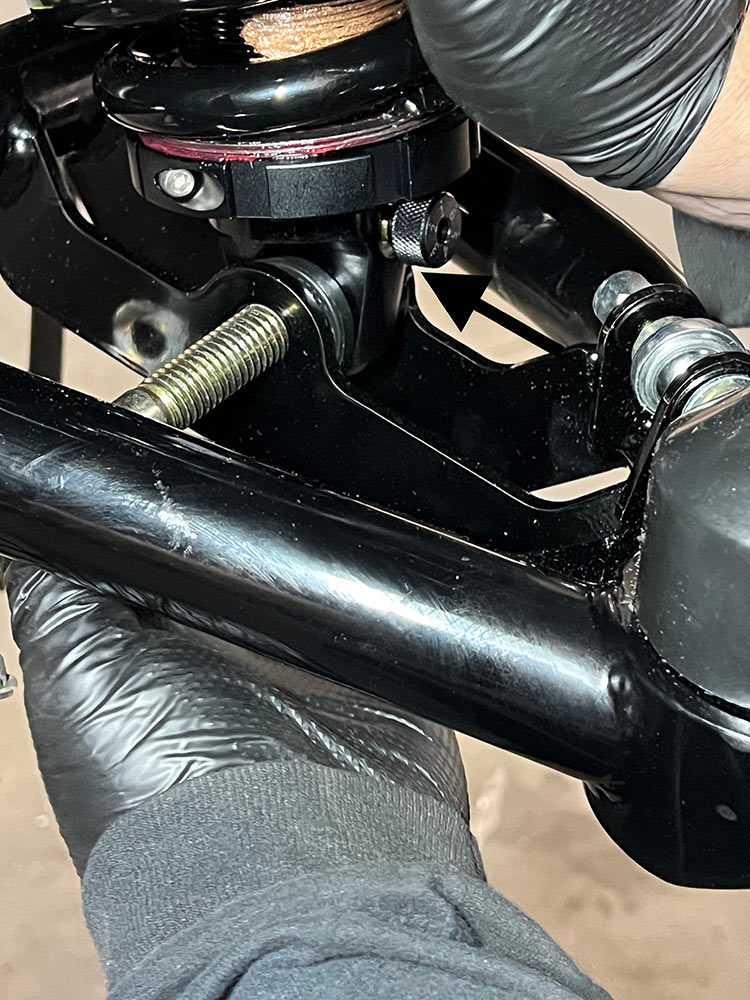
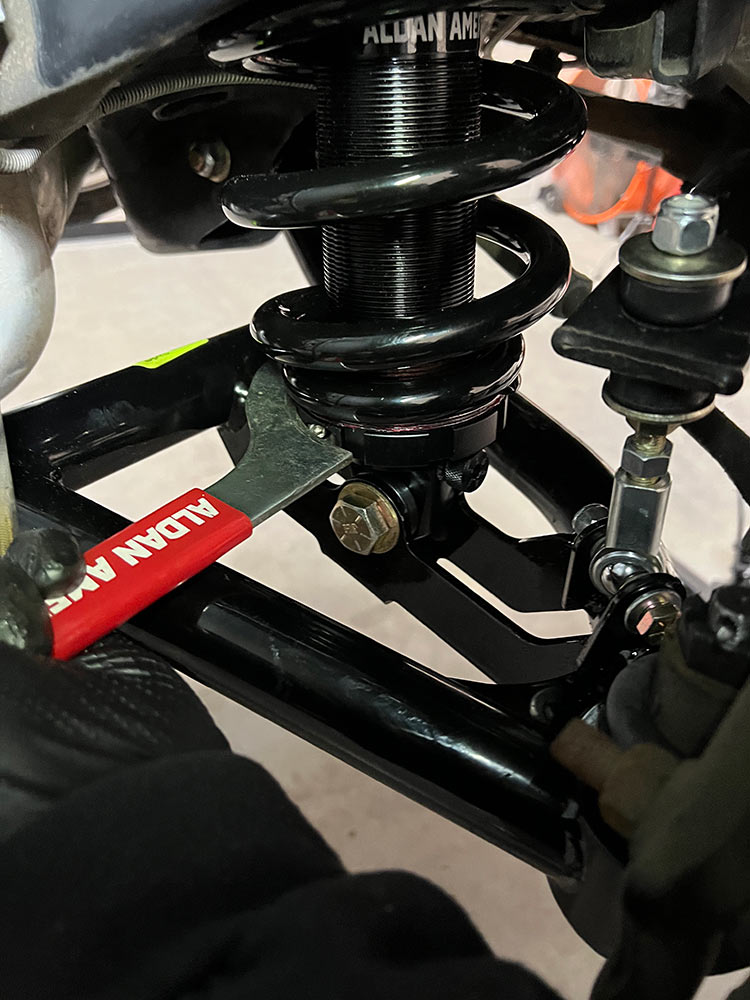
As mentioned earlier, the Aldan American coilover features a single bolt lower mount design. When ordering lower A-Arms from POL, it is important to mention this so you purchase an arm compatible with this design. As an additional assist here, both Aldan and POL will sell you a package with the correct A-Arms and coilovers so you won’t encounter a problem with fitment Note that the lower compression adjustment knob (arrow) needs to face out for easy access.
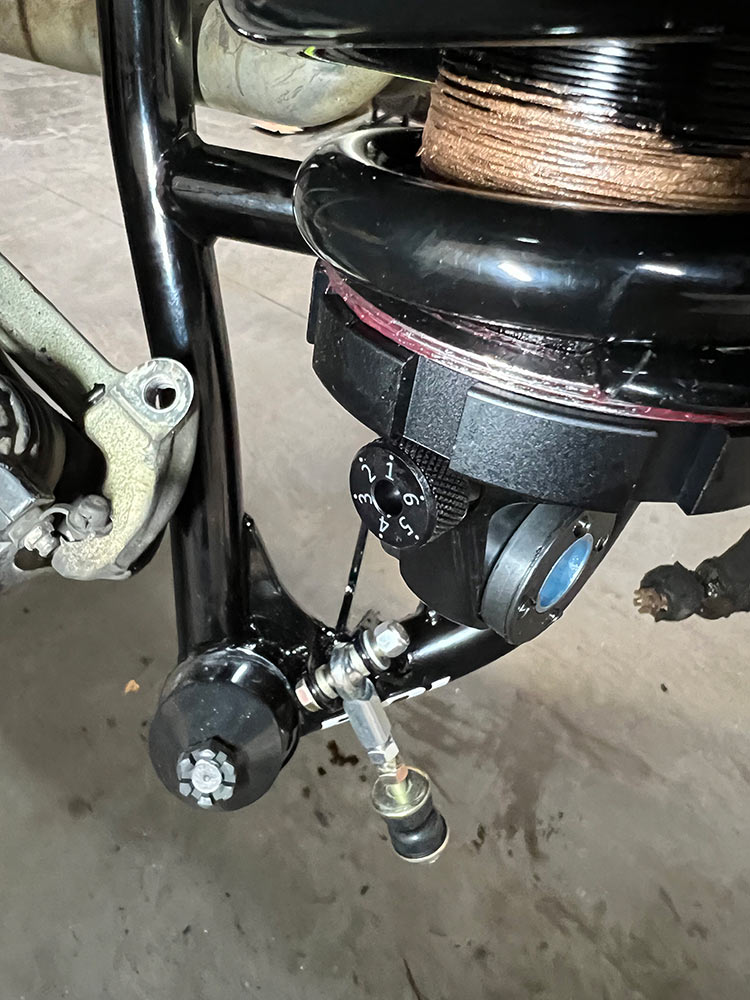
As a starting point, we set the lower compression adjustment knob to 1. We can adjust this to a different setting if we would like to stiffen the shock valving.
The upper coilover mount should look like this before tightening. We would like to see the bushing slightly more squished that shown here for optimum performance. You do this by tightening the nut.
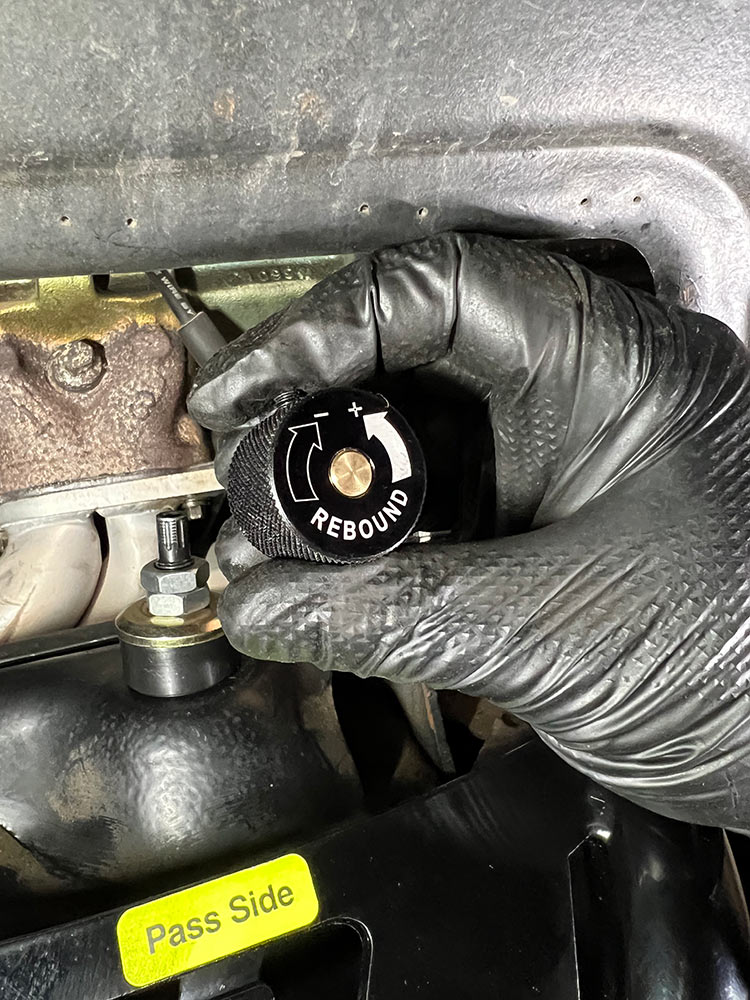
On double adjustable coilovers, this knob will allow you to adjust the rebound valving of the coilover. Single adjustable shocks will not have this feature. First install the second jamb nut to hold the shock in place and then screw on the knob. Turn the knob fully counter clockwise until it stops and then 10 clicks back to reach the mid-point. In all you will have 20 points of rebound adjustment.

Reinstall the front suspension components by following the GM assembly manual instructions, a great guide to ensure that your suspension is safe. This novel little POL sway bar end link features a more solid connection between the A-Arm and the sway bar than stock and is full adjustability with the turnbuckle.
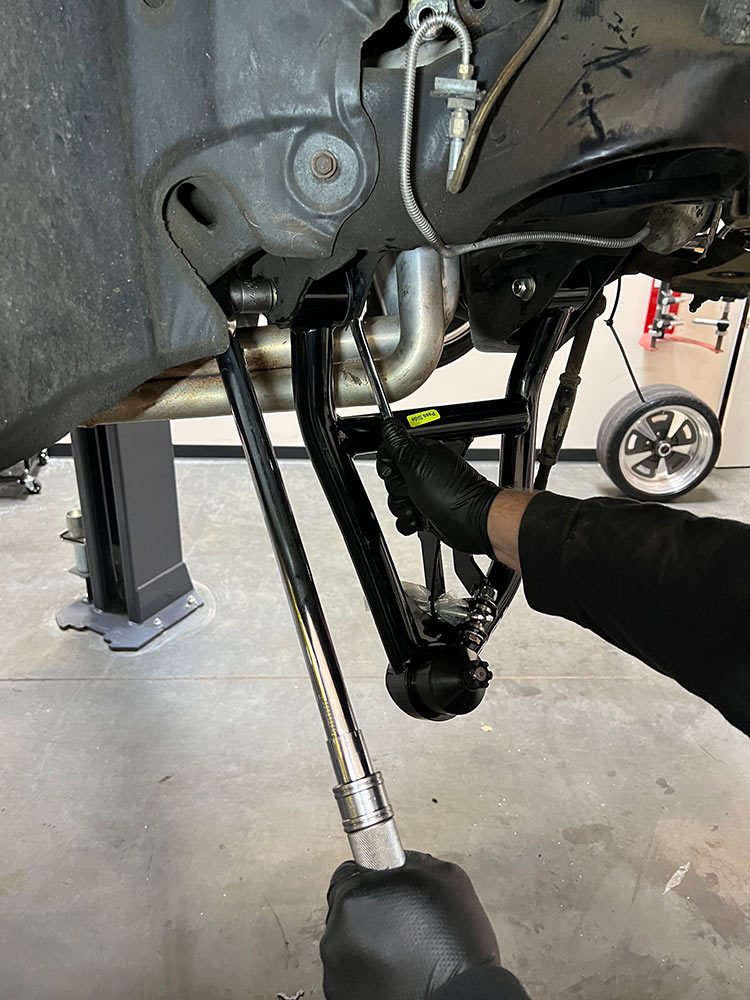
We did not perform any ride height adjustments at this point that only happens with the car back on the ground. This wrench will turn the lower coil spring mount raising or lowering the height of the vehicle. After making this change, make sure that the tires and wheels do not contact the fenderwell or damage can occur. Aldan American suggests lowering your vehicle no more than two inches from the stock ride height.
The rear suspension of our GTO had received a similar series of upgrades over the years, most notability aftermarket shocks and oversize disc brakes. The Aldan American coilover kit is completely compatible with these changes.
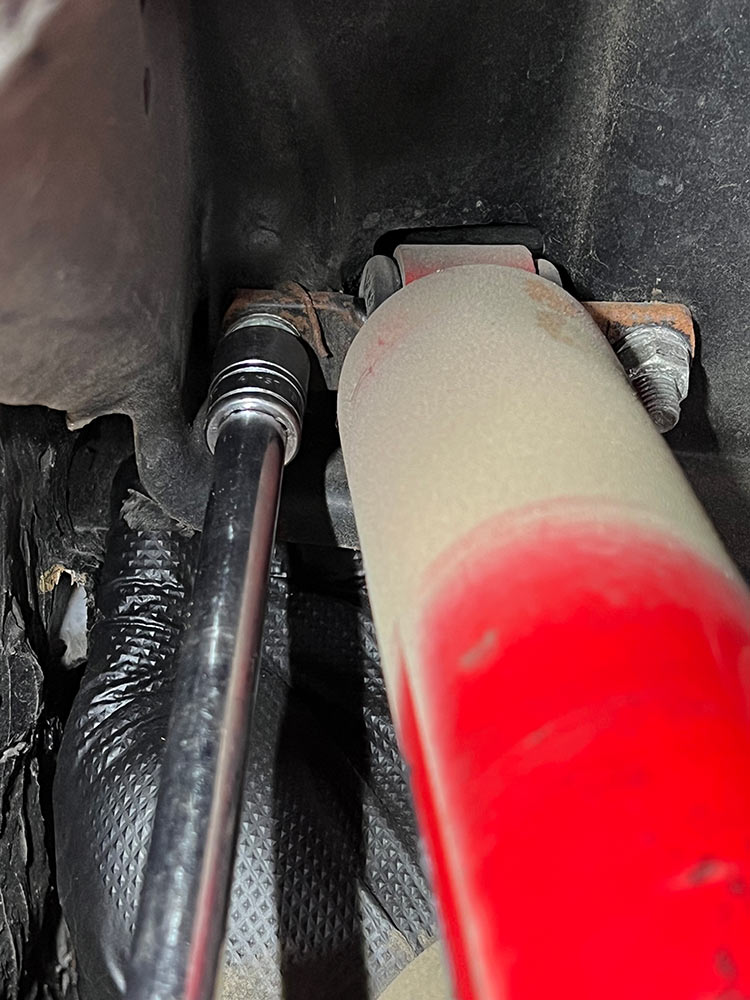
After removing the lower shock mount bolt, we removed the two bolts that hold the shocks to the chassis. Not only do you need a long socket extension to reach the hardware for this but a box end wrench behind the frame to keep the bolts from turning.
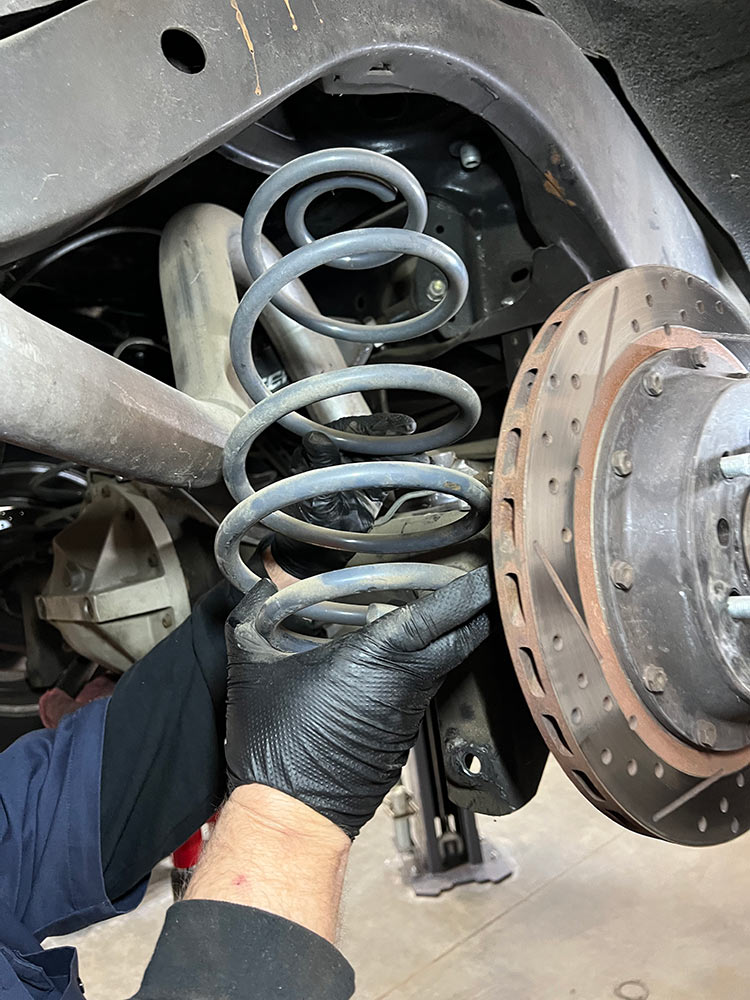
With the shocks out of the way, our springs became completely loose in the chassis and were easily removed. We found this to only to be the case if both shocks were removed, one shock alone won’t do it.
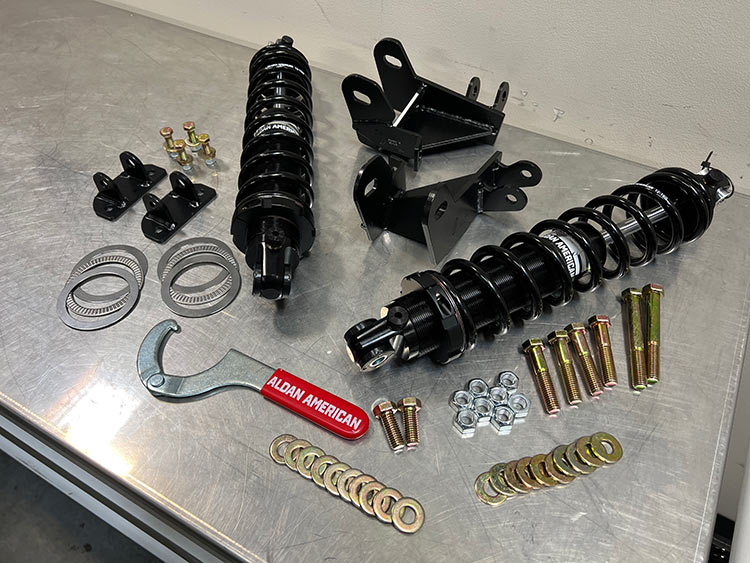
The Aldan American rear coilover kit includes all of these pieces including the two brackets that will serve as the mount for the lower coilover connection.
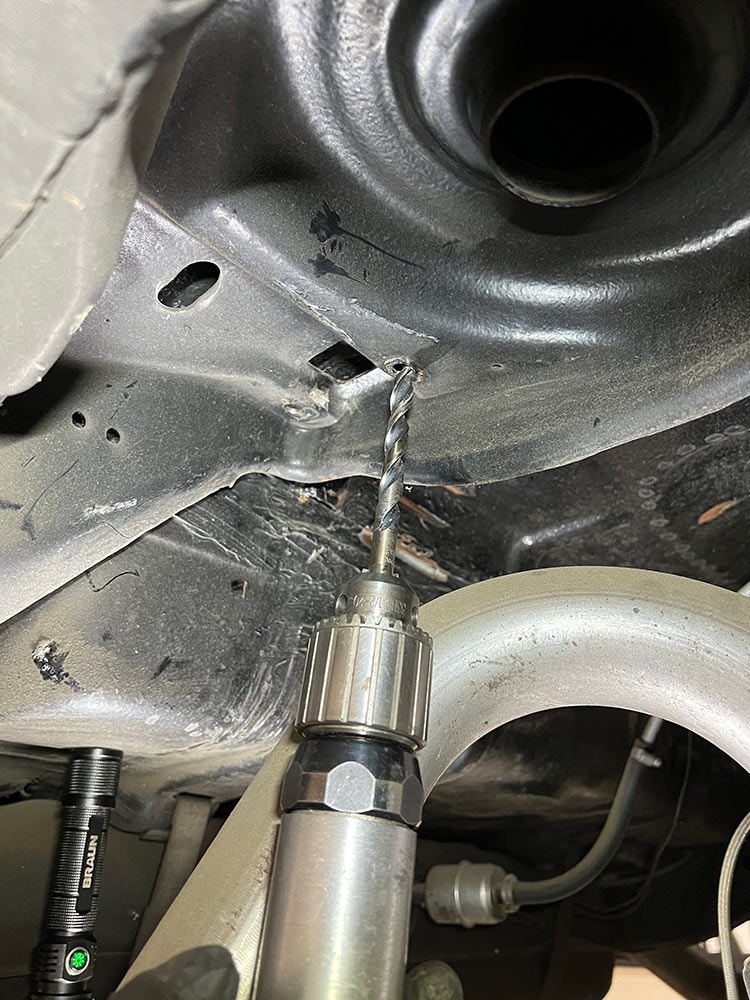
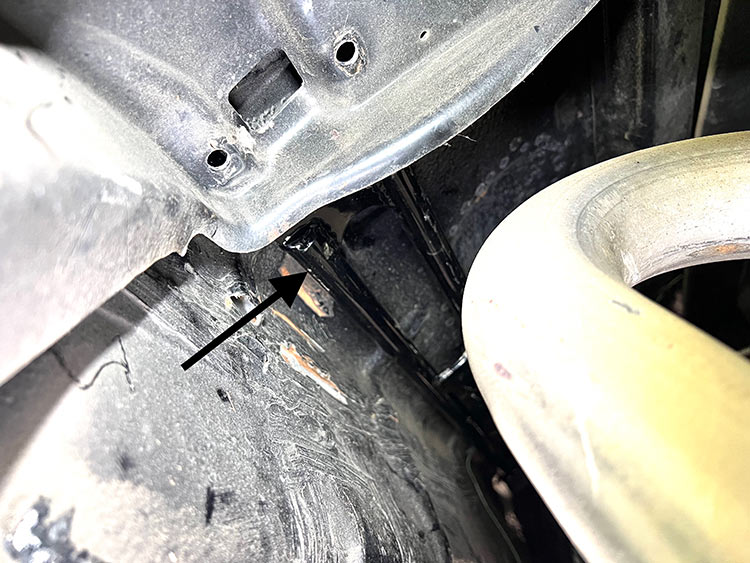
Since the Aldan American coilovers alone will replace the single shock and spring system used by the factory, oversize hardware is used to mount to coilover to the chassis. For that reason, we needed to open up the mounting holes for the new larger-diameter hardware.
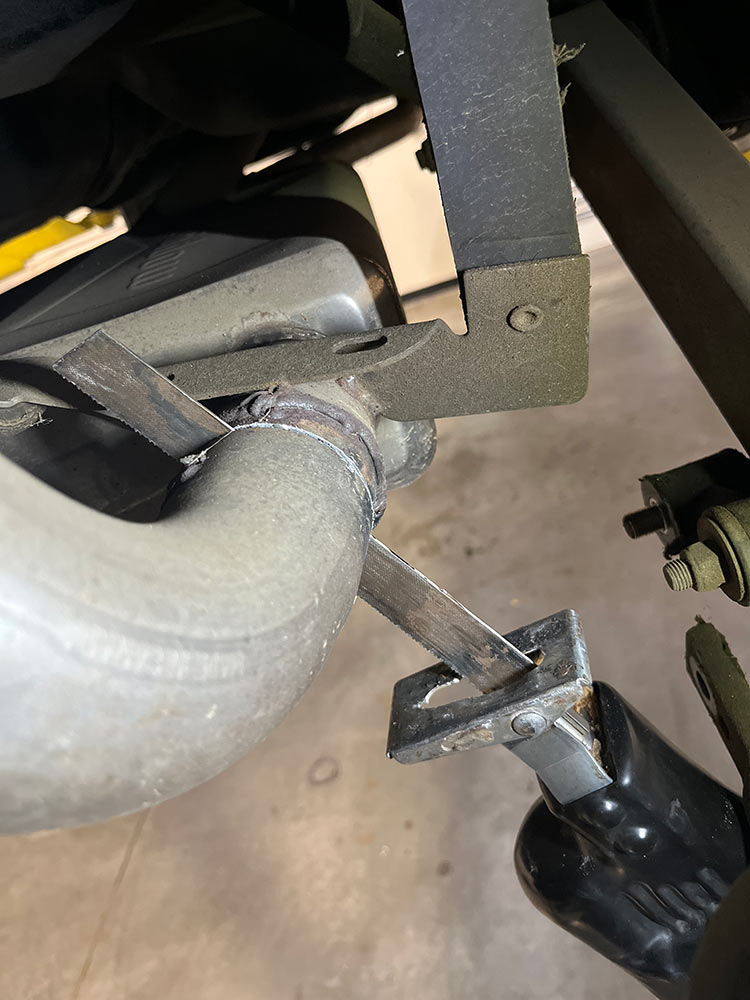
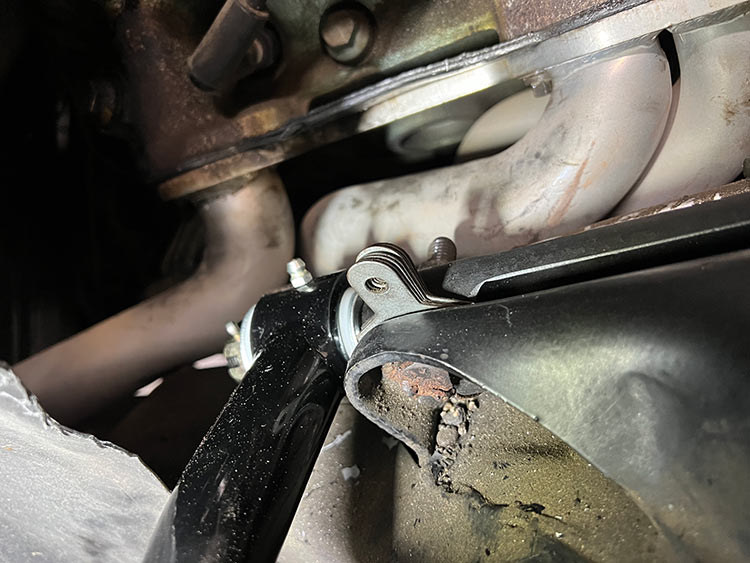
It was not long before we determined that the design of the custom exhaust system on our GTO was not going to clear our new coilovers. Our GTO’s custom tailpipe interfered with the coilovers positioning. For that reason, we cut off the rear section of the exhaust. A new exhaust will need to be built to route exhaust around the coilovers. In most faces, Aldan American coilovers will fit around the factory exhaust tubing.
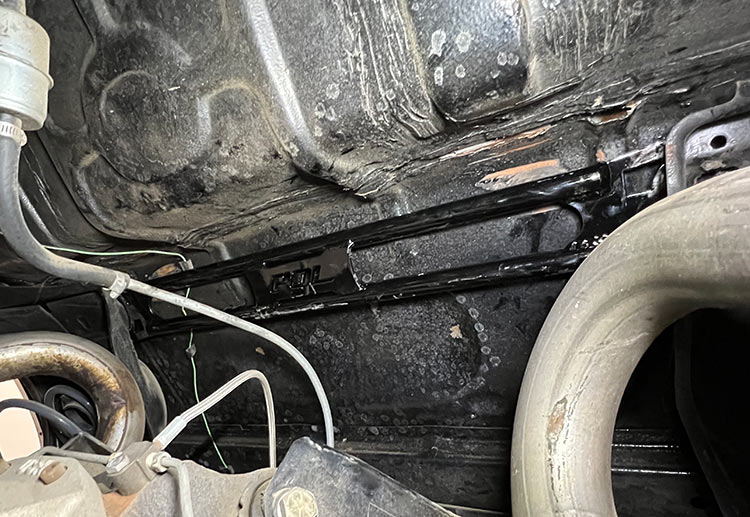
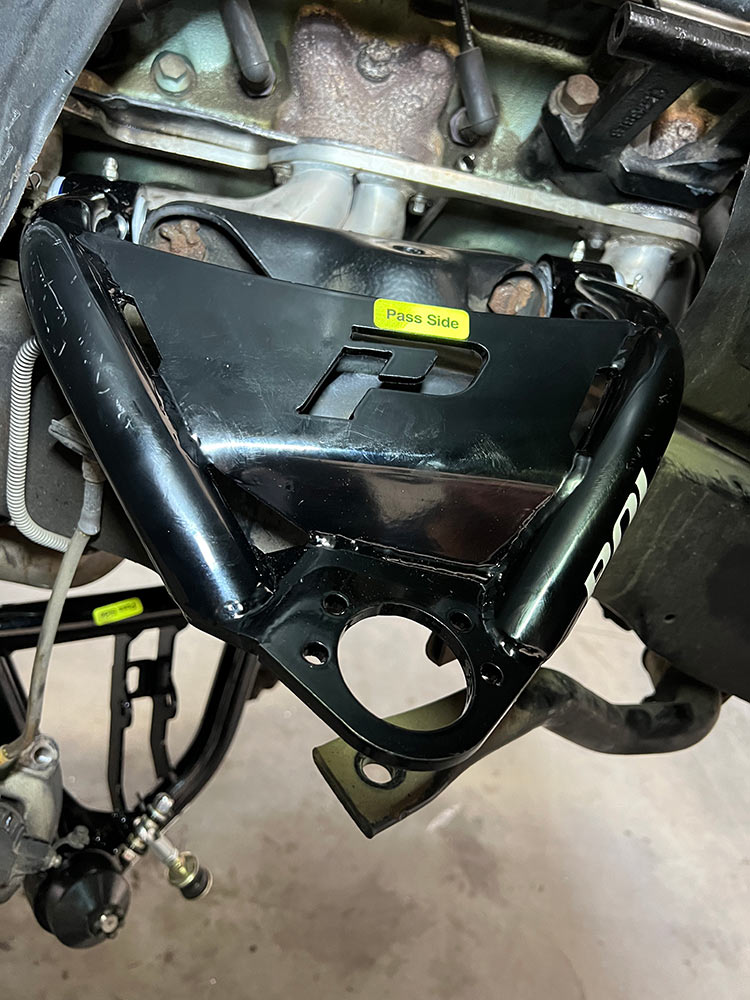
This POL-designed upper shock brace for GM A-bodies is a recommended upgrade. It fits in this position and is held in place with the same hardware used to mount the upper shock mount brackets.
Here is another view of the upper shock brace. As mentioned, the two boltholes to the left will not only hold the support in place but also the Aldan American coilover mount brackets (also a part of this kit).

These upper coilover bushings are zip-tied in place by Aldan American when the kit arrives. They fit together in this manner and slip into the upper mounting bracket. A supplied bolt holds the system within the bracket.
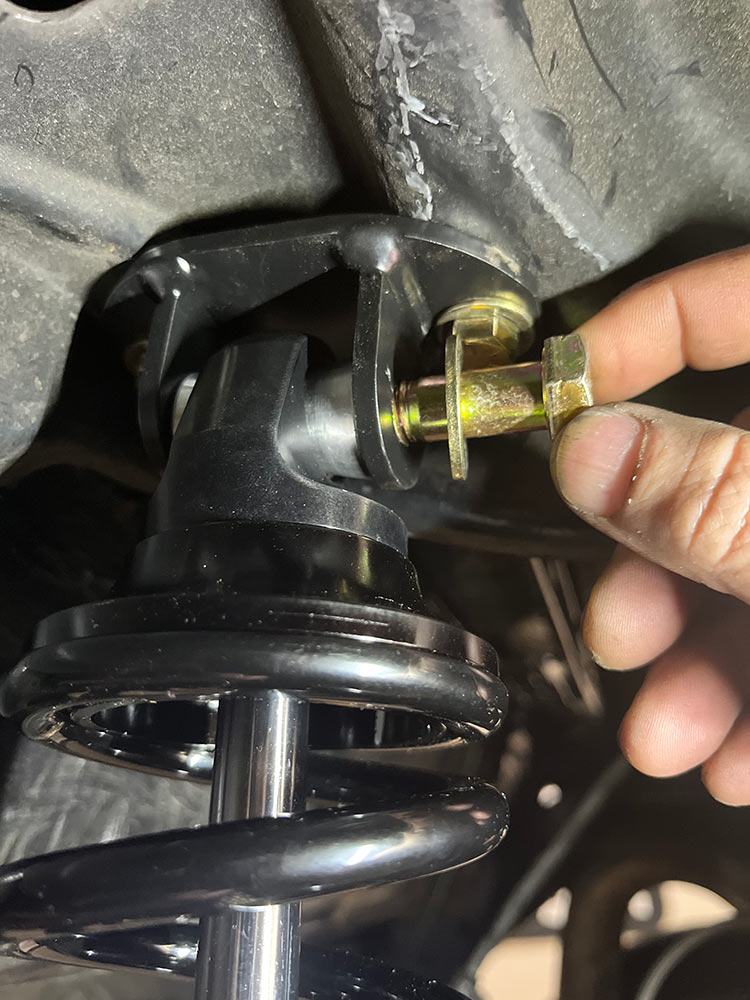
With the upper brackets installed, this single bolt holds the upper coilover mount in place. Torque these bolts to 35 ft. lbs.
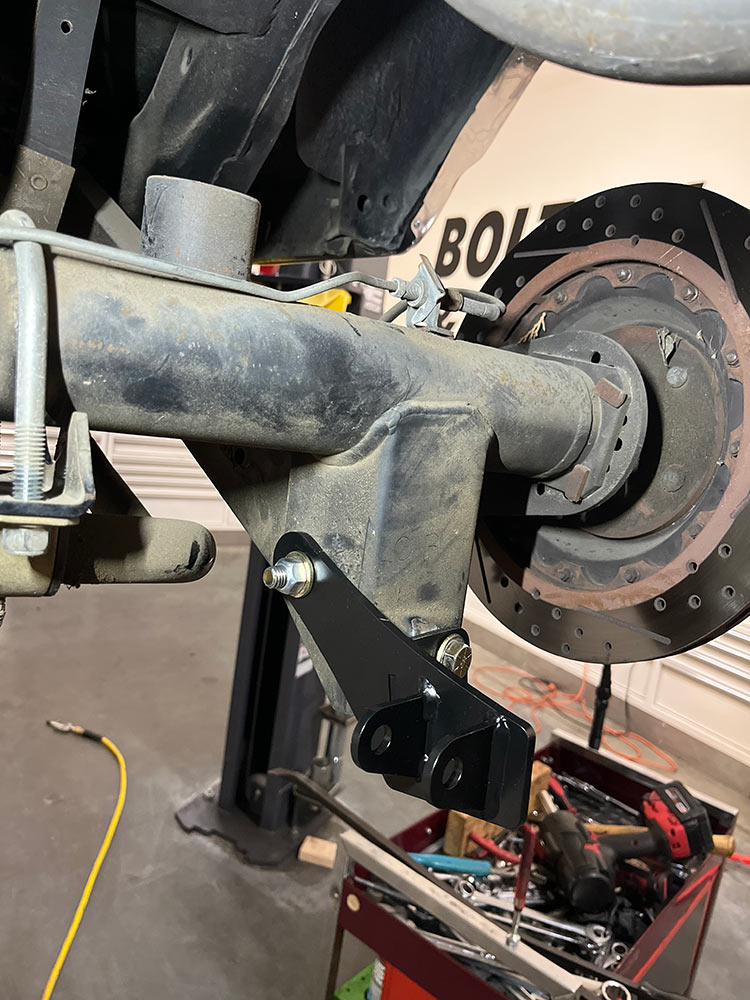
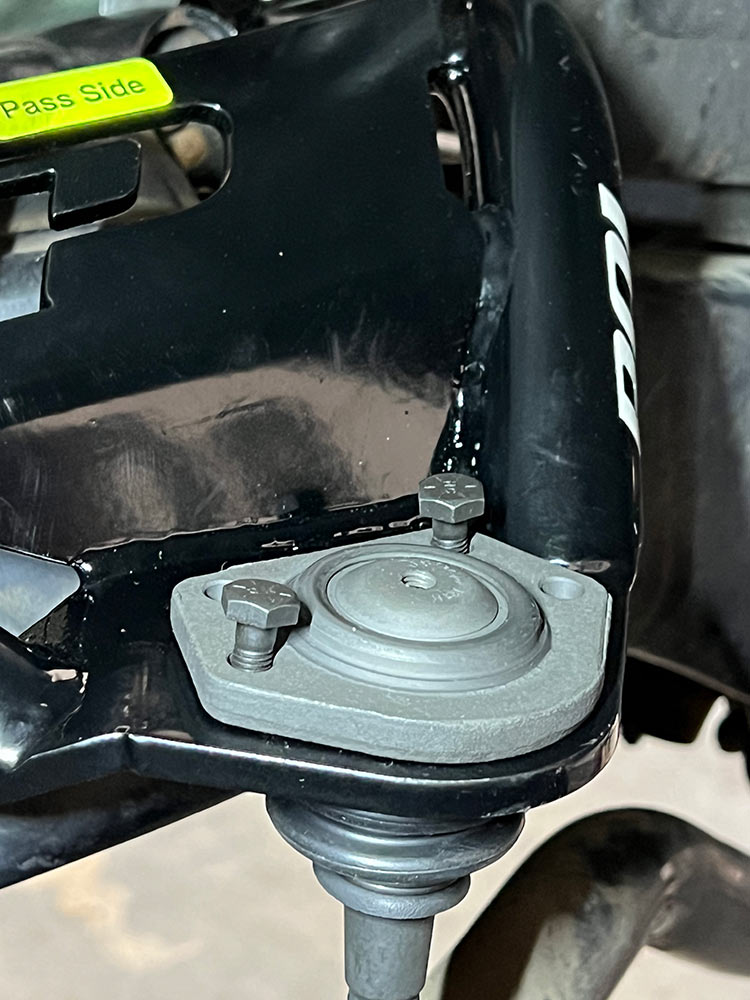
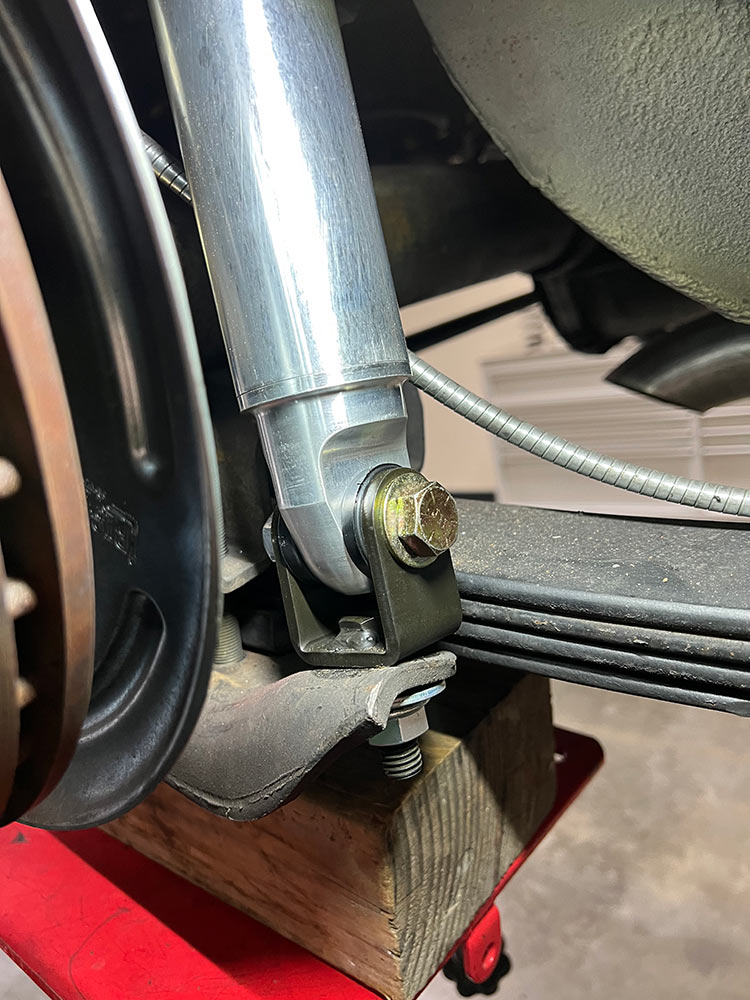
As we investigated further, our GTO featured a high performance Moser rearend housing. Good news/bad news: our planned Aldan American lower coilover mount brackets did not fit. Good news – Aldan American’s G-Body brackets went on without modification. Note that these brackets not only provide a solid mounting point for the coilovers but also moves the coilover inboard compared to the factory positioning. This simple change allows you to install larger width tires and wheels if desired. That’s a huge added benefit when improving the performance of your vehicle.
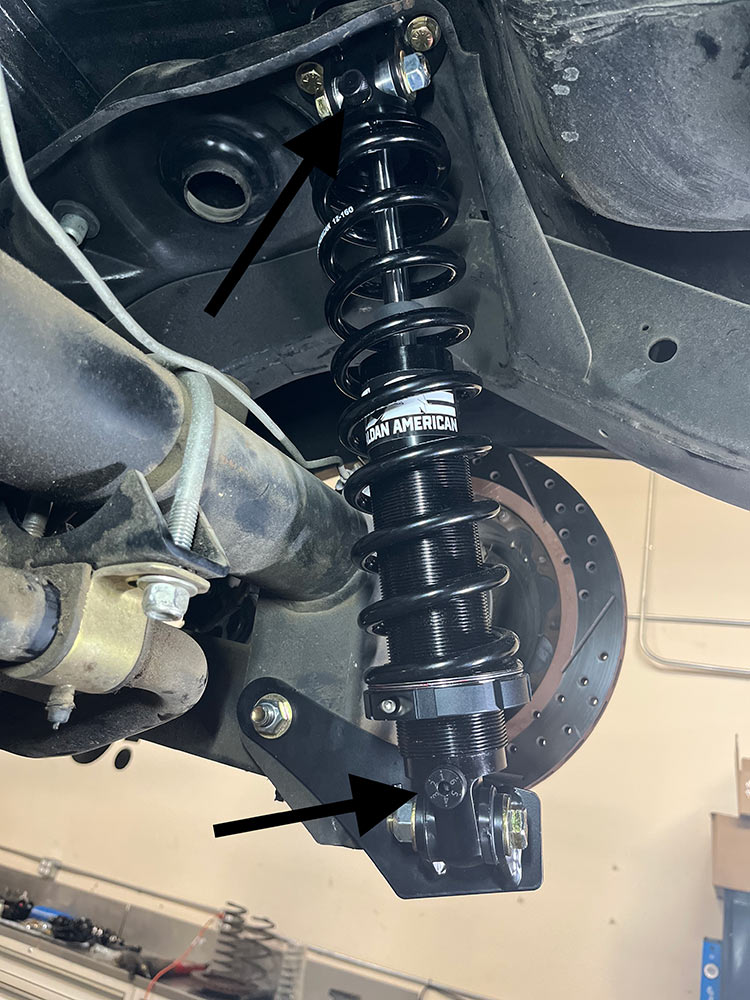
With our coilover in place it was time to adjust the coilover compression and rebound settings. We preset the rebound stiffness by turning the adjustment knob counterclockwise until it stopped. Then we backed off the knob three clicks in the clockwise direction as a starting point. On the compression setting (knob at the bottom of the coilover) we left the dial set at the #1 position.
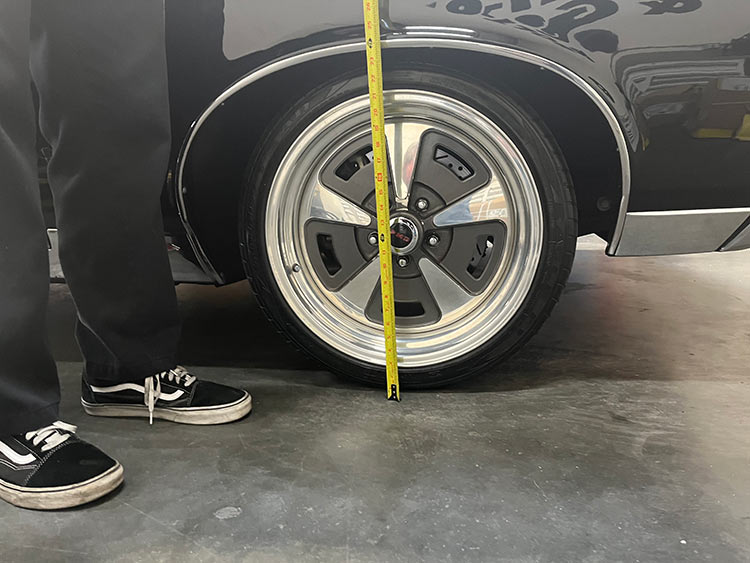
As mentioned, we can adjust the height of our GTO as much as two inches lower than stock ride height. A vehicle with a lower ride height, all other things equal, generates better cornering ability.
Ready to hit the highway or maybe head for some parking lot slalom action, our GTO was now far more adjustable to the whims of the driver than ever before possible. And as for ride quality, 60 years of suspension evolution are evident at every corner we take.
About Aldan American Coilover Shocks:
Each Aldan American coilover kit includes a coil spring specifically designed for the weight of the car and the performance application noted by the installer. In our case, we used a 550lb.-in. rate front spring and 160lb.-in. rate rear spring. Each coilover features a thread collar, which serves as the mount for the bottom of the coil spring. The collar can be turned up or down to lower the vehicle as much a two inches from factory stock ride height using a specially designed wrench that comes with all Aldan American kits.
Lowering a vehicle’s ride height lowers the roll center (a theoretical point in the middle of the vehicle on which it turns around a corner) of the vehicle and improves handling. The only limitation – which requires the utmost care – is retaining adequate tire clearance within the wheelwells. At all times, the tires/wheels must not come in contact with the wheelwells, suspension or fender edges even on extreme bumps or damage to the tires can occur. If this occurs, the vehicle needs to either be raised up or differently sized tires and wheels installed with proper backspacing and offset.
Source:
Aldan American | aldanamerican.com | (310) 834-7478
Performance Online | performanceonline.com | (800) 638-1703