Twice as Nice: Double Adjustable Coilovers from Aldan American give you ultimate handling control

Step-by-Step Coilover Install: 1972 Chevy Chevelle (A Body)
If you’re curious about what tools and skills are needed to install coilovers, this guide is for you and you’re going to be surprised by how easy it is. Today we’re walking you through a coilover install on A Body vehicles — a 1972 Chevelle –using Aldan American springs and double adjustable coil overs. *Note that single adjustable coil overs are also available from Aldan American. Single adjustable coilovers are perfect for vehicle owners looking for some adjustability but designed for street cruising rather than performance driving applications. Double adjustable coilovers are for more competition-oriented applications but also allow for easy street cruising as well – you just have to dial in your shock valving to you liking and head down the road. It’s that simple!
About Aldan American’s Double Adjustable Coilover Kits
Suspension tuning is a highly misunderstood term. Sway bars, springs and shocks can all be adjusted to affect the way your car handles when cornering, accelerating and stopping. But for classic muscle cars, these archaic suspension systems have not had a lot of tunable components to help owners achieve truly improved handling, that is until recently.
Aldan American’s double adjustable coil over kit includes everything you need to adapt high tech coilover shocks and springs to your classic muscle car. This double adjustable coilover system allows you to tune your shock settings for rebound and compression. These great looking aluminum-bodied coilovers slip in place without cutting or welding and allow you to tune the shock valving with a simple turn of knobs located on the body of the shock.
Each coilover contains an internal valving system that when combined with the outer coilover spring, delivers the ultimate in control. Both the front and rear coilovers are fitted with knobs – top and bottom – that can be adjusted while the car is safely positioned on the ground with the wheels and tires still in place. This allows the tuner to make precise valving adjustments to dial in the best possible handling.
Today’s Install:
Source: Aldan American | Aldanamerican.com | 310-834-7478
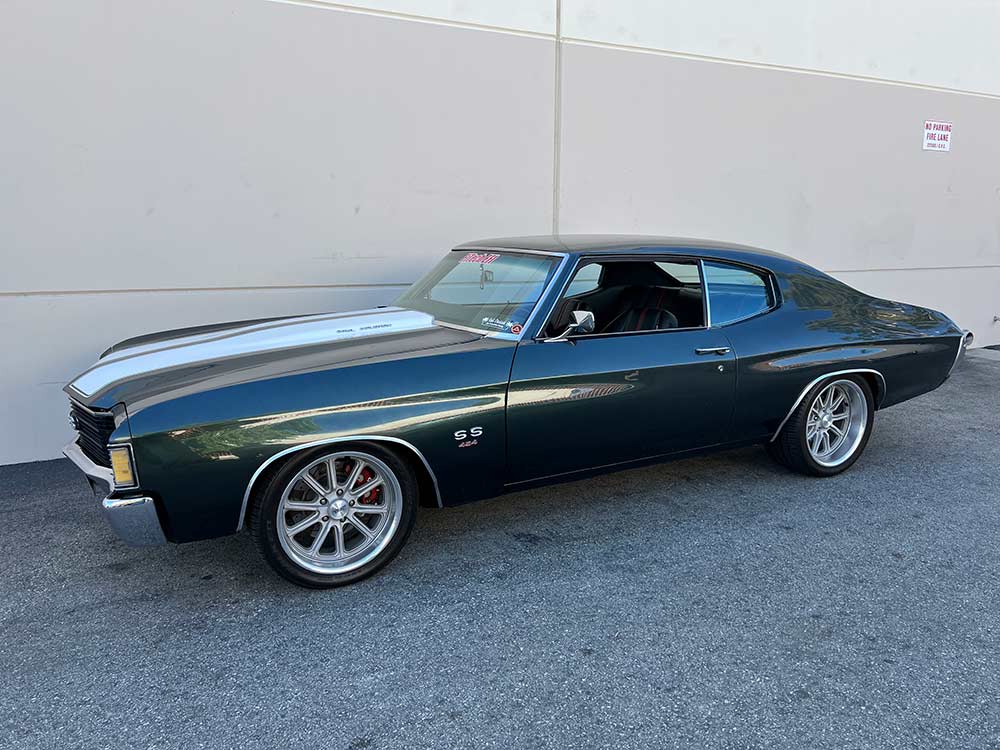
1) Our test vehicle for this install is a 1972 Chevrolet Chevelle, but this kit is compatible with 1964-72 A-body vehicles. That grouping includes not only Chevrolets but General Motor A-body platform vehicles such as Olds Cutlass, Pontiac Lemans and Buick Skylark – and all derivations within that grouping such as GTO, GTX and 442 models. The Aldan American double adjustable system is perfect for a wide range of classic muscle cars.
Our 1972 Chevy Chevelle has received a number of performance upgrades including the installation of an LS engine. Aldan American offers a couple of different spring rates for this platform; the 450 lb. per inch rate springs used here for aluminum LS and small block Chevy engine-powered cars and a 550 lb. per inch rate spring for big block and iron LS engine-equipped vehicles.
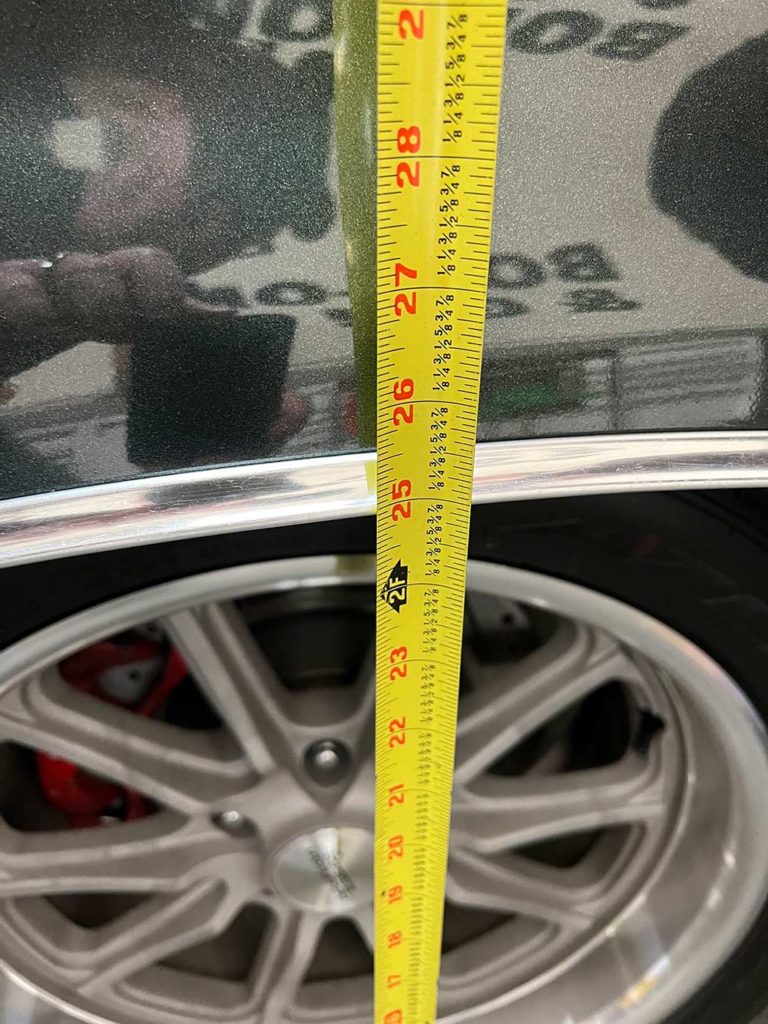
2) We need to get a read on the overall height of the vehicle before modification. We measured at the edge of the four-wheel openings. We were happy to see that the vehicle was very even when measured side-to-side displaying no apparent damage to the chassis, body or suspension.

3) This kit from Aldan American features the linear rate springs, high tech, double adjustable coilovers and all brackets, hardware and adjustment tools for installation. These kits are extremely affordable especially considering the impressive handling benefits they provide.

4) The Chevelle’s suspension had received the benefit of an upgraded braking system but the rest of the suspension was stock – perfect for our Aldan American suspension upgrade.
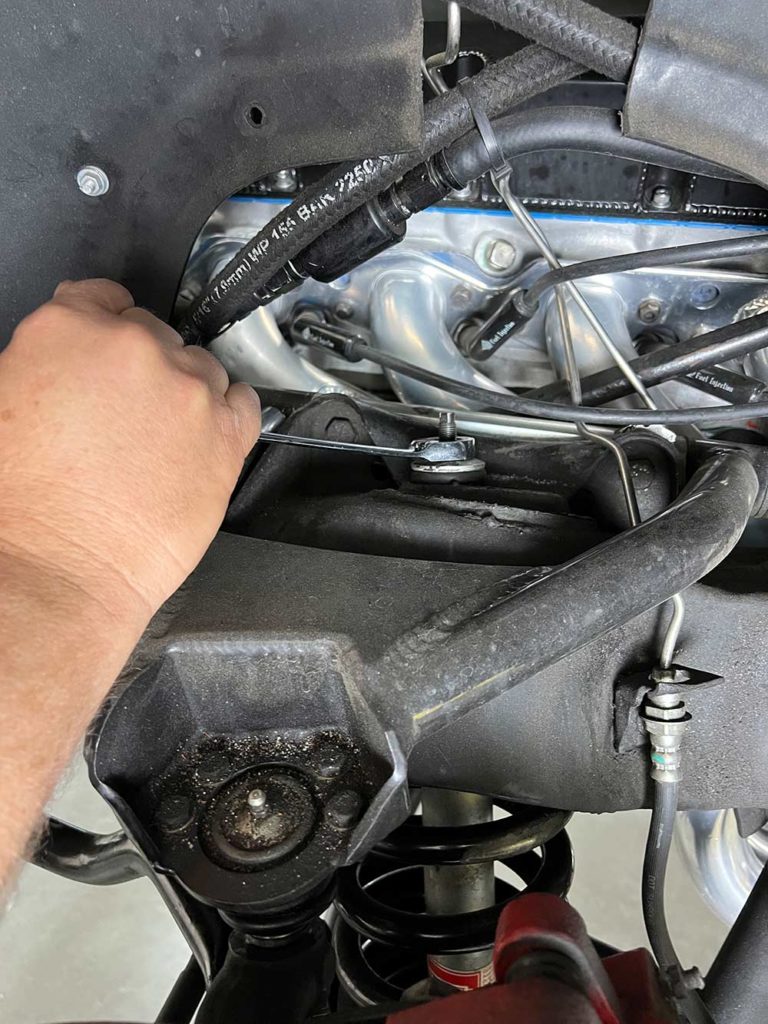
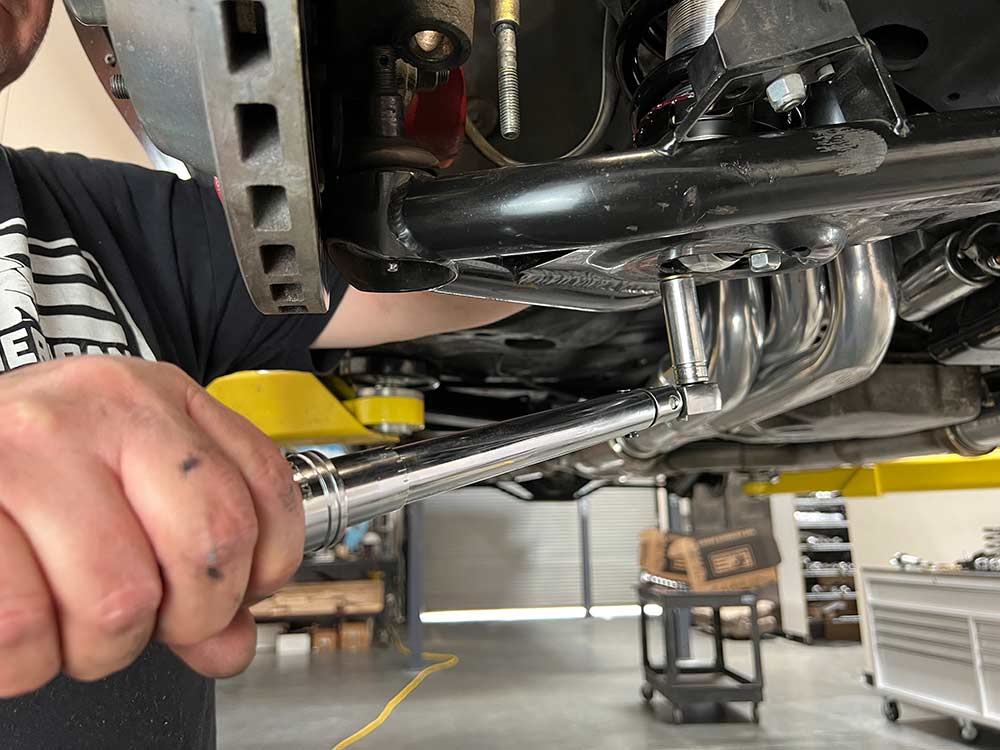
5) After supporting the vehicle safely off the ground and removing the tires and wheels, we began by removing the top shock mount fasteners that are positioned above the upper A-arms.
6) With the original shock released at the top, remove the two lower bolts and slide the old shock out through the lower A-arm opening.
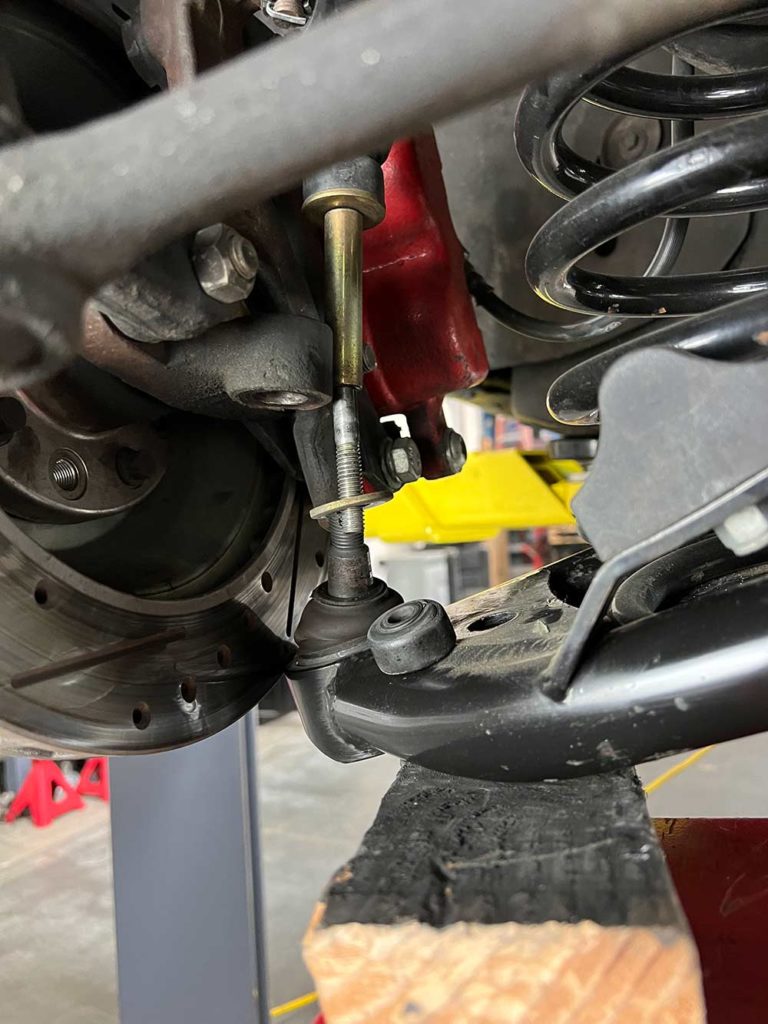
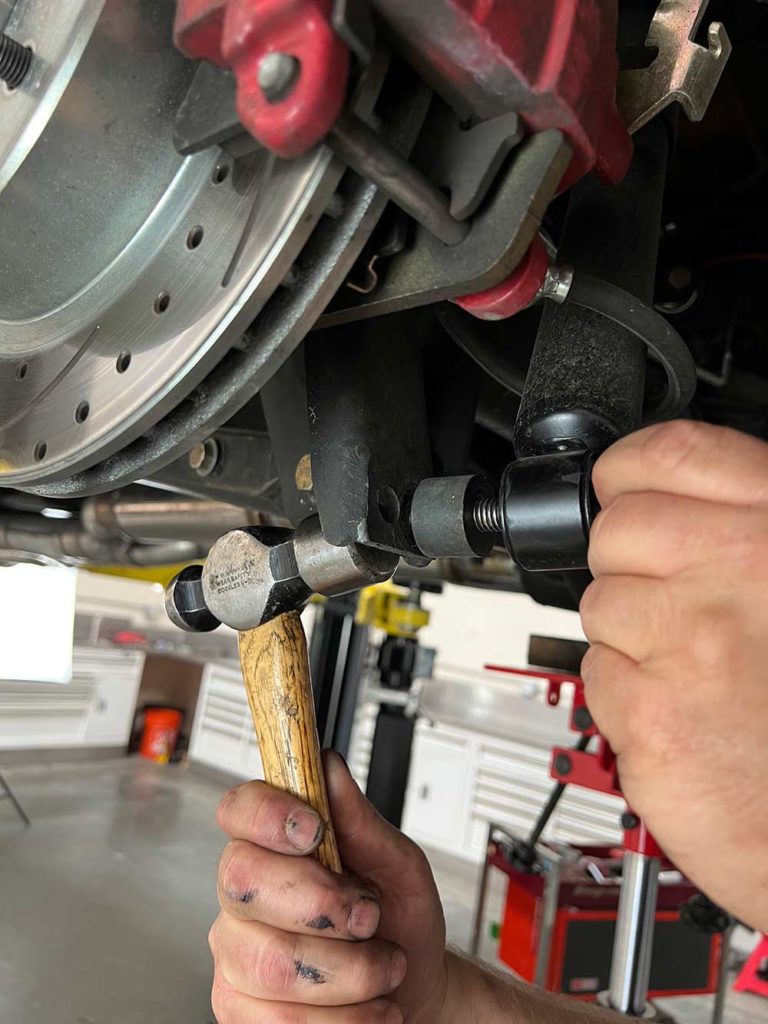
7) With a proper support under the lower A-arm, disconnect the sway bar end link and then the lower ball joint. There is a lot of pressure from the spring placed on the lower A-arm so be careful as you release the spring. If you are worried about controlling the spring pressure, use a spring compressor to keep pressure on the spring coils. This makes it much easier to control the spring as you remove it.
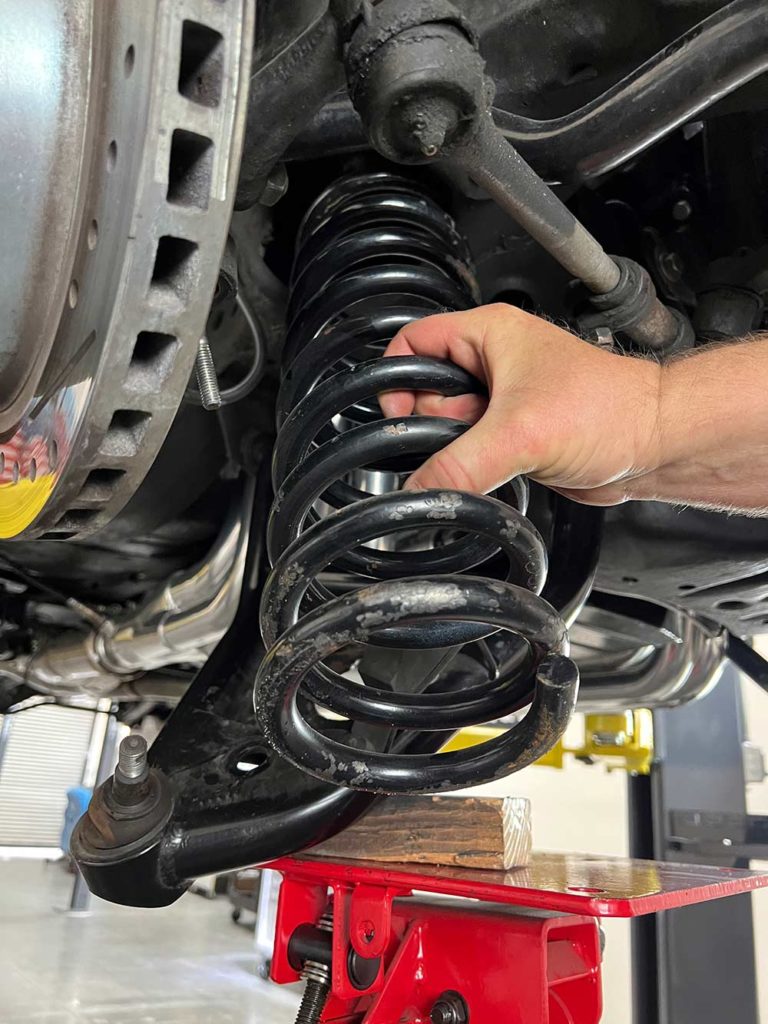
8) The factory spring will not be reused. Note that this spring is very different in shape than the conical Aldan American springs that will replace it – another key advancement to be found with this kit.
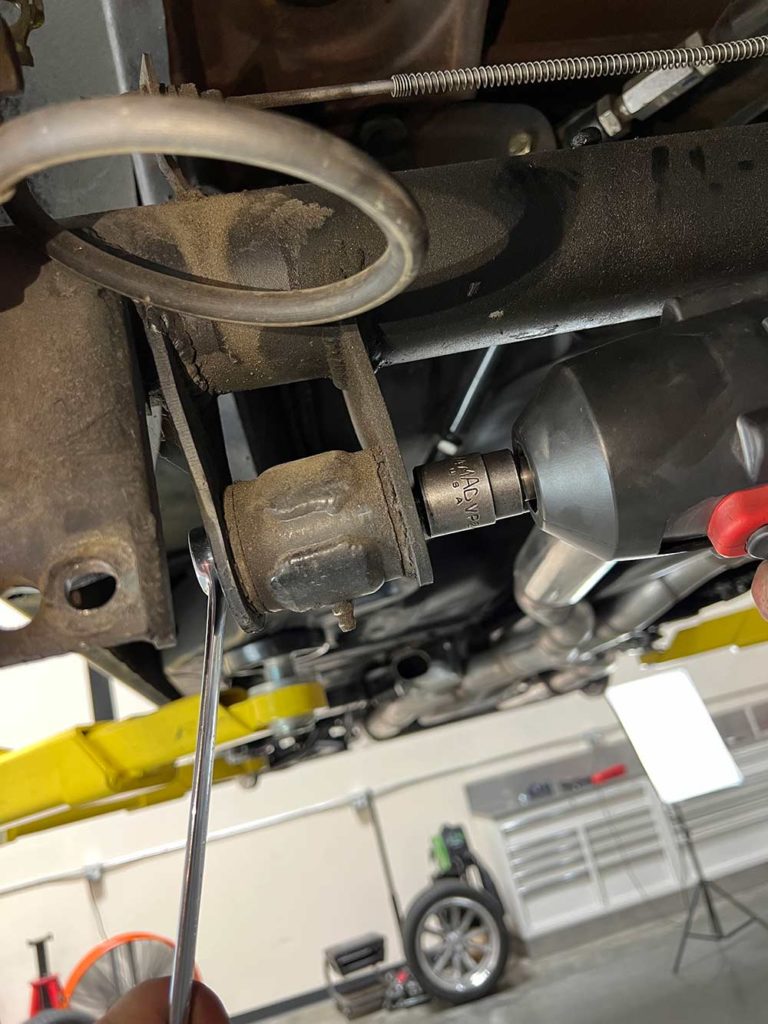
9) The Aldan American double adjustable coilover will place more force on the A-arm pocket than the factory solo shock system. For that reason Aldan American upgraded the hardware that will connect the coilover to the A-arm. We opened up the holes to 3/8-inch using a Uni-bit. This bit cuts a clean, round hole making it perfect for the larger diameter bolts we will use.

10) Aldan American also offers a few optional parts that will enhance the durability of the coilover kit install. The bearing kit (above) includes a series of shims and a roller bearing that will allow the spring to turn and lower the side stresses of the spring. The reinforcement plates (below) increase the stiffness of the lower A-arm spring pocket for increased durability.
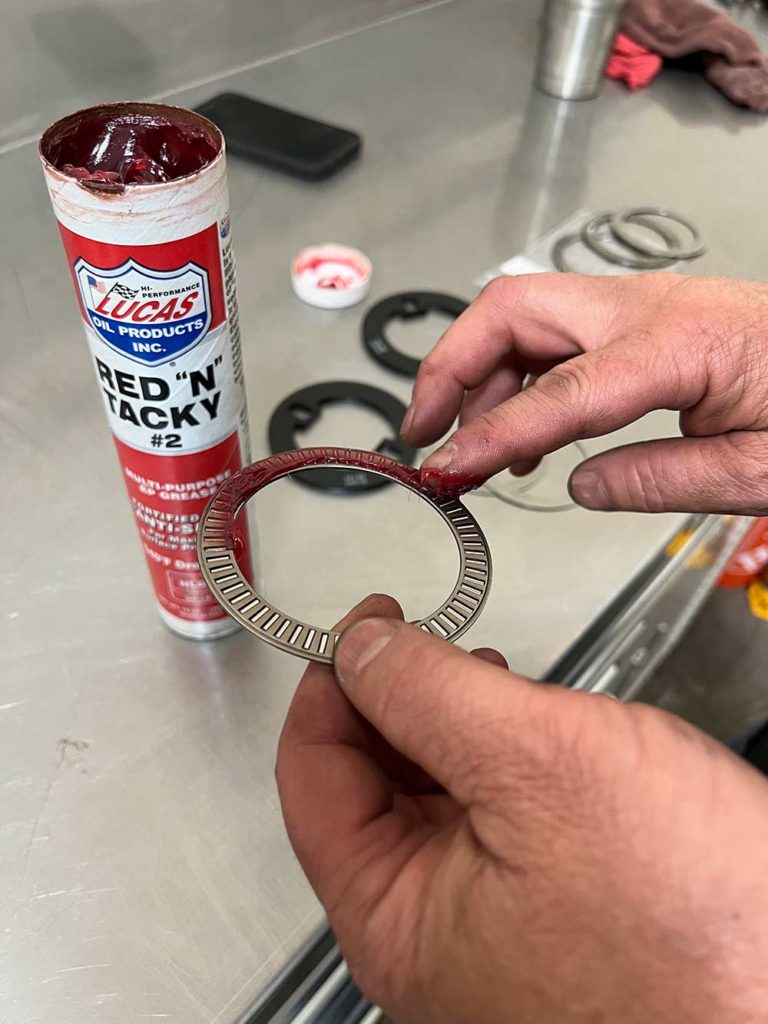
11) We lubricated the optional bearings with a thick bearing grease to ready them for installation. Any quality bearing lube will work here.
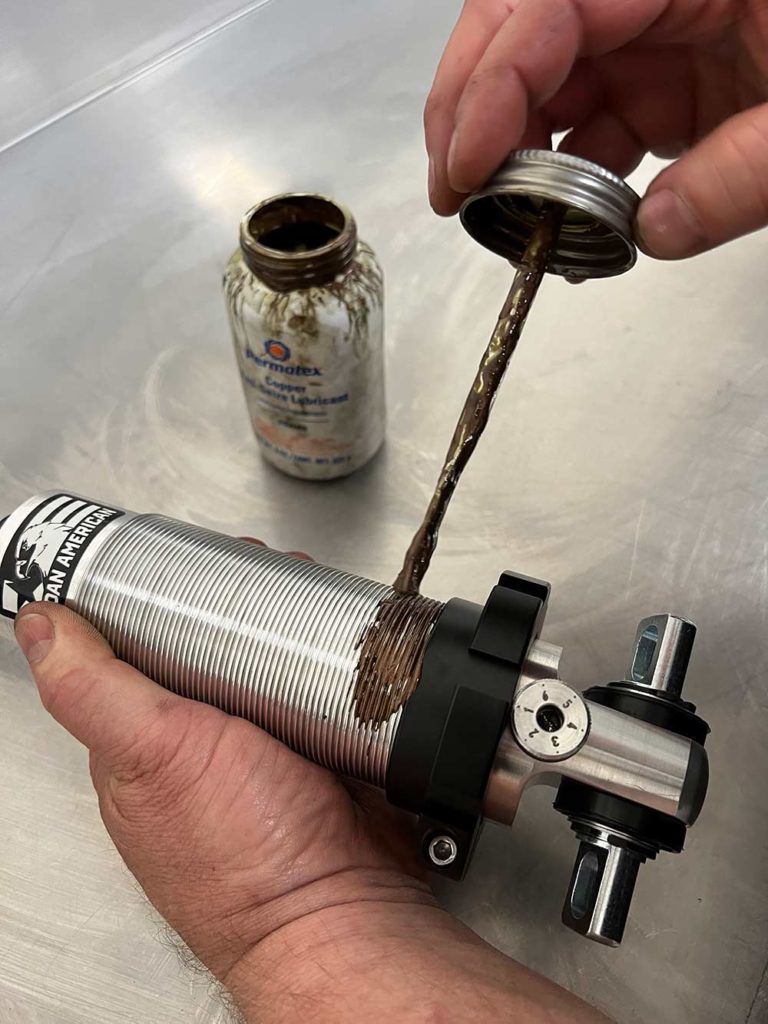
12) To prep the coil over housing for installation, we applied a copper-based anti-seize lubricant on the threads. This will inhibit corrosion where the lower spring mount rotates around the threaded body.
13) A key part of the shock prep is to insert these Aldan American-supplied bolts and small washers into the lower coilover mount. These washers help the bolts move freely in the slotted mount during installation. Don’t forget them.
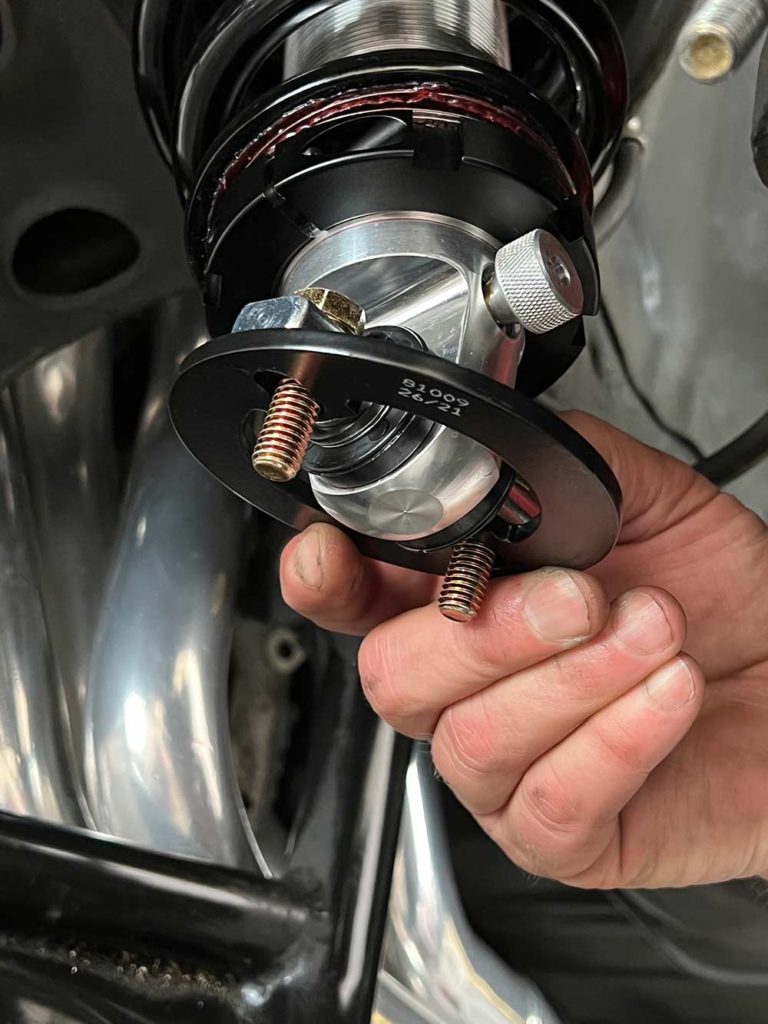
14) The earlier mentioned optional reinforcement plates fit to the coilover mount in this manner. They fit nicely into the A-arm spring pocket.
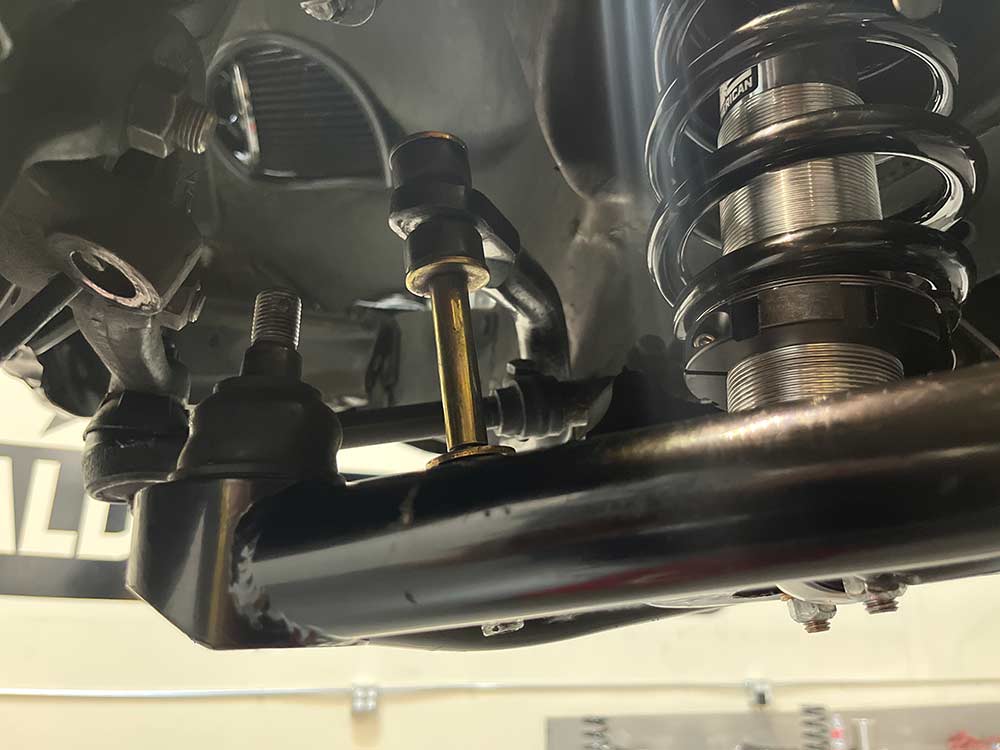
15) After loosely threading the bolts into the bottom of the shock mount, reassemble the sway bar end links. Note that the ball joint has not yet been re-assembled – this makes assembling and preloading the sway bar links that much easier.
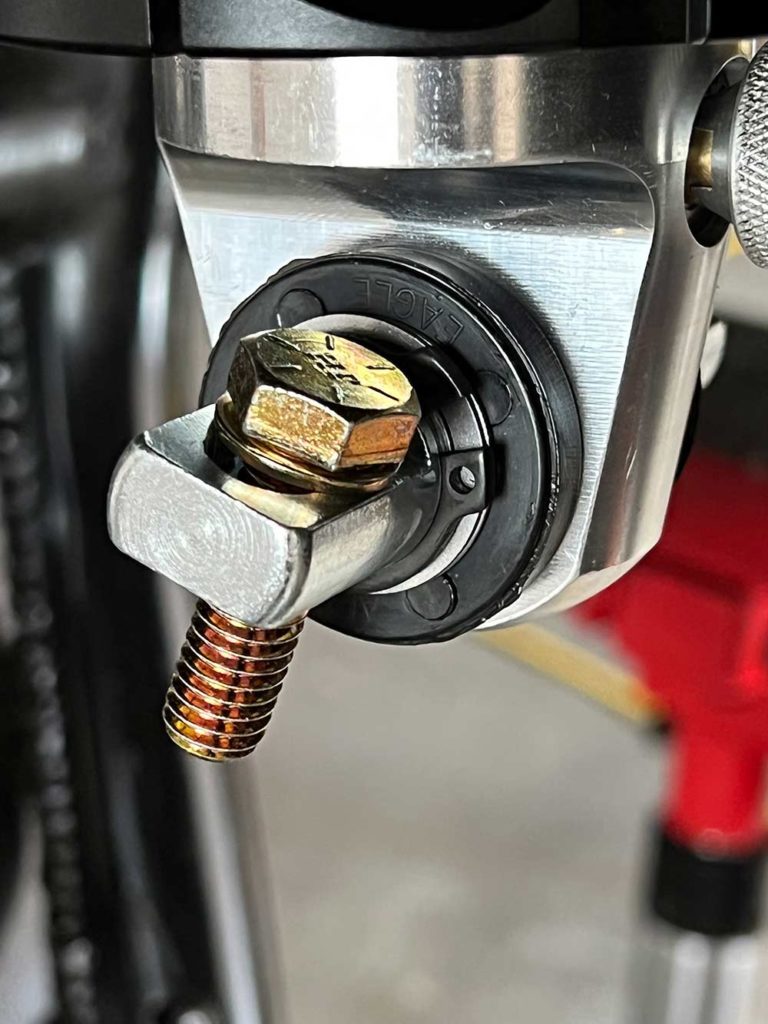
16) With the sway bar link attached, reconnect the ball joint and final torque the coilover mounting bolts on the bottom side of the lower A-arm to 35 ft. lbs. Don’t forget to make sure the ball joint torqued to factory spec and locked in place with a castle nut that is in good condition and a new, locking cotter pin.
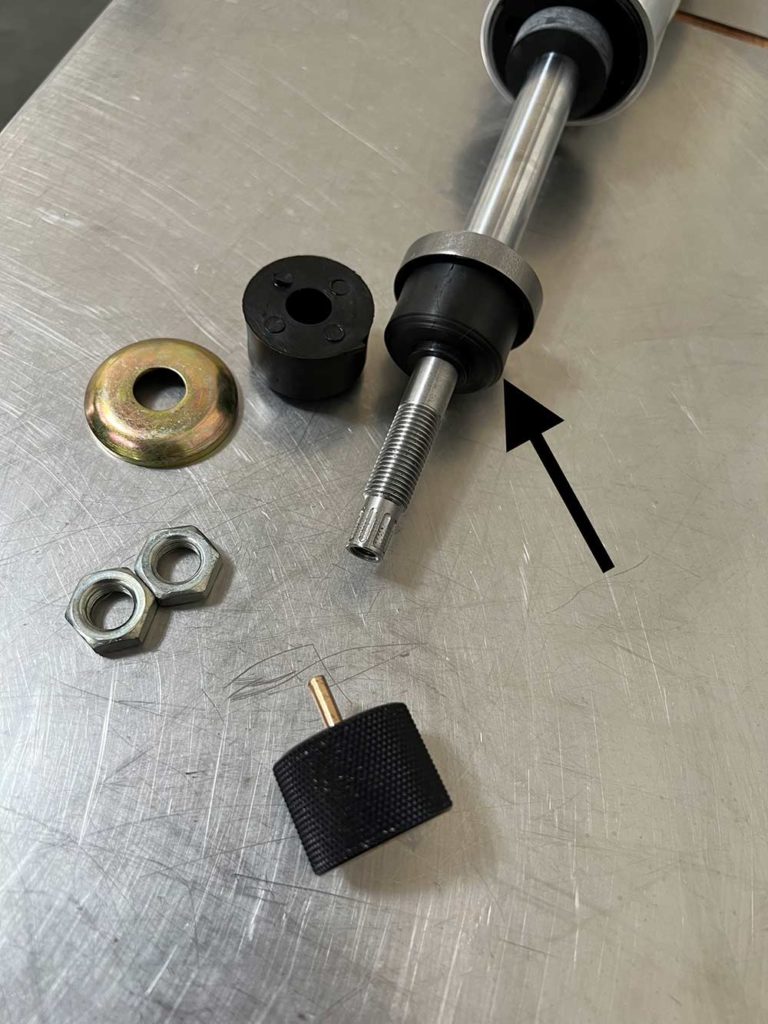
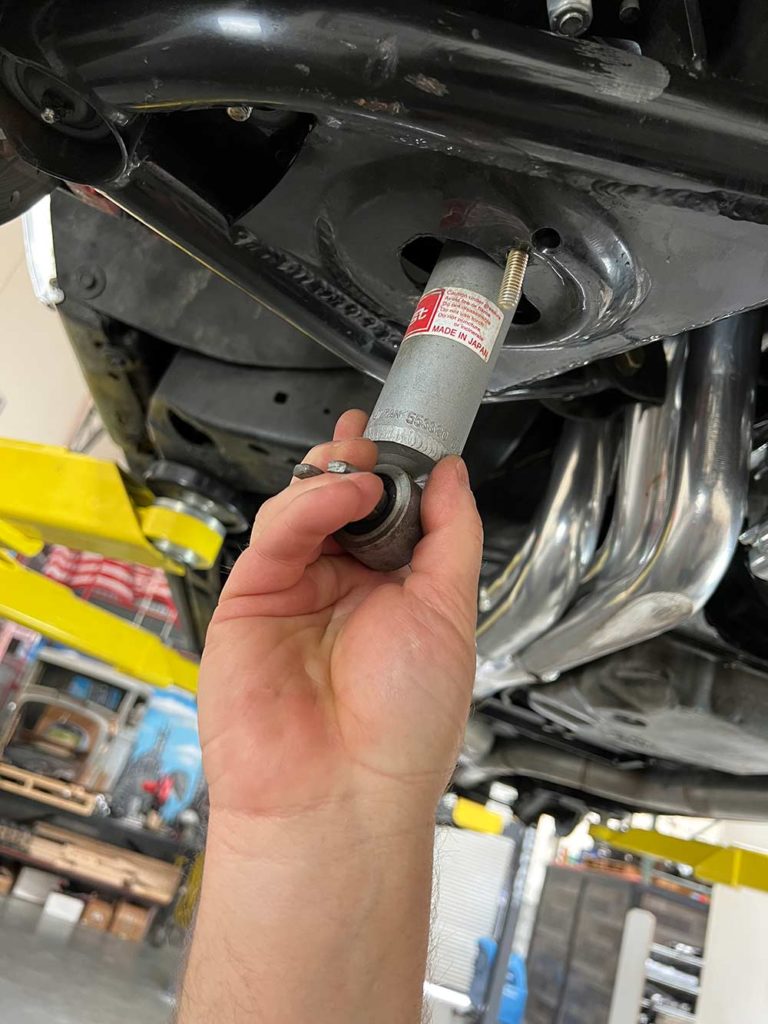
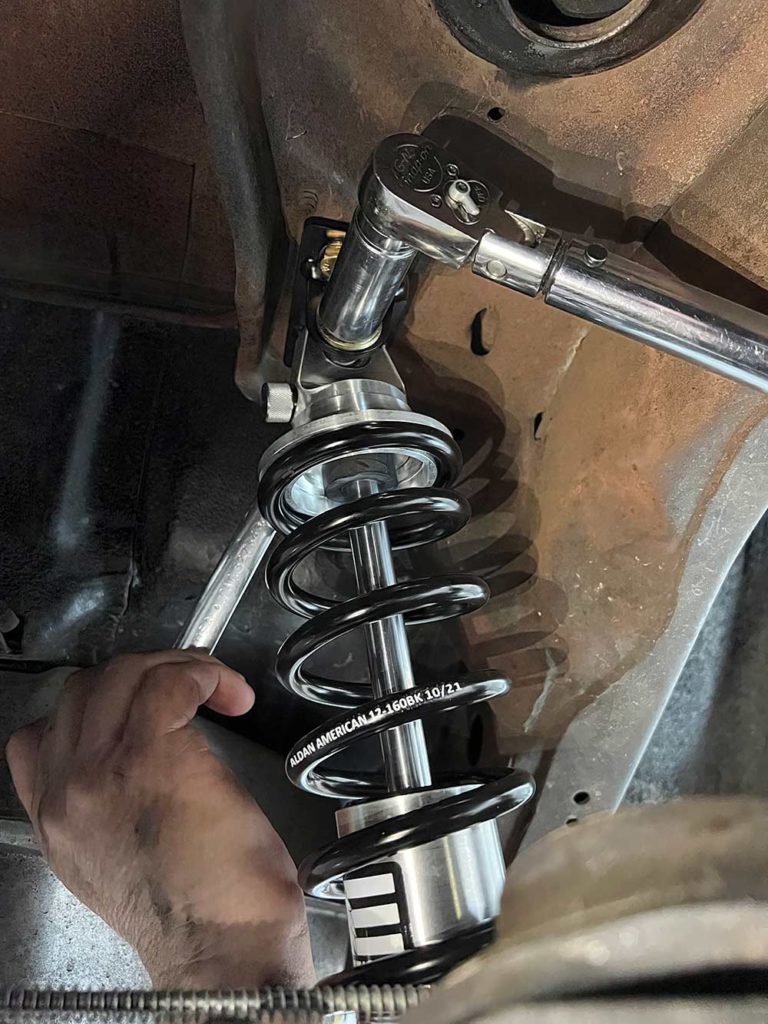
17) The Aldan American double adjustable coilover features these parts and the critical adjustment knob (bottom). This knob has to be unscrewed from shock before installation through the A-arm. Note that before we inserted the coilover, the lower rubber bushing was already in place on the rod (arrow).
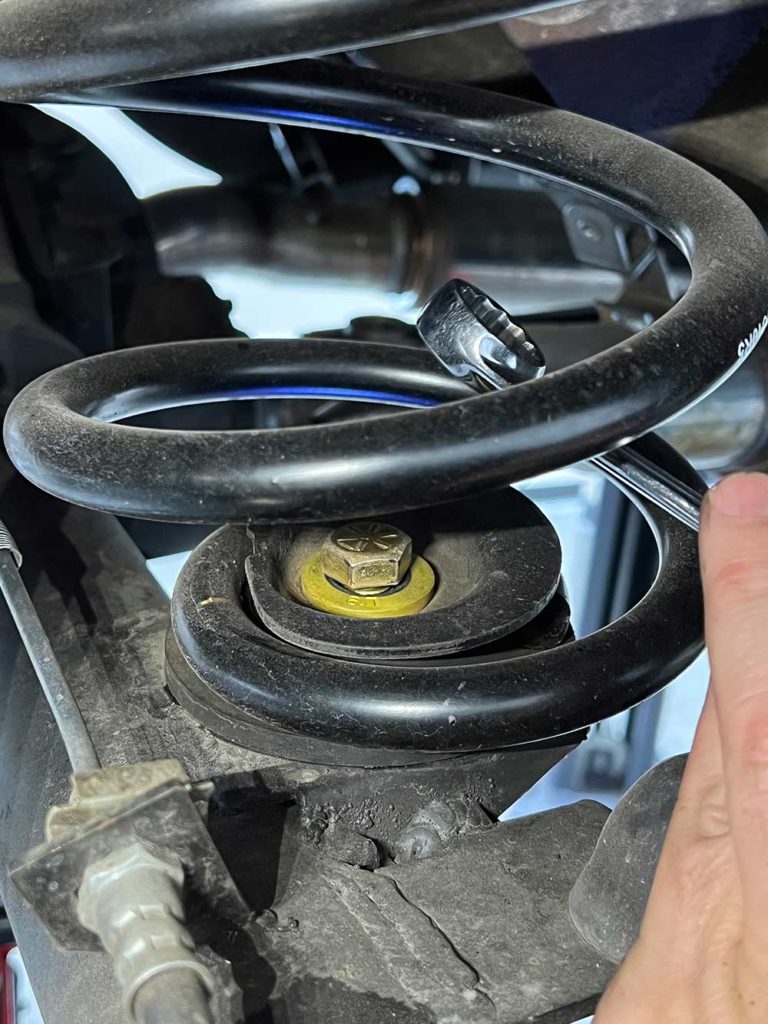
18) After locking the two jamb nuts to secure the coil over bushings, reinstall the Aldan American adjustment knob by screwing it back into the top of the coilover. Turn it clockwise until it stops. Do not overtighten.
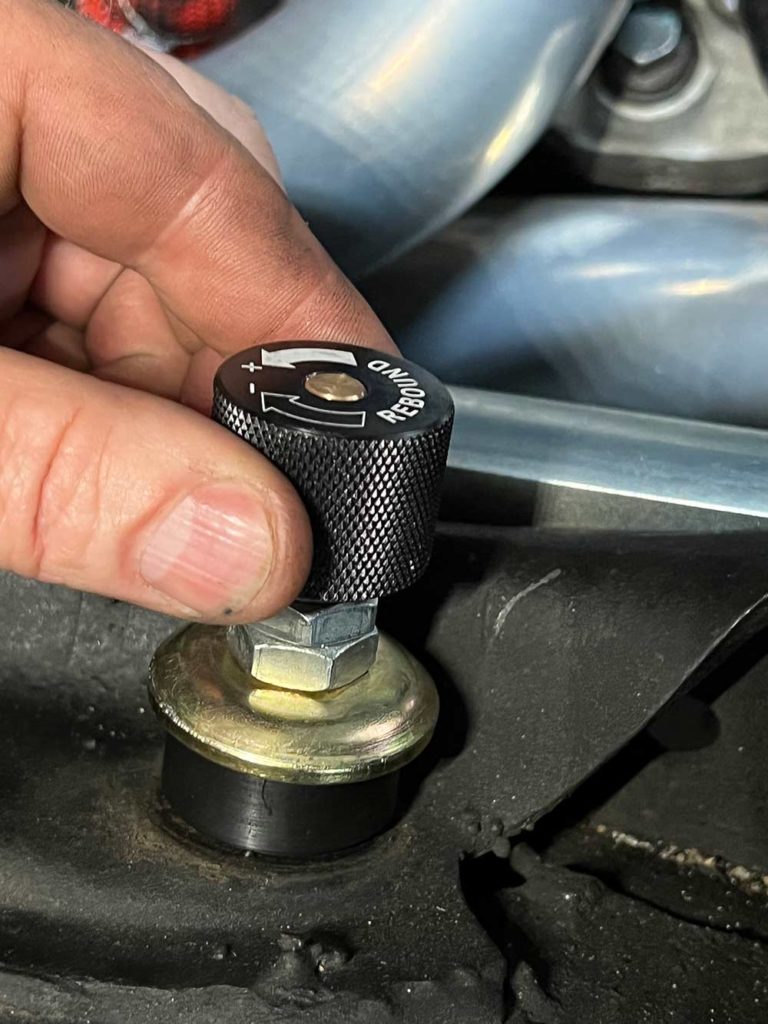
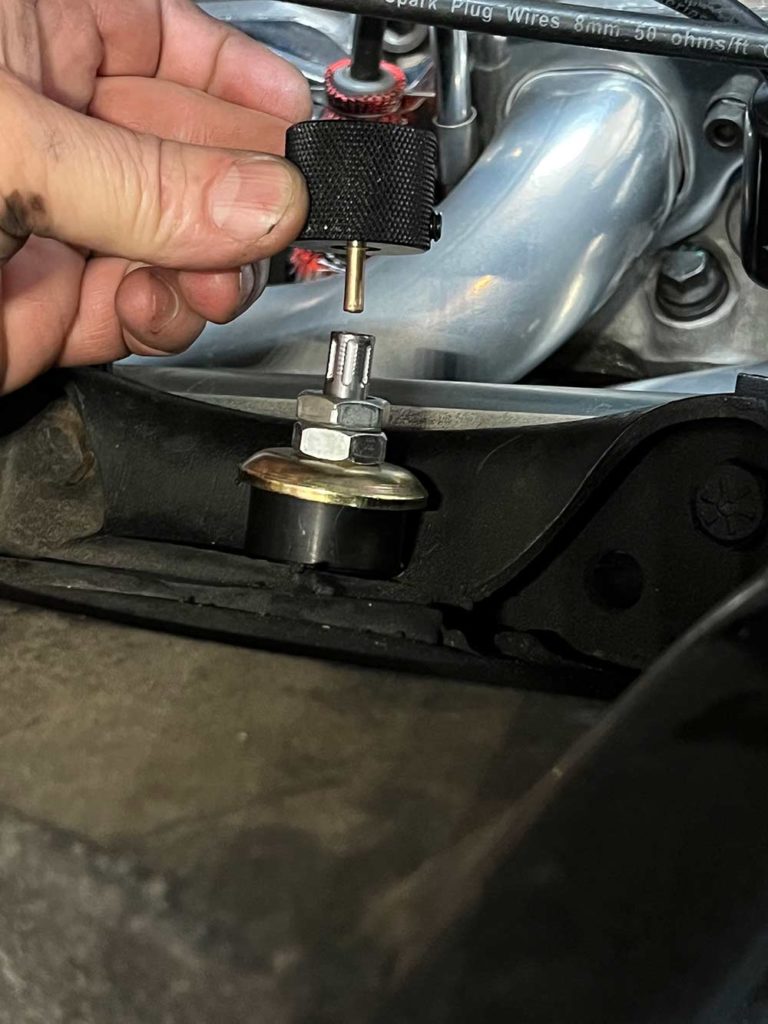
19) The upper rebound adjustment knob features six adjustment points. We recommend a beginning position of three clicks counter clockwise to begin. You will have to count clicks to find this location. On the bottom, start the compression knob at the #1 position – it is marked on the knob.
20) In the rear, begin by supporting the vehicle rearend and then unbolting the rear factory shock mount. A hammer is helpful in tapping the bolt out of the rearend trailing arm bushing.
21) On some A-body GM cars, there is a retainer that holds the spring in the pocket. This will need to be unbolted to release the spring.
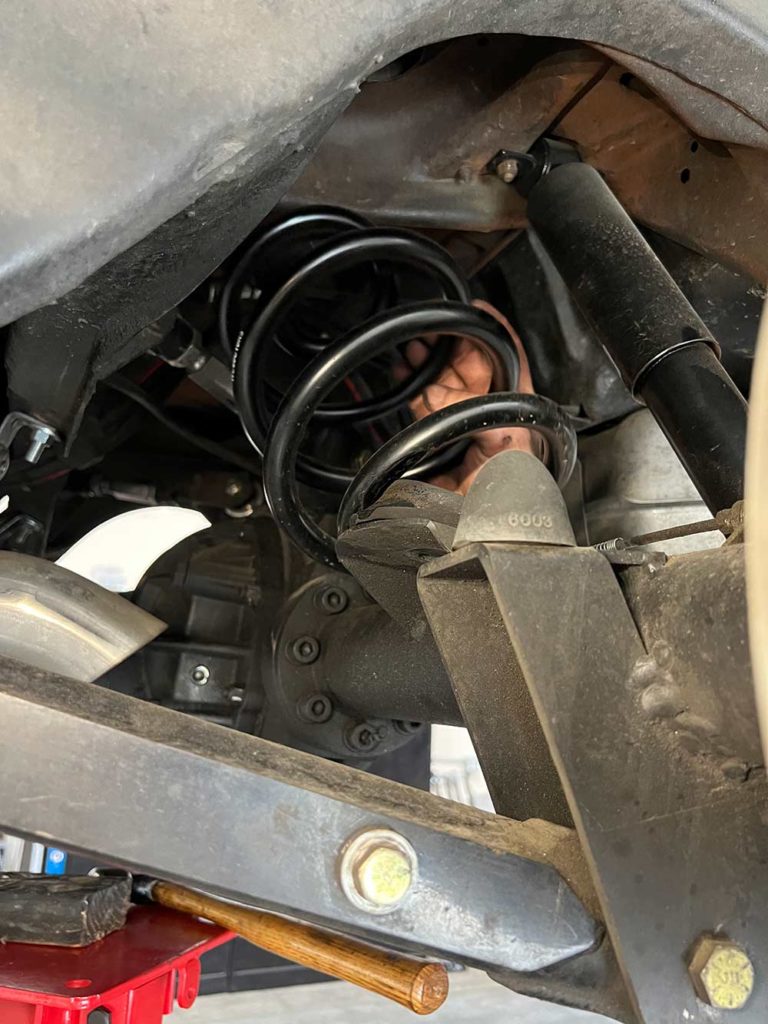
22) With the retainer out of the way, the spring should come out easily if you slightly lower the rear end (do not release it completely. If the spring does not come out, use a spring compressor to compress a few coils in the spring. If it does not come free, there is excess pressure here and you may need an expert to help. Be careful.
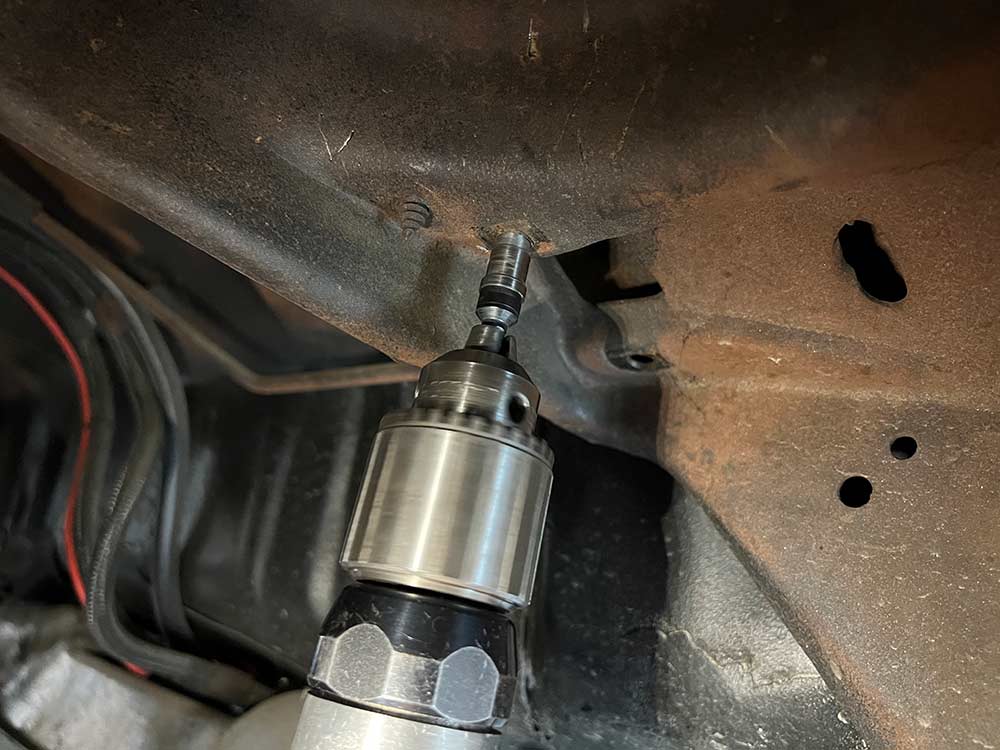
23) Remove the two bolts that hold the top of the factory shock in place and then open up the holes with a Unibit. These holes need to be opened to 3/8-inch in diameter to accept the new Aldan American hardware.
24) Next unbolt the rearend from the trailing arm. Again make sure that the rear end is supported safely.
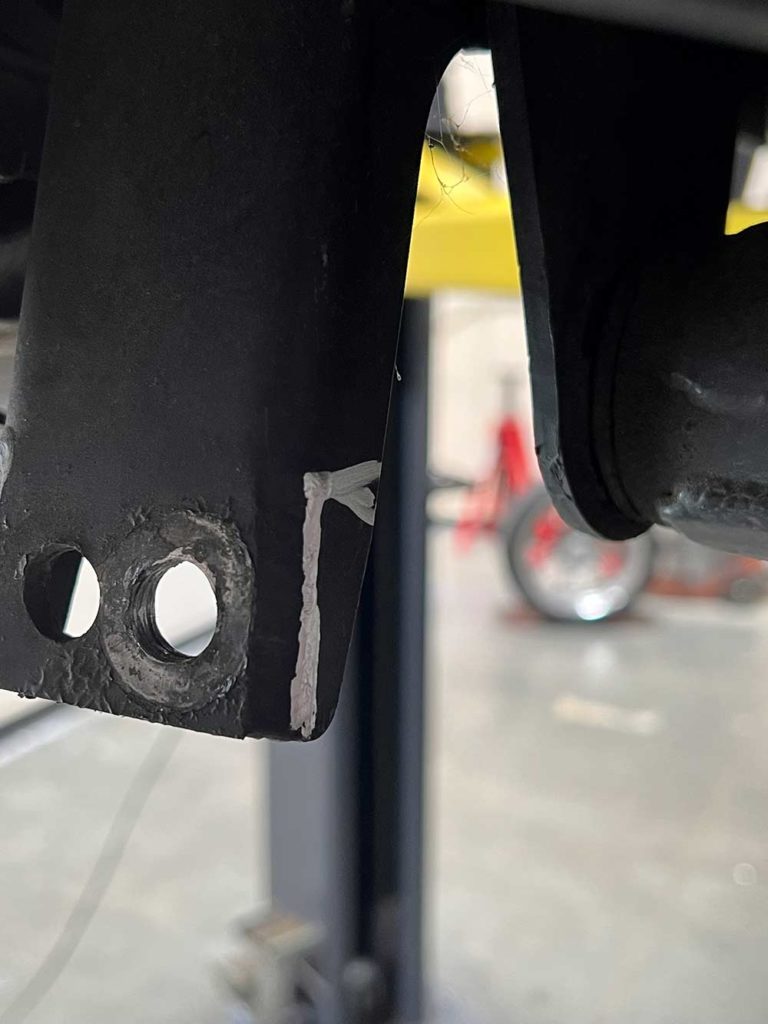
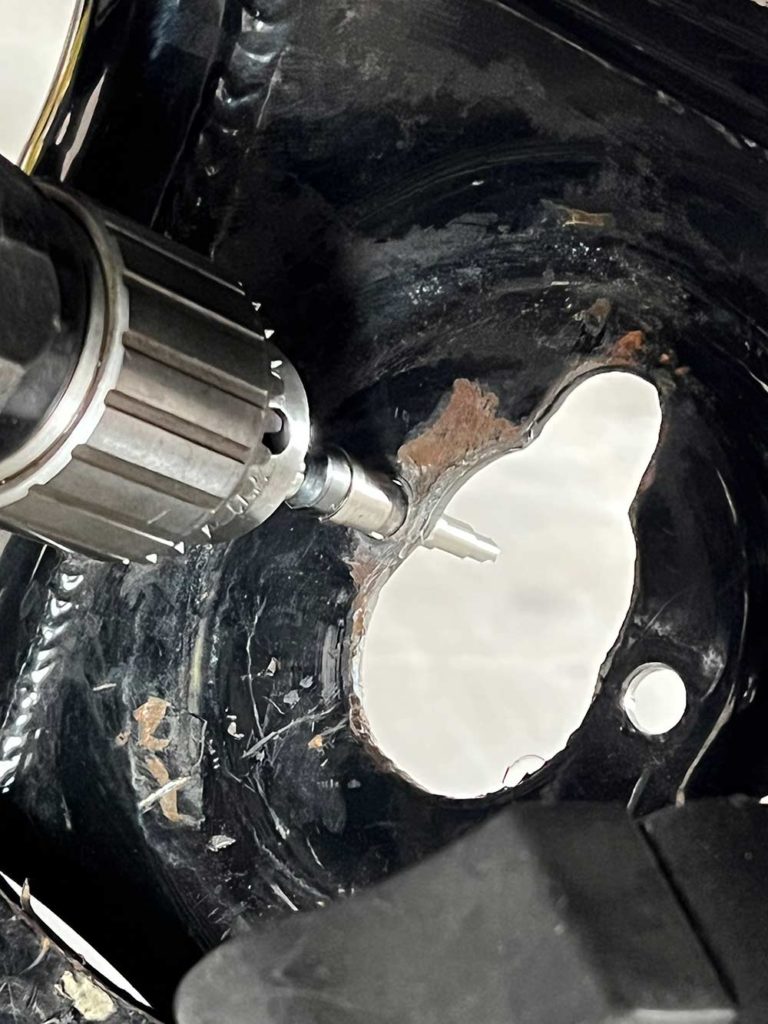
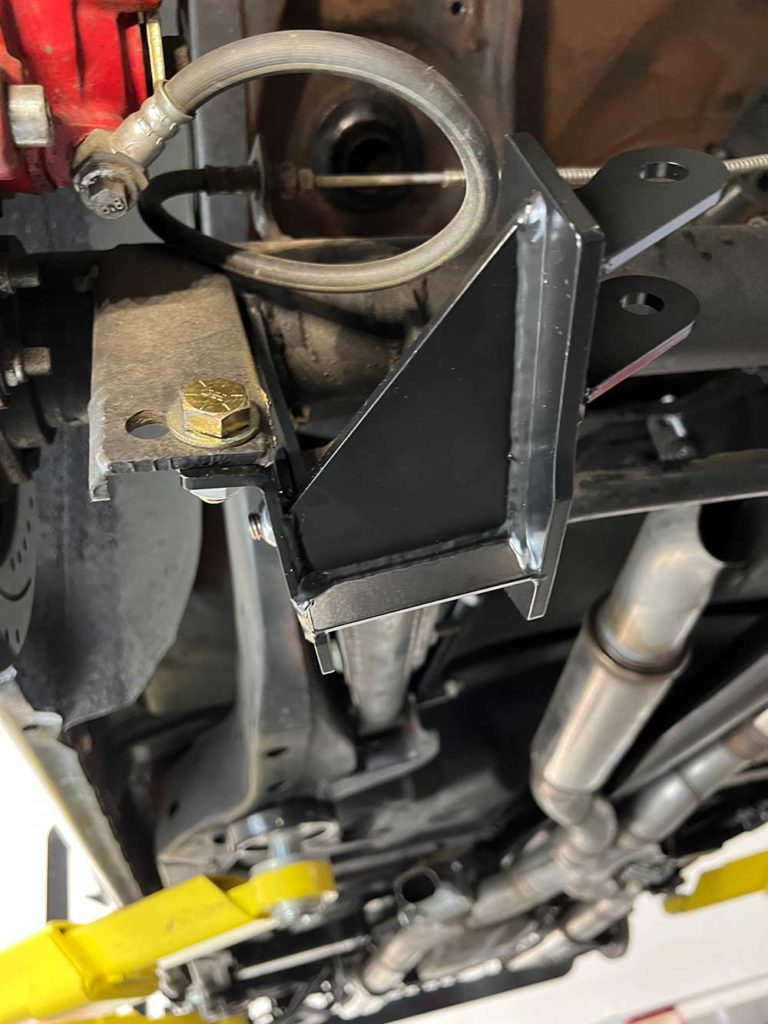
25) Installing this kit does not require any cutting or welding if the original factory parts are in place. On our case, the rearend of our Chevelle had been replaced with an aftermarket unit. To accept the Aldan American coilover shock bracket, we had to notch this flange. The silver marking shows the piece that was removed. Again, this is only because non-factory parts were encountered.
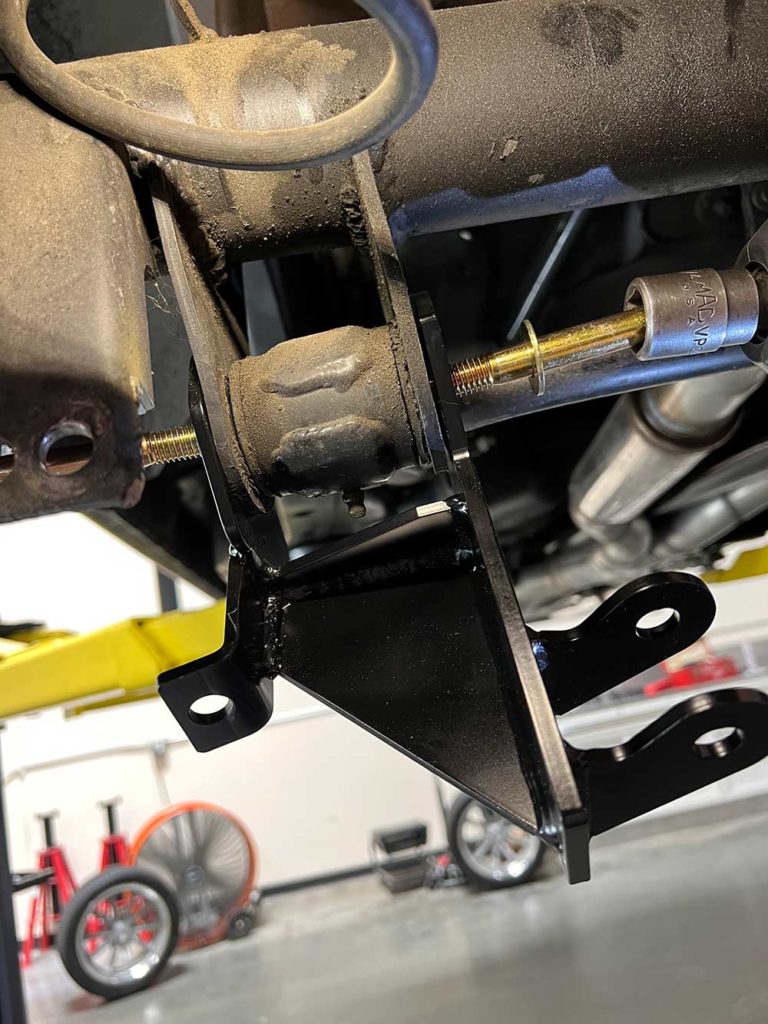
26) To install the Aldan American-supplied coilover mount, this bracket needs to be installed. To line it up with the bolt and bushing, we inserted a bolt in from the left while pushing the main bolt in from the right. Only one bolt is needed in the final installation.
27) When the lower coilover mount bracket is fully installed, it will look like this. These bolts are torqued to 75 ft. lbs.
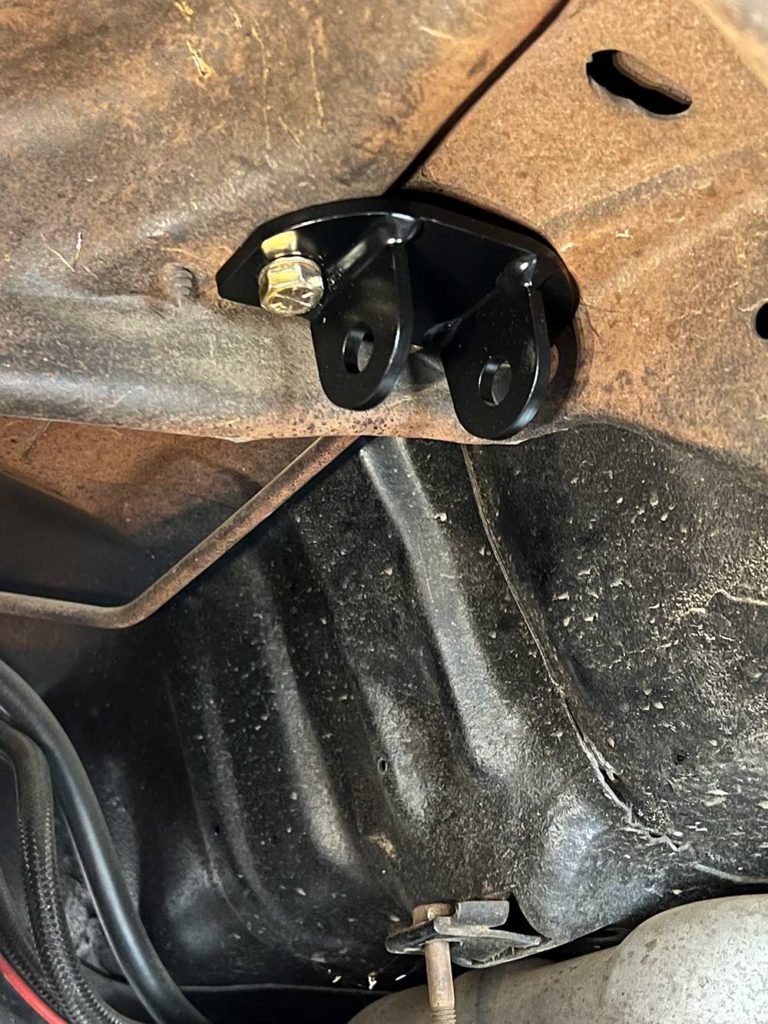
28) Aldan American-supplies this upper coilover mount bracket that fits in the now enlarged factory shock mount holes. Note that the bracket has a straight side and a curved side – the curved side faces out.
29) The coilover bolts up to the upper shock mount with a single bolt that is torqued to 75 ft. lbs. Note that the rebound knob is facing out, but can face inward if the owner wishes. We think it’s easier to reach in this position.
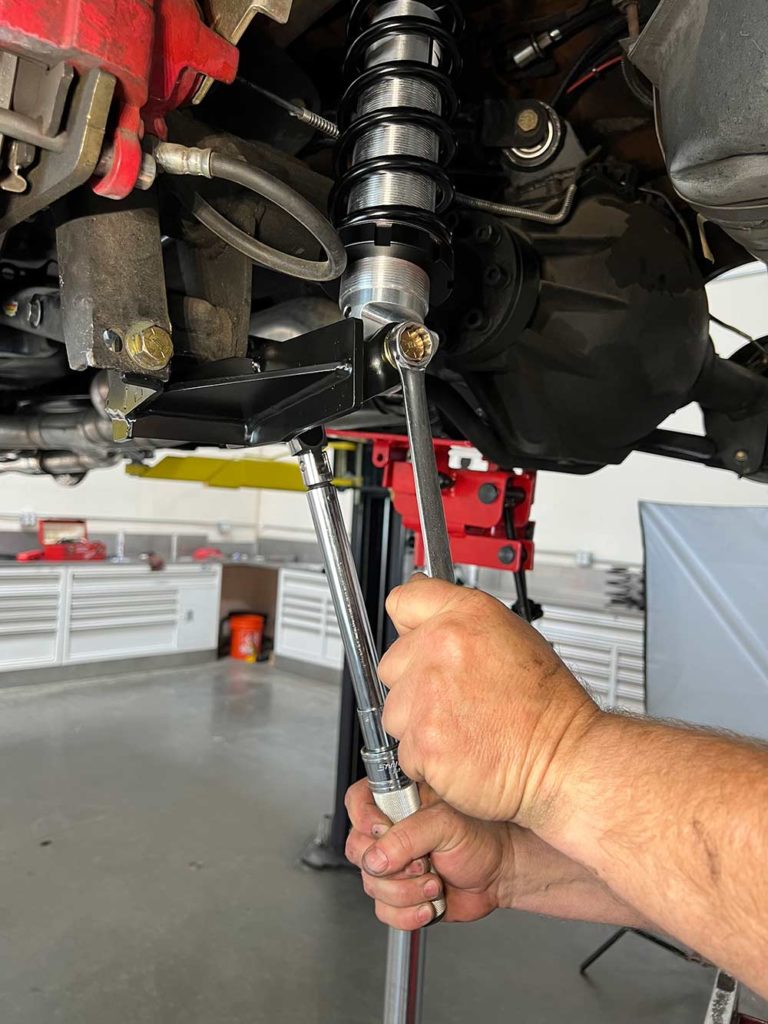
30) The lower coilover mount looks like this when finished. This bolt is also torqued to 75 ft. lbs. The adjustment knob faces backwards for ease of access.
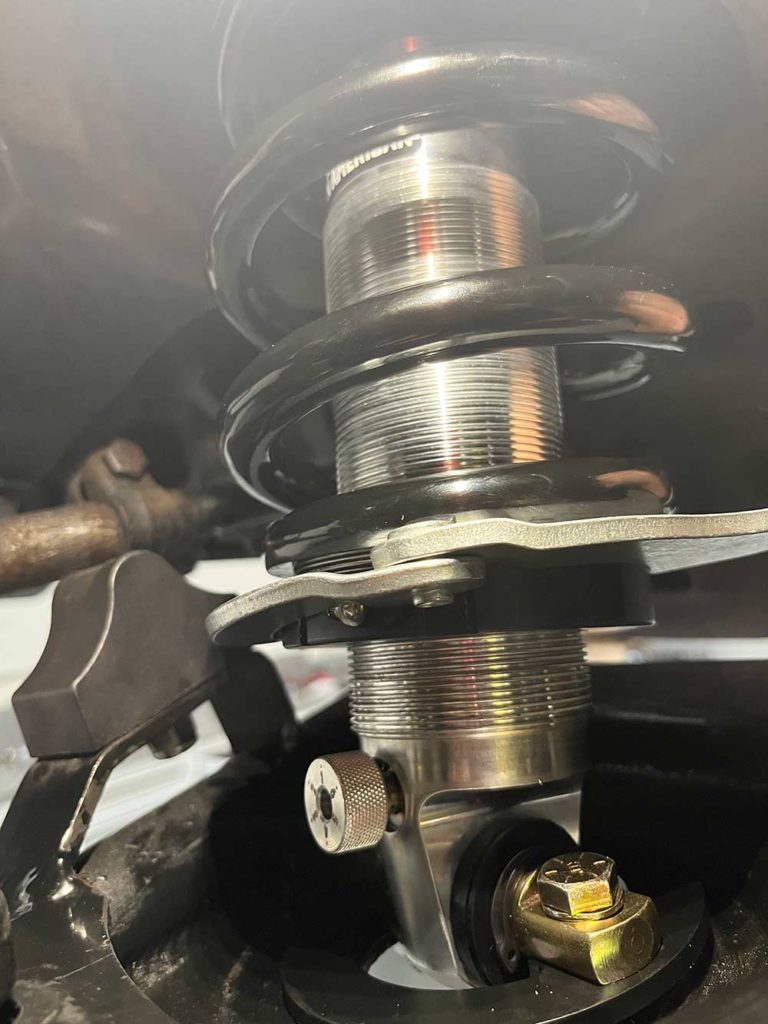
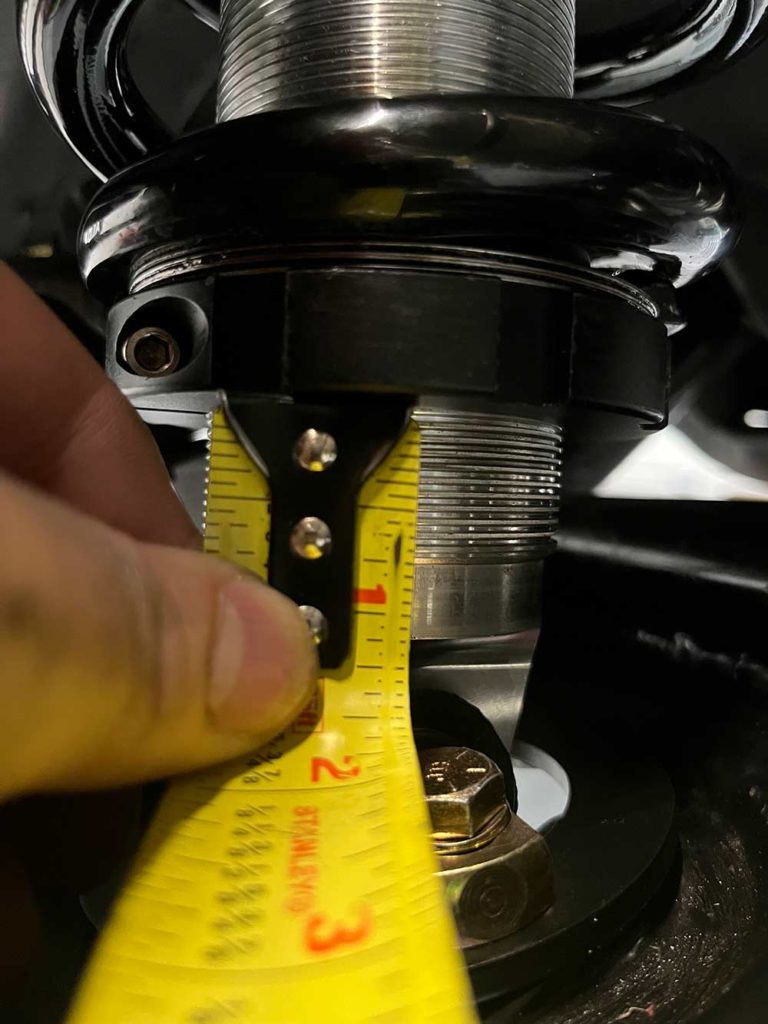
31) The supplied Aldan American adjustment wrench makes it easy to change the ride height of the chassis in just a few minutes. Our builder likes to slightly bend the wrench handle to give him more clearance around the spring and A-arms.
32) As you can see, there is a fair amount of adjustment possible with the Aldan American coilover suspension system. The limitation here is your tire/wheel clearance as you can damage lots of parts and even lose control of the vehicle if the tires contact the fenderwells hard enough.
33) The final ride height of the vehicle was determined after some experimentation driving over various dips. Because the double adjustable coilovers offer more latitude for tuning, we took the time to test in various setting, turning the rebound and compression knobs and retesting to determine the best settings. Note that the best setting for ride quality will probably not be the best for high performance cornering. But here’s the best part: you can tune your shocks in a matter of minutes to your requirements – street or race. High tech indeed!