Fast Forward: Pushing our Chevy C10 into the new century with Aldan American Coilovers, POL suspension parts and front disc brakes
By Cam Benty
Photos by Cam Benty and Gary Nelson

When the first Chevy C10 pickups hit the road back in 1960, they offered a great way to hall hay – and maybe some passengers. Equipped with GM’s classic A-arm suspension, tube shocks and four-wheel drum brakes, they bore little resemblance to the performance suspensions offered on their cars. Now, thanks to parts offered by Aldan American, Performance Online and others, these trucks can carry their loads on high as they take on not only daily chores but an autocross or two should their driver’s feel the need.
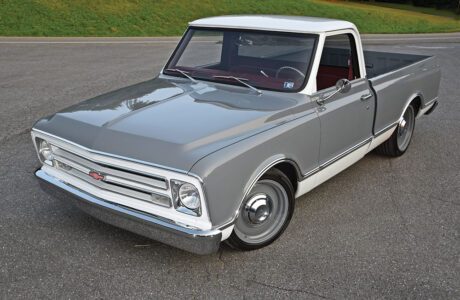
Our 1969 Chevy C10 was about as original as they come with worn out suspension parts including spent ball joints, tie rod ends and the rest. The timing for this overhaul was good since the front drum brakes were at the end of their life along with pretty much everything else inside the wheelwell. Best of all, the parts shown with this installation not only fit first generation C10’s but also the next generations meaning the things you see here (while some part numbers will be different – check the website or call for details) will work on any C10 from 1963 through to 1987!
For the record, the first Chevy C10 built from 1960-62 had torsion bar front suspensions and unfortunately this Aldan American kit will not work with that configuration. The 1963-1987 C10’s all use a coil spring suspensions, the perfect set up for this Aldan American suspension upgrade kit. Of note is that Aldan American makes three different kits (part numbers) for these trucks; one for 1963-70 model trucks, one for 1971-2 Chevy C10’s and finally one for the 1973-87 C10 models. The big difference with the 1973 and newer truck suspension is the spindle design and larger ball joint sizing. A common upgrade with these trucks is to use the 1973 and newer spindle which will allow for the installation of the Chevy C10 disc brake system. C10 trucks before 1973 used drum brakes all around.
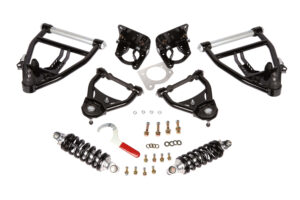
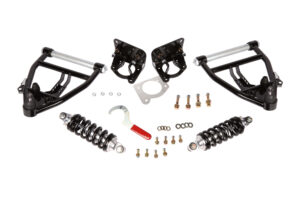
To the rescue come the folks at Aldan American with their double coilover (single adjustable system is also available) suspension system in lock step with Performance Online (POL) kit. This new kit, sold by Aldan American, includes new tubular A-arms, tie rods and special bracketing to allow direct mounting of the Aldan American coilovers (of note here is that the POL tubular A-arms will not work with Chevy C10’s equipped with drum brakes. If you have drum brakes you will either have to convert to disc brake brakes or use the factory A-arms). For this installation a 4-inch hole saw (purchased separately) is required along with an angle drive to cut through the crossmember. Other than that, this is a true bolt up operation.
The Aldan American coilovers are a huge technological step forward in adjustable suspension design. With either single or double adjustable internal valving, these nitrogen charged shocks allow for 11 points of rebound and/or six points of compression damping control. Fully rebuildable for long life, the shock bodies are built of 6061 billet aluminum surrounded by cold-wound, high tensile strength chrome silicon steel springs. An innovation only found with Aldan American, the lower spring mounts can be adjusted but turning the lower spring mount collar with the Aldan American adjustment wrench. Aldan American coilovers can be adjusted to raise or lower vehicle ride height a full two inches.
As with any suspension change, it is critical to realign your suspension to ensure you have proper tire wear and steering control.
Aldan American recommends these specs.
Camber:
- 1/8 to -1/4-degree for street driving
- 1/4 to -1 degree for track use depending on conditions and driving style
Caster:
- +4.5-+8 degrees for street use with 1/2 degree additional stagger to passenger/right side
- For Track use, determine best settings based on driving style without caster without stagger
Toe:
- 1/8-inch total tow in
The Aldan American coilover kit includes the POL suspension components used here. With this install, we added the optional drop spindle to lower the overall ride height of the truck, a six-lug bolt pattern rotor (to match the wheels already on the truck) and disc brakes. A five-lug rotor is also available. Even the new brake lines are included. Simply bolt up the POL kit, bleed the brakes, align the suspension and go. In the end, this Chevy C10 front suspension kits dramatically improved ride, tire to ground traction and also allowed for a high level of adjustability that was never before possible on any truck of this vintage.
Let’s deep dive into the Chevy C10 Install:
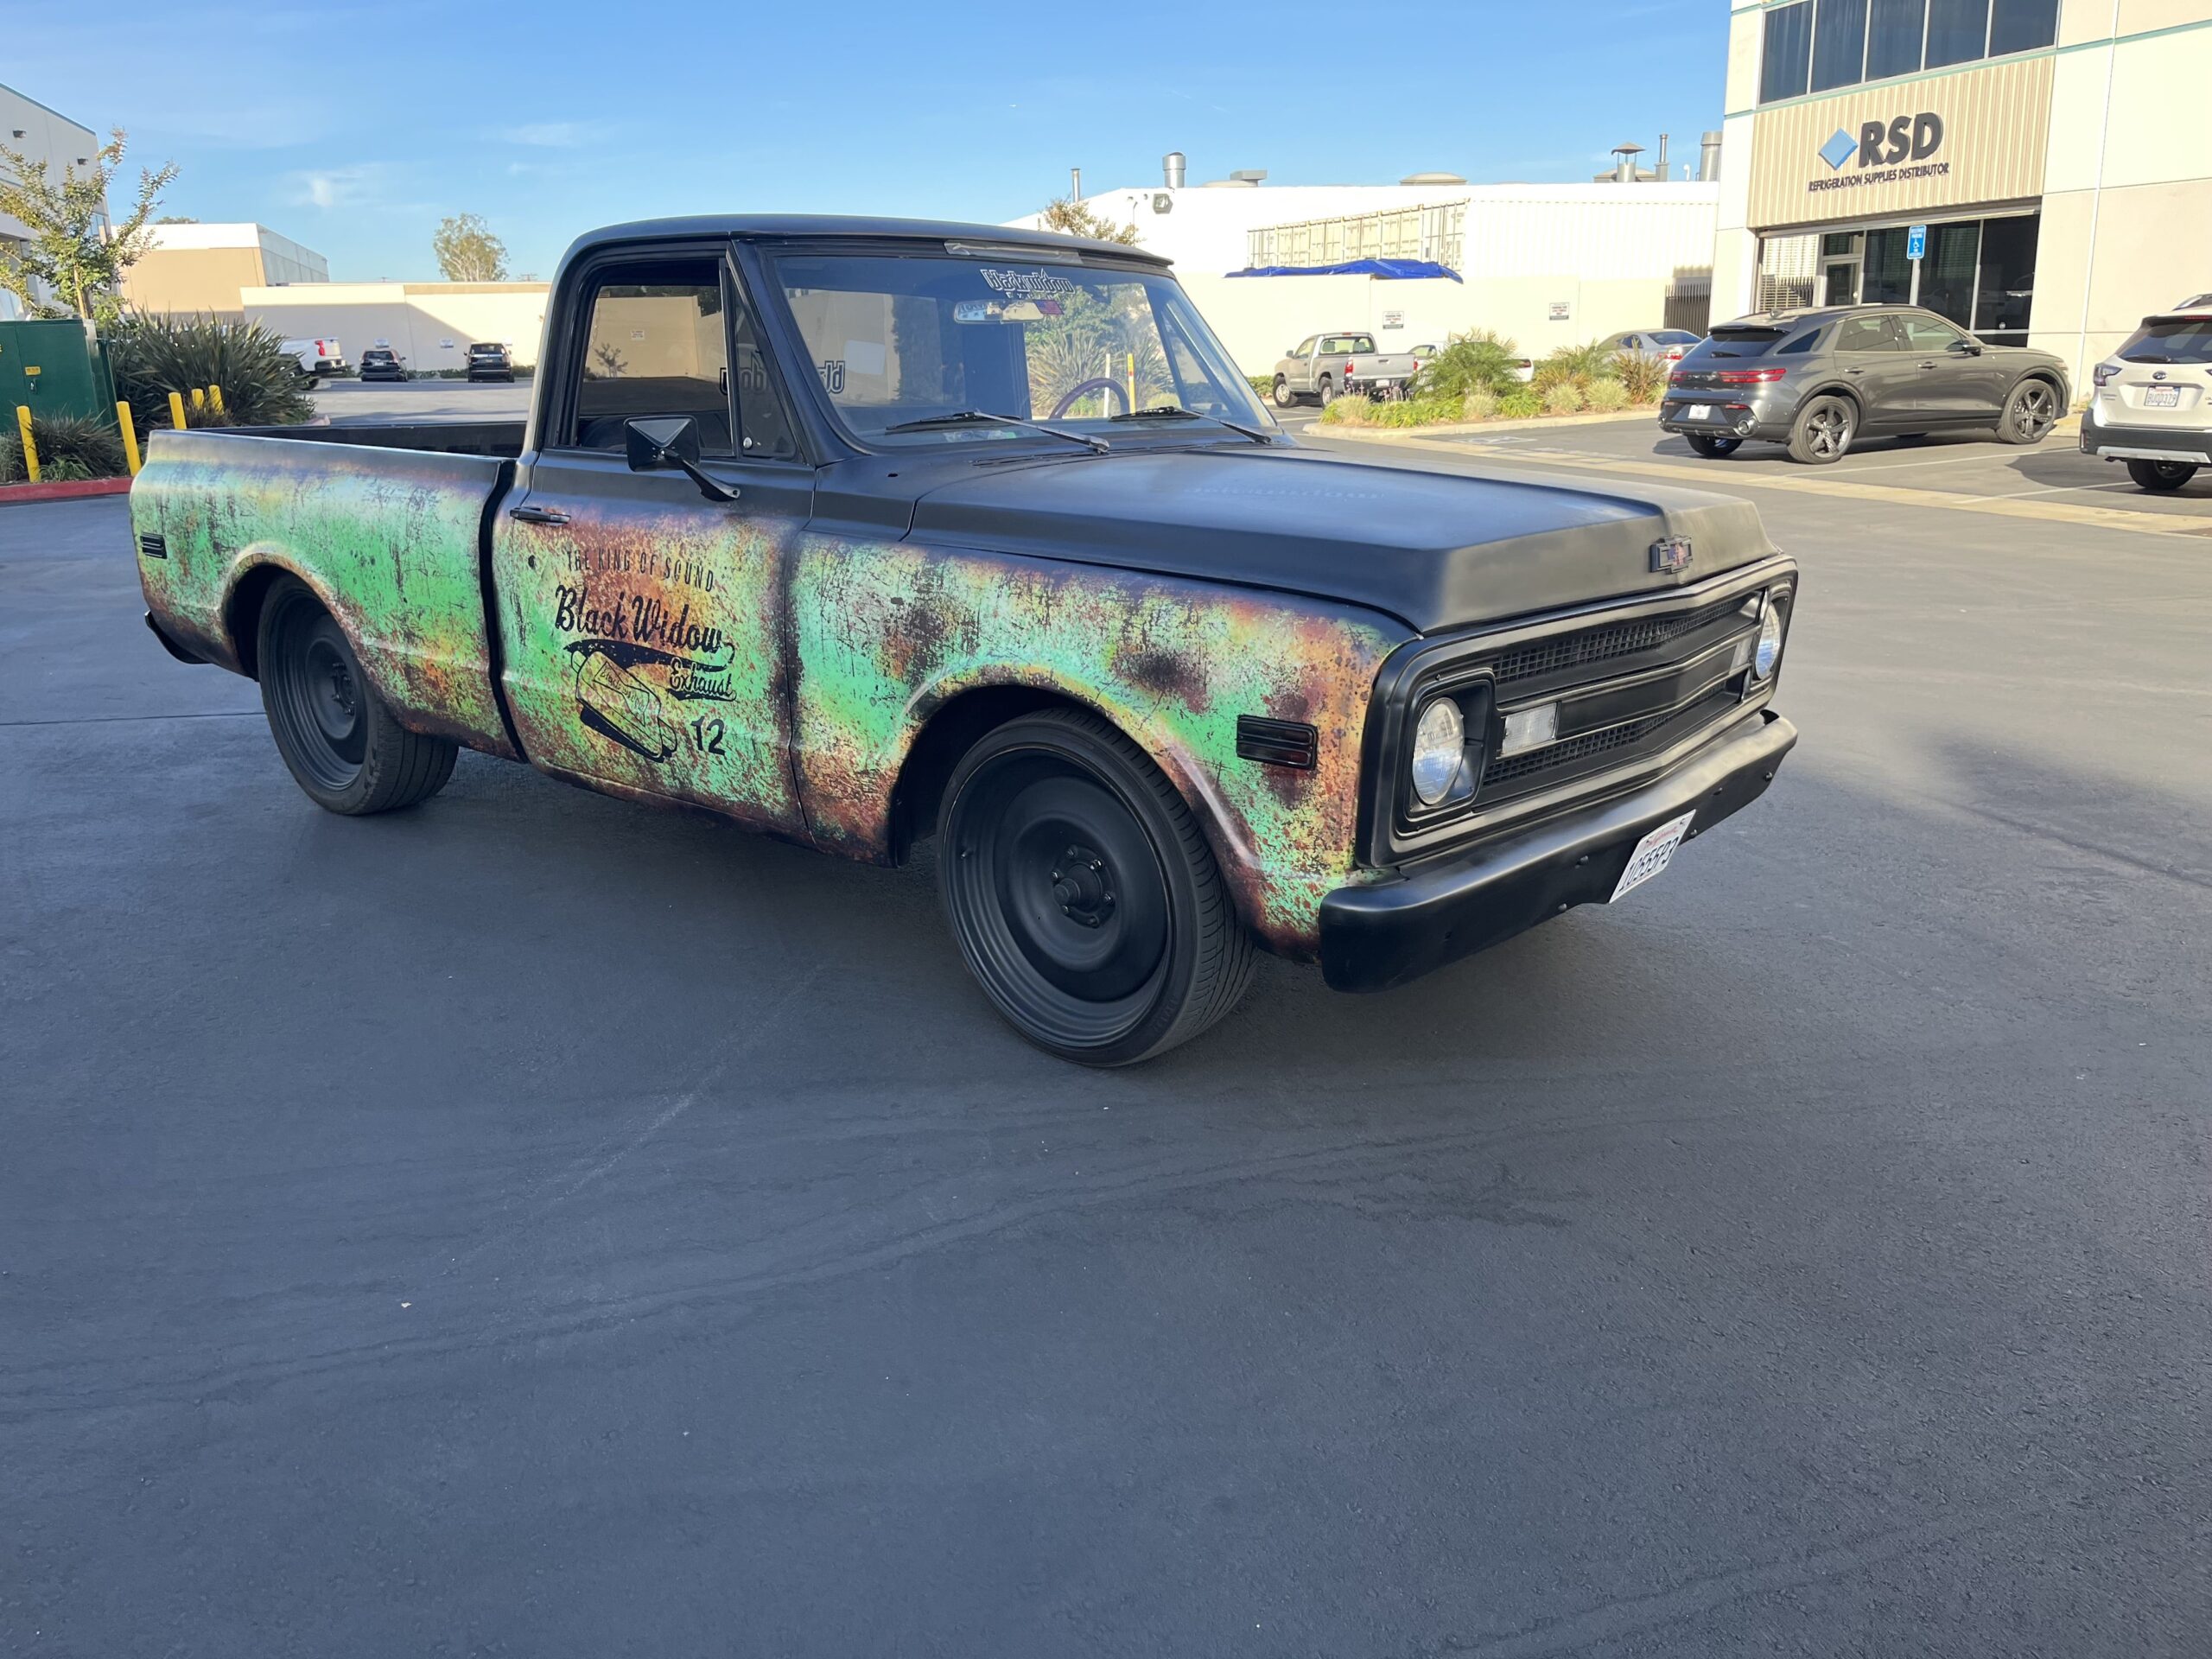

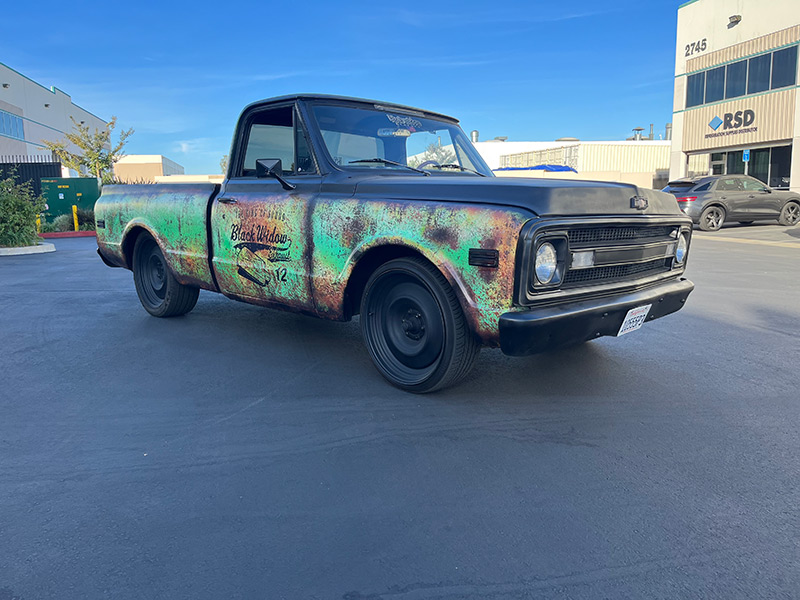
While our 1969 Chevy C10 pick up may fool you into believing its a worn out truck, the cool exterior body wrap delivers a great look on an old form. That was not the case with the suspension however, which was in need of a total redo.
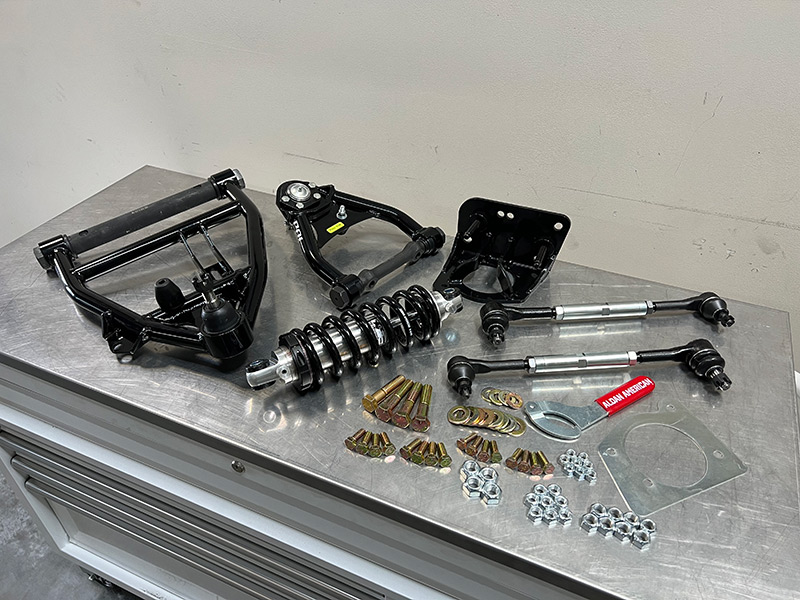
To make our C10 truly better than new, we installed these Aldan American coilovers and an assortment of parts from Performance Online including tubular A-arms, tie rod ends, coilover conversion bracket and all the hardware required for installation.
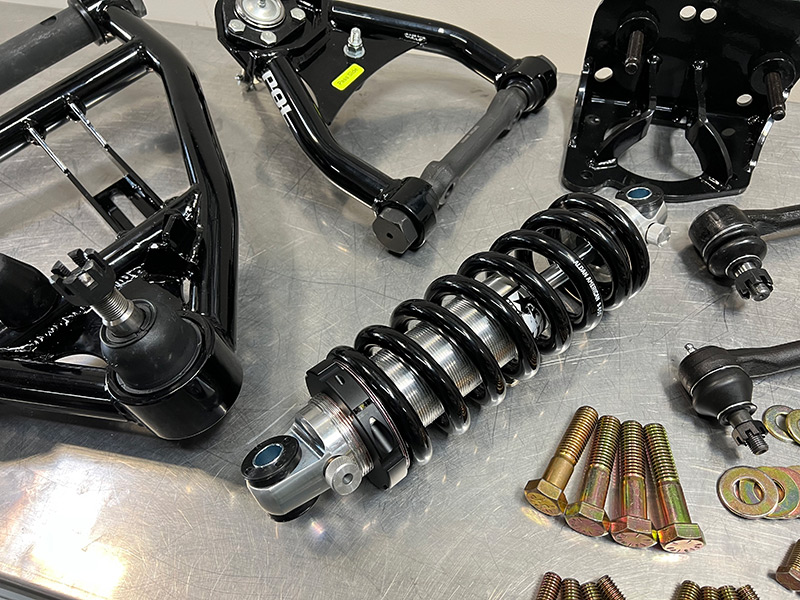
At the heart of the system is the Aldan American coilover that replaces both the center coil spring and shock absorber on our original suspension. This Aldan American coilover features adjustments for both rebound (top knob) and compression (lower knob) allowing us to tune the ride – generally a firm setting for performance and soft for highway driving.
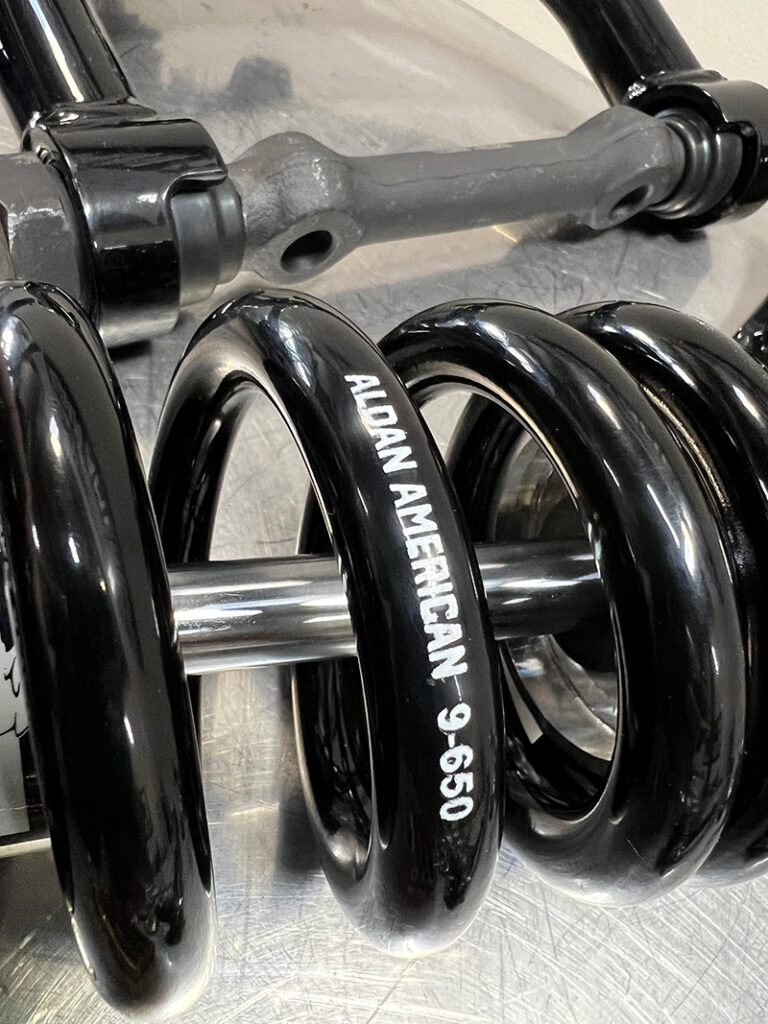
Aldan American coilovers feature springs that are rated to the application, powertrain and intended driving style. This spring features 9-inches of free length and is rated at 650 pounds per inch compression. Aldan American offers stiffer springs for all out performance or heavier engine combinations.
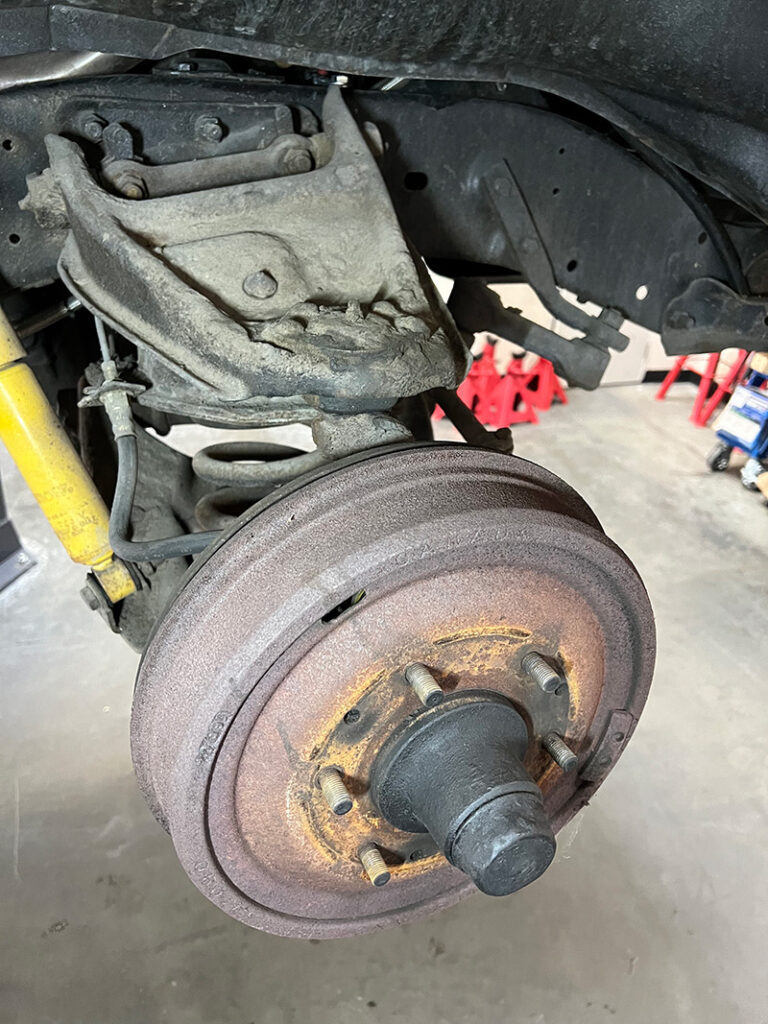
Just as it left the production line back in 1969, our Chevrolet C10 was little changed over the years even sporting the front drum brakes that were standard equipment on these vehicles. Time for an upgrade!
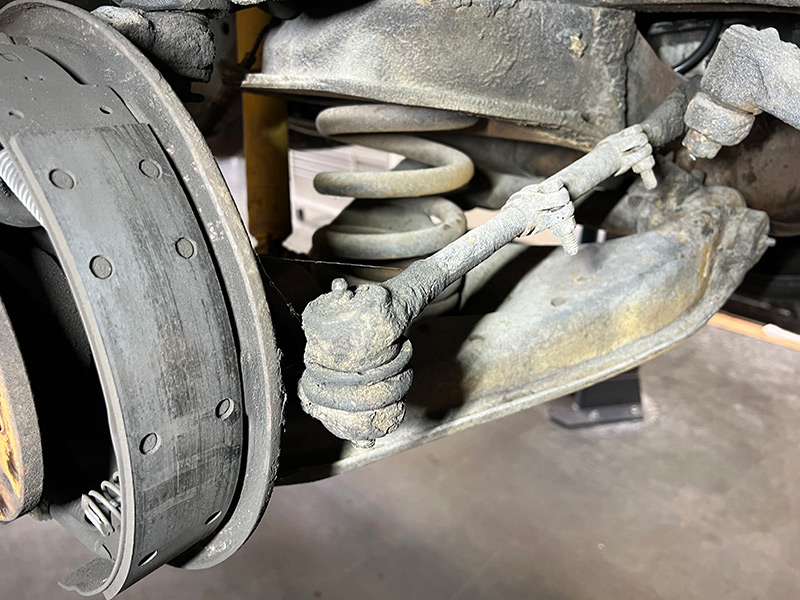
You can usually save yourself time and effort if you steam clean the underside of your vehicle before diving in on a project such as this. With the grease and dirt removed, you can better assess the condition of things. First to go were these well worn tie rods.
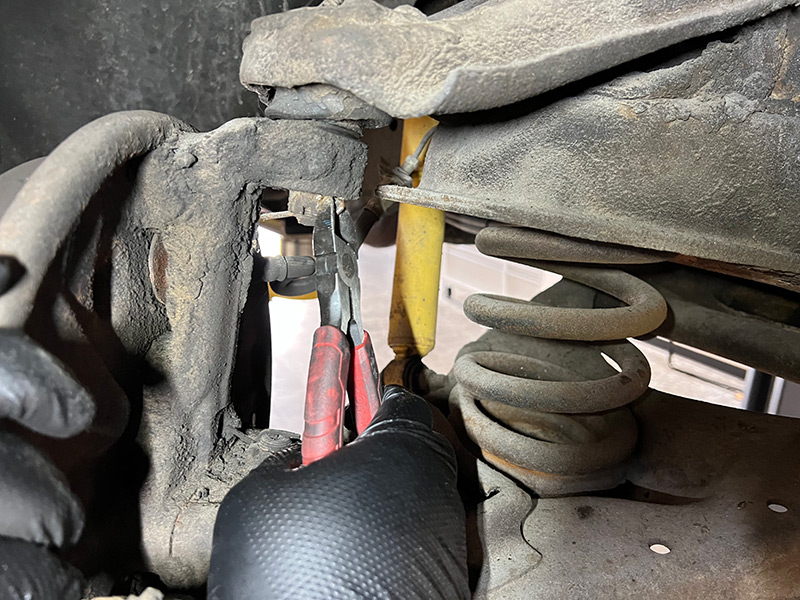
We removed the cotter pins from the castle nuts that hold the spindle to the ball joints, both top and bottom. Be careful when removing the spindle as it will release the coil spring. Always have a jack located beneath the lower A-arm to control the release of spring pressure. None of these parts will be reused with our upgrade.
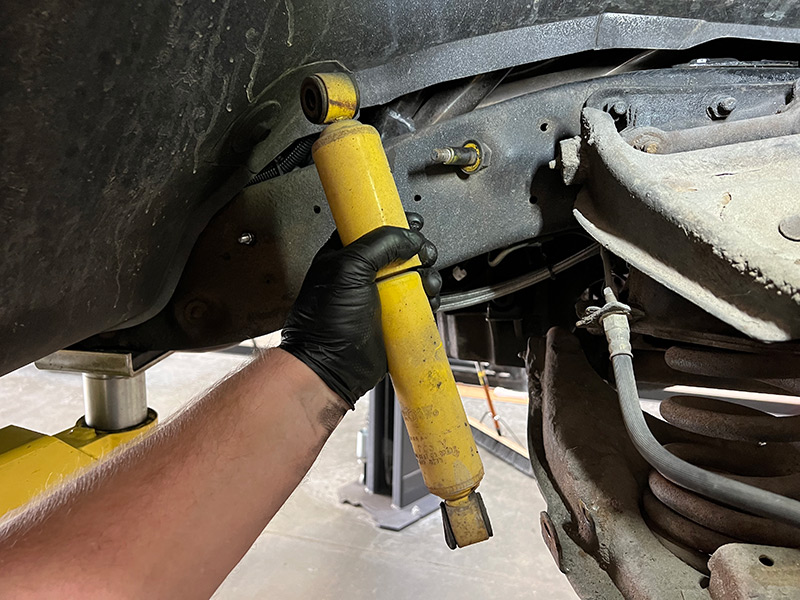
Remove the current shock by unbolting the fasteners at the top and the bottom knowing that there will be some hydraulic pressure in the tube even with the spindle released. Also remove the upper shock mount, it will no longer be of service.

Carefully lower the lower A-arm with the jack. If the spring is under high pressure, use a spring compressor to keep it under control. This can be a dangerous operation so if you are concerned, enlist the help of a professional mechanic.
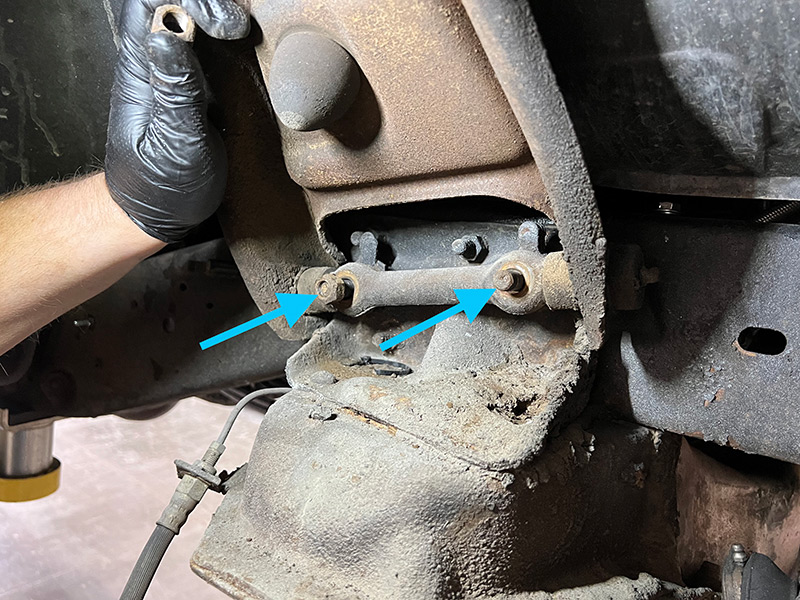
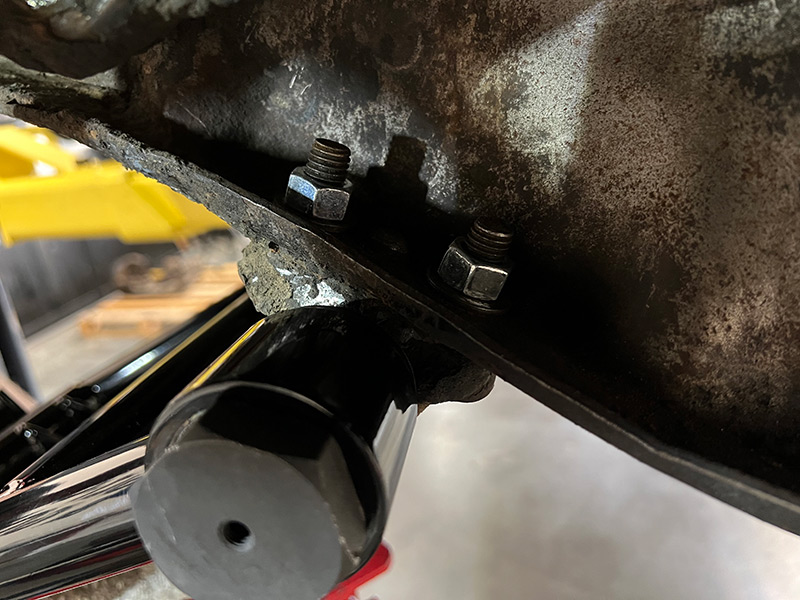
To unbolt the upper A-arm, remove the two nuts (arrows) that hold it to the studs on the frame. Penetrating oil can be helpful in releasing bolts that have become corroded. In extreme situations, a cutting torch could be required.
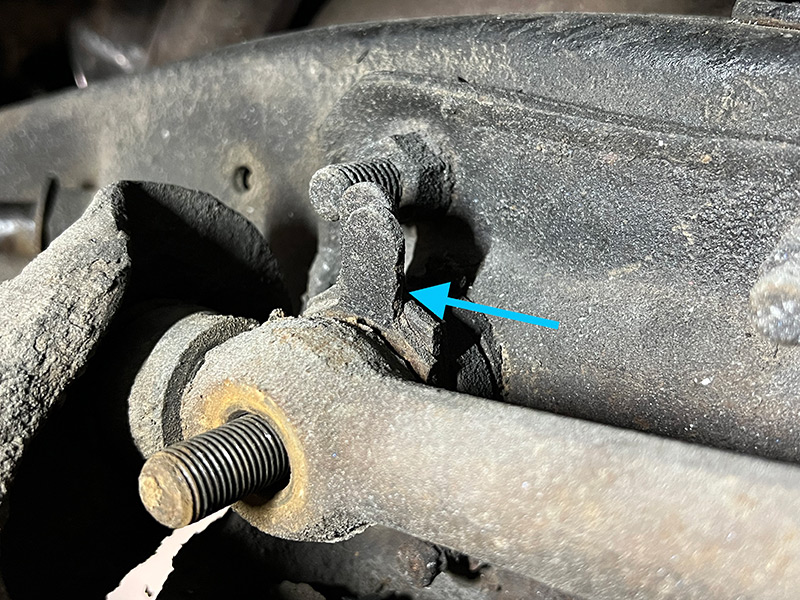
These shims (arrow) are critical to the alignment of the front end. Take note of the number of shims used at the two mounting points as we will replace them in the same configuration when the new parts go in. This will be used as starting point for our alignment before we take it to an alignment shop. Always have a professional alignment shop set all front-end specs after any suspension component change or you will not be achieving all of the benefits possible from these quality components.
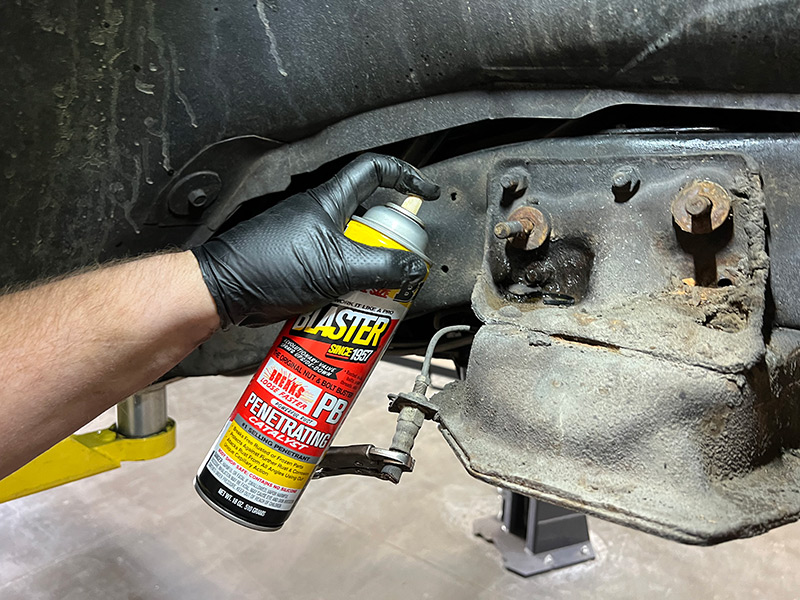
To remove the upper suspension bracket, you will definitely need penetrating oil to unlock these nuts and bolts. Here we can just unbolt these bolts as will be shown in subsequent photos.
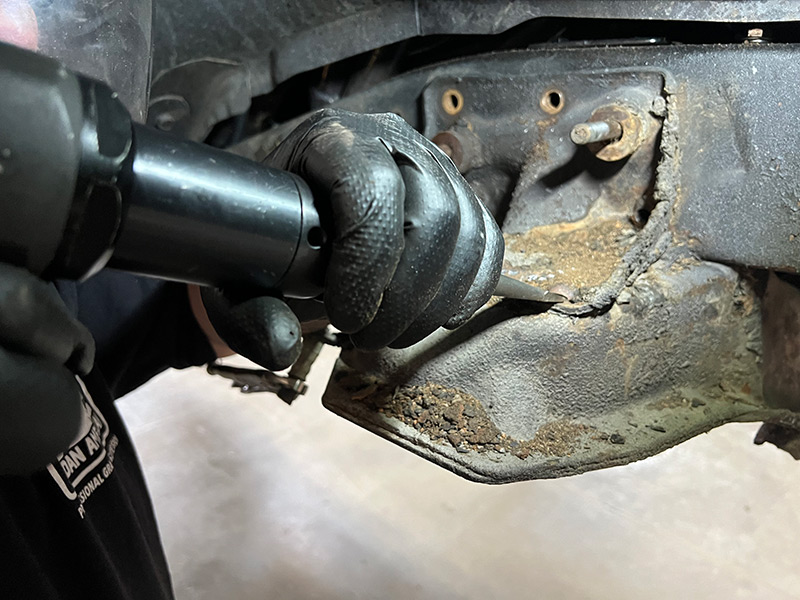
Regardless of where you live, you will need a chisel to remove the heads of the four rivets that connect the bracket to the crossmember. Cut them off and punch out the rest of the rivet.
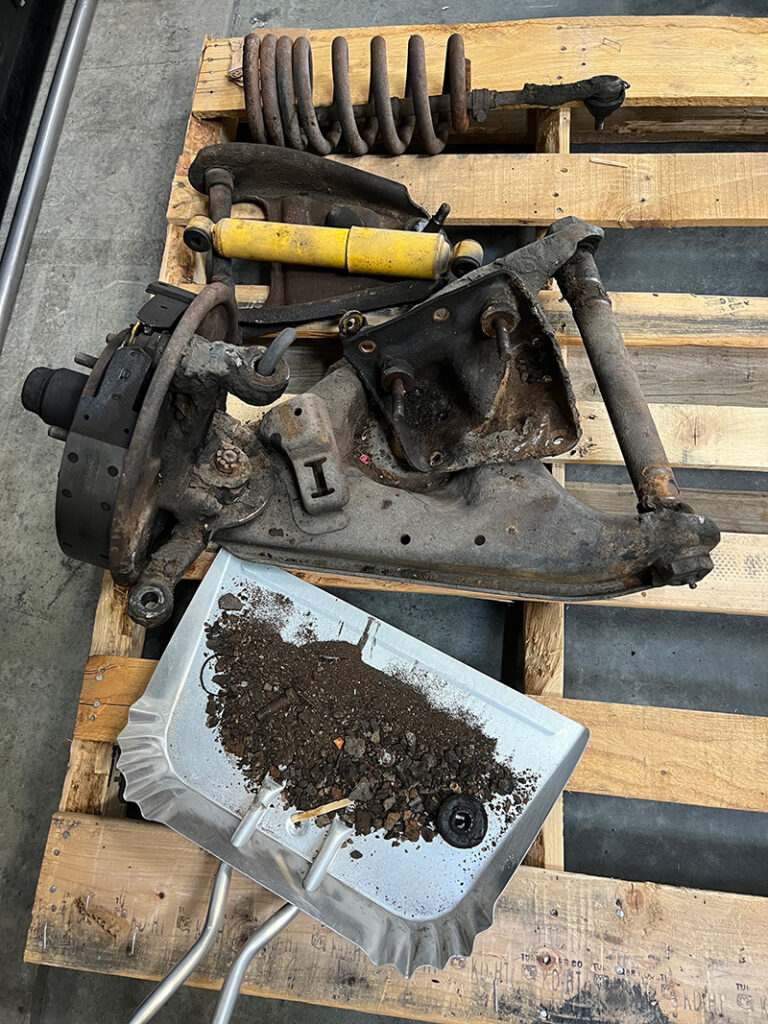
At this point you should have a collection of old parts that look like this, along with lots of debris. None of these parts will be reused with this upgrade.
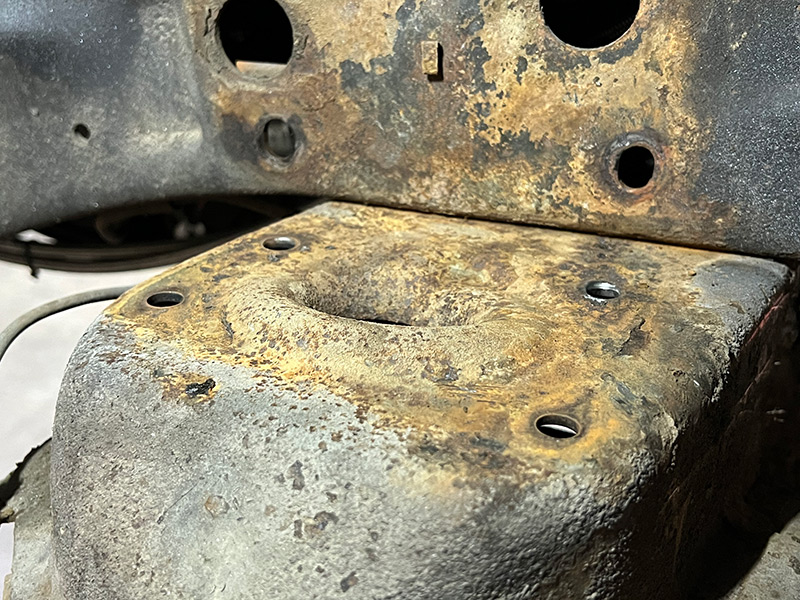
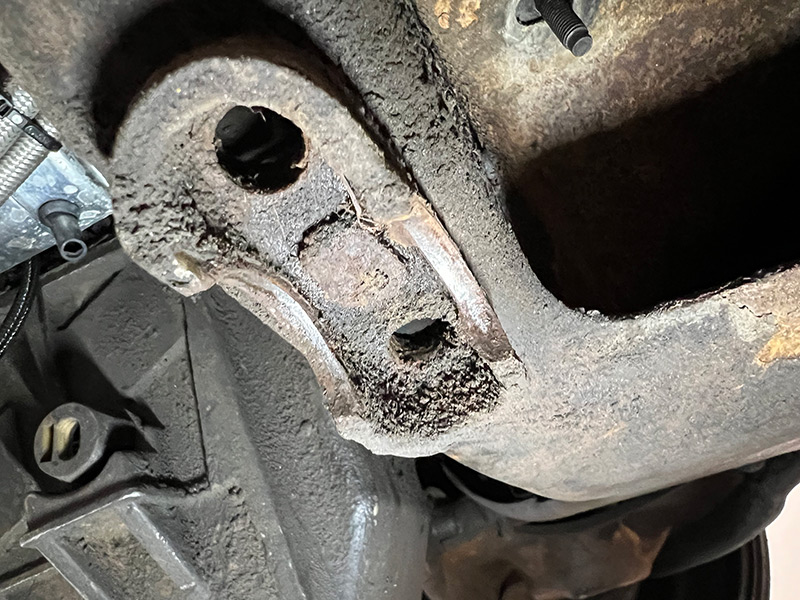
With the bracket removed, the chassis should look like this. If your chassis does not look like this due to rust or damage, you will have to repair it to this level in order to proceed.
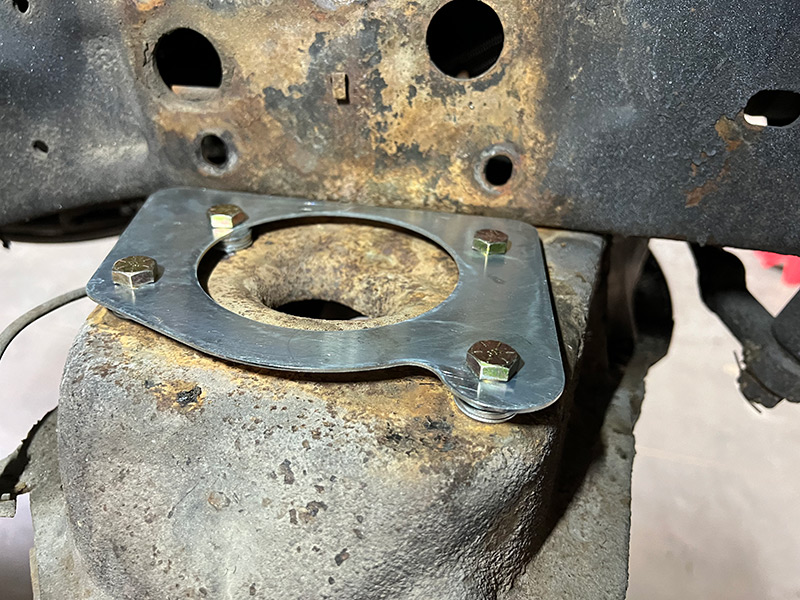
To prepare to make the hole for the coilover to pass through, you will need to cut through this section of crossmember. Aldan American supplies this ingenious alignment guide along with all hardware to set you up for success. The stacks of washer at each corner of the guide allow you to raise the guide high enough to clear any of the contours in the crossmember and so that the teeth in the hole saw are well below the guide.
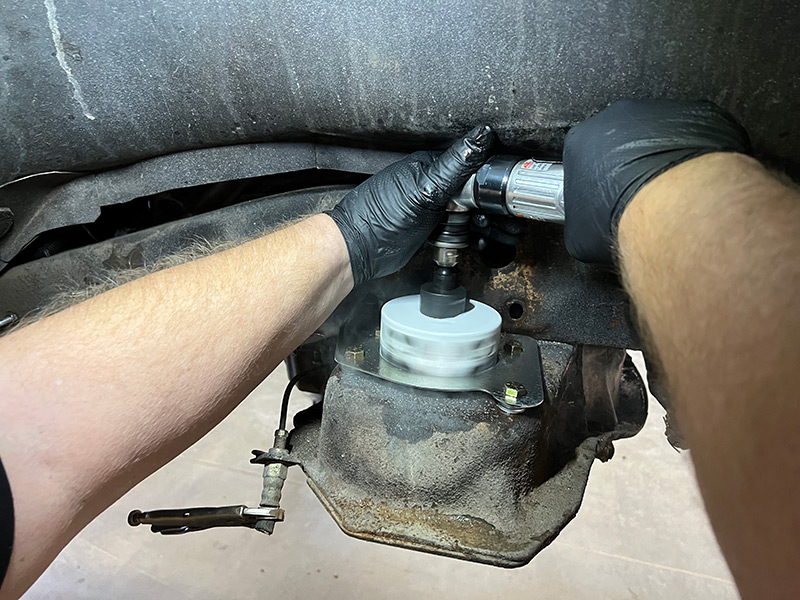
Using a four-inch metal hole saw and right angle drill (neither are supplied in Aldan American kit) you need to cut a hole through this crossmember. Lubricate the saw blade often to reduce heat and help the saw make a clean cut.
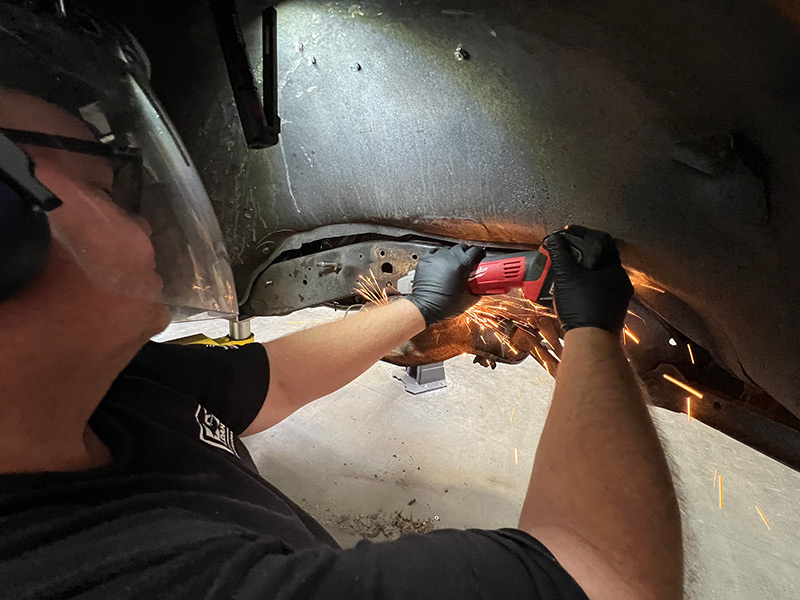
Wearing proper protection, grind the edges of the hole smooth both inside the hole and on the top surfaces. All rough edges should be removed along with any irregularities. This area must be completely flat or the coilover mounting plate will not fit properly.
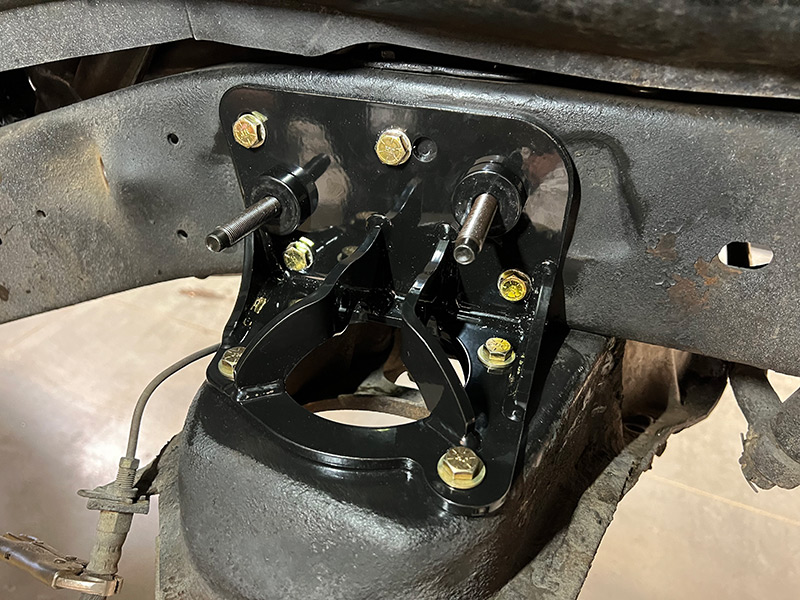
Our new Aldan American supplied upper coilover-mounting bracket will look like this when bolted in place. All hardware is supplied. Torque the attaching 7/16-inch fasteners to 55 ft. lbs. For the record, all 3/8-inch fasteners are torqued to 35 ft. lbs.
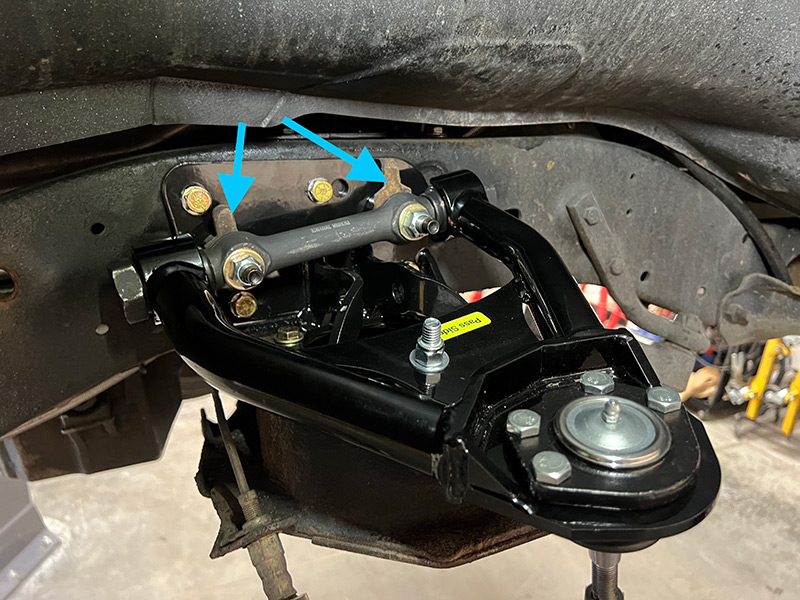
Next we bolted in the new POL upper A-arm using new hardware. It is critical that we reinsert the exact same number of shims into the upper mounts as when we removed them earlier. We also cleaned up the shims with a wire wheel to remove debris so we can get an accurate spacing. Be sure to use the fine threaded nuts on the studs.
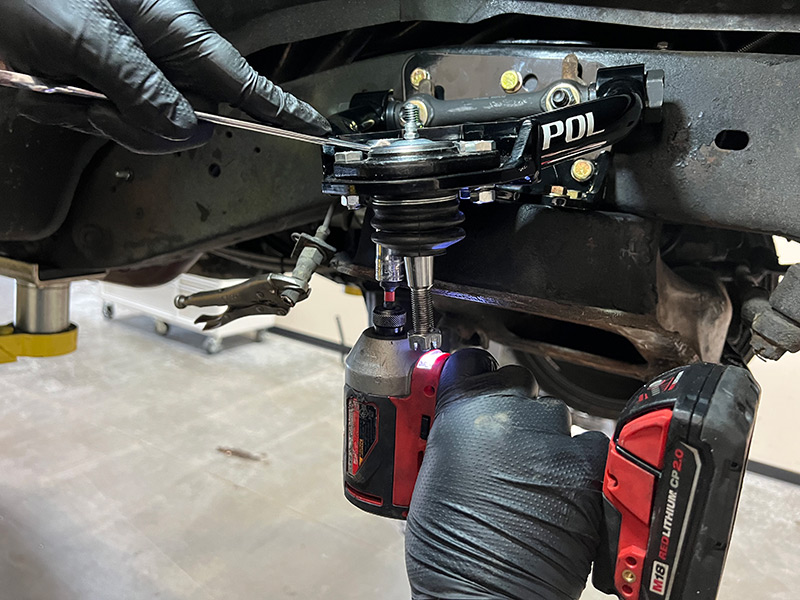
The ball joints in the POL A-arms come with the kit and should be tighten to spec. The lower ball joints are already pressed in place.
Before cleaning the saddle mounts that will receive lower POL A-arms, they appeared like this. A wire wheel was used to clean them up. Of note is the pin that sits in the middle of the saddle. There is a corresponding notch in the A-arm mounting crossbar that will locate on this pin.
To help make the installation of the lower A-arm easier, we used standard nuts on the U-bolt mounts to get everything in place then replaced them with the correct lock nuts. If the original U-bolts are not in good shape due to rust and corrosion, order new ones from Dorman (Lower Control Arm U-Bolt kit, PN 13503 – these are the larger 9/16-inch bolts and early C10’s will require opening up the holes in the chassis with a drill). With early Chevy C10 applications that use a 1/2-inch diameter bolts, torque these fasteners to 45 ft. lbs. For the later model C10 systems with a 9/16-inch diameter bolt, torque them to 80 ft. lbs.
The Aldan American coilover fits perfectly using the specially designed POL A-arm mounts. If you are looking to keep the stock-style coil springs and shocks, Aldan American now offers conventional shock absorbers as well.
The POL lower A-arm allows for three points of adjustment. For this installation, we used the lowest mounting point (the one closest to the ball joint).

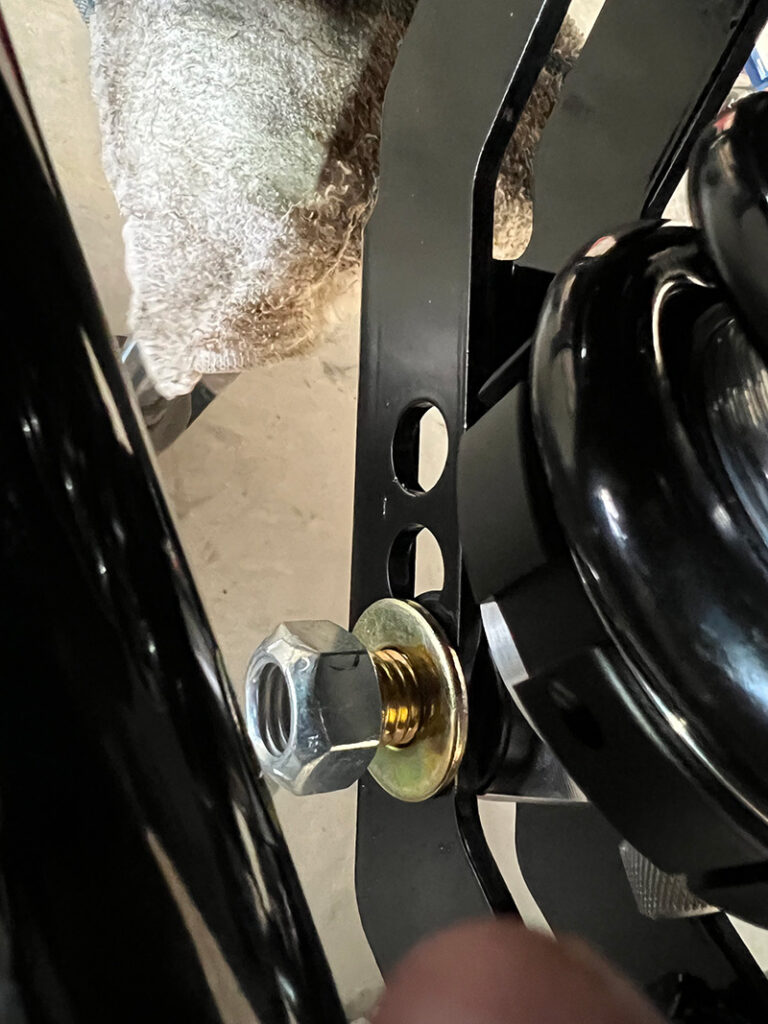
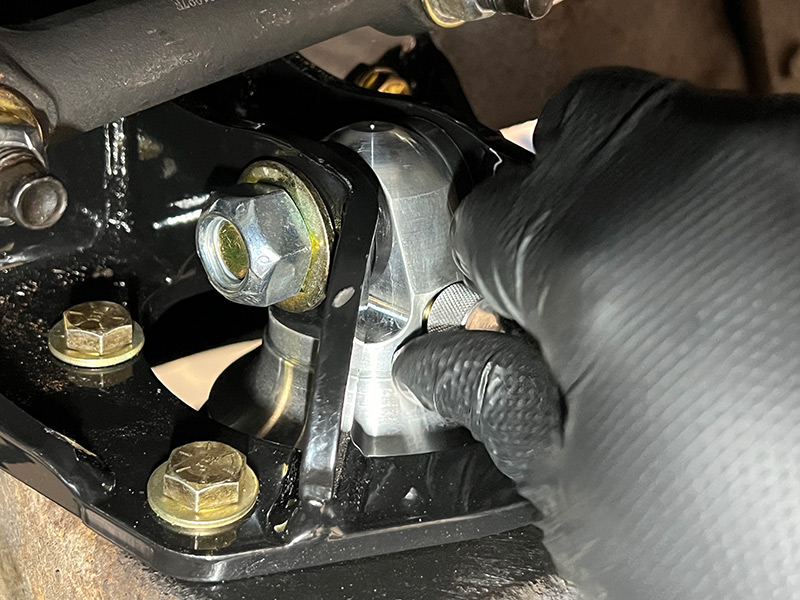
Insert the top and bottom coilover mounting hardware and torque the bolts to 75 ft. lbs. Make sure that the coil over passes through the hole you cut in the chassis without any interference. The coilover adjustment knobs must point towards the outside of the vehicle to be accessible once installed.
This upper knob controls the rebound characteristics of the coilover. Turn the knob fully counter clockwise until it stops and then back clockwise four clicks. This will serve as a good starting point for future adjustment.
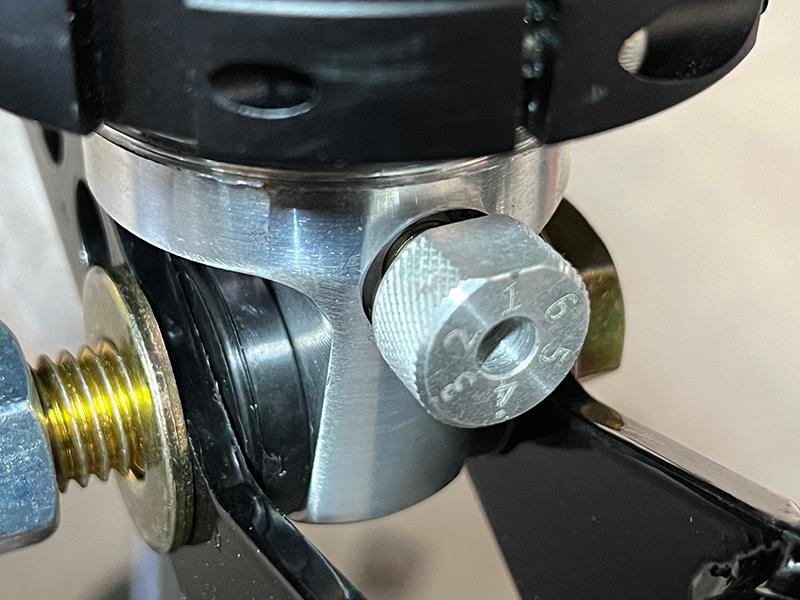
The knob at the base of the Aldan American coilover controls the compression attitude of the unit. In our case we started at the #1 setting, which is easy to denote by the flat top section of the knob facing up.
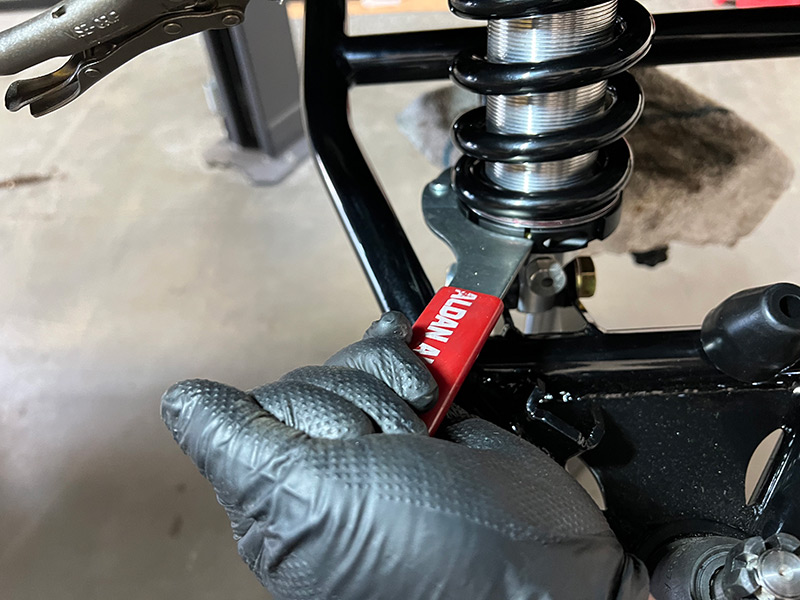
One of the key benefits to Aldan American coilovers is this ability to adjust the ride height of the vehicle with a simple turn of the lower spring mount collar. This wrench, an Aldan American-exclusive, allows you to turn this collar to raise or lower your vehicle height up to two-inches. This operation must be done with the car safely supported off the ground.
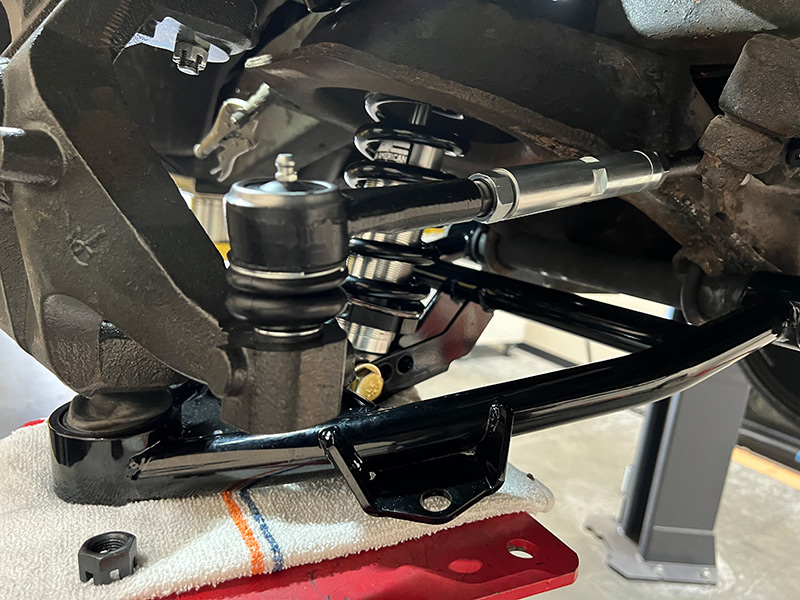
After installation of the new POL drop spindle (for front disc brakes), we installed the new tie rods and associated hardware. It is important to note that these A-arms will not work with a drum brake set up. Before installation, we compared the overall length of the old tie rods and turned the tie rod ends evenly to match that length. This will help get the toe-in alignment spec close to original. Again, a professional alignment is in our future – and for safety reasons must be done immediately at the conclusion of our work here.
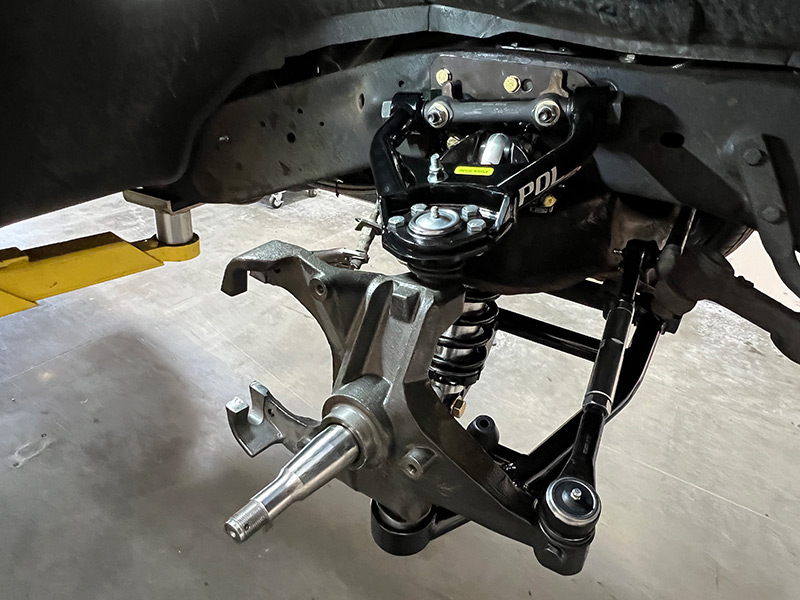
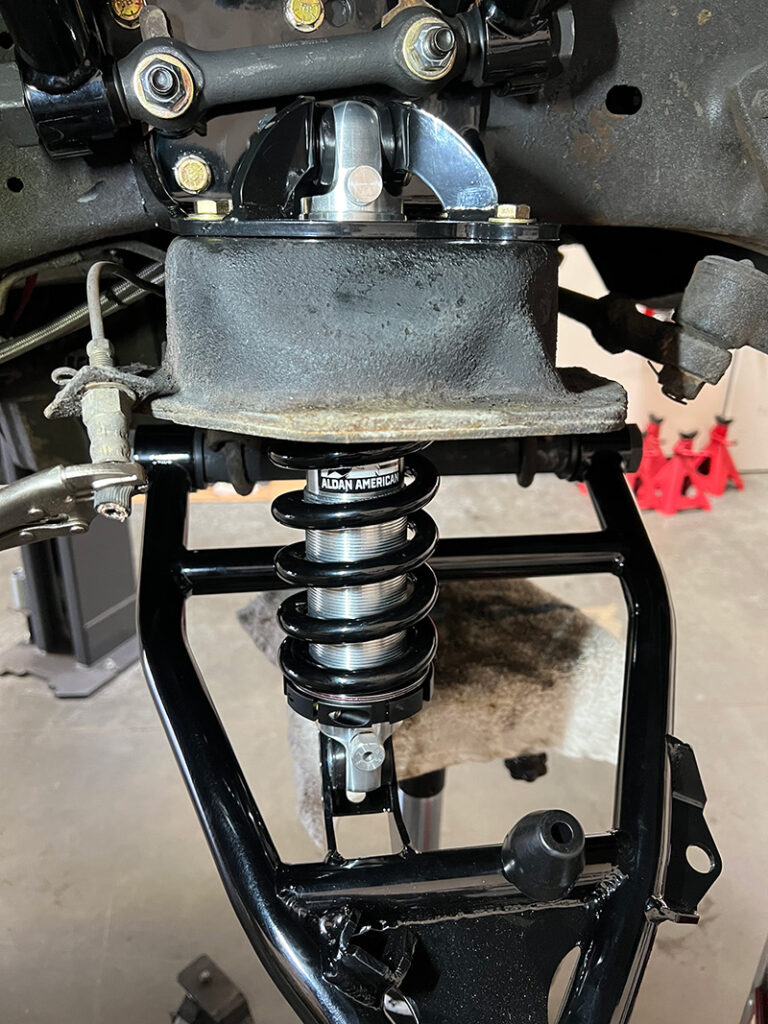
With the POL spindle in place and everything torqued to spec, the new suspension looks like this, a major upgrade in appearance and performance.
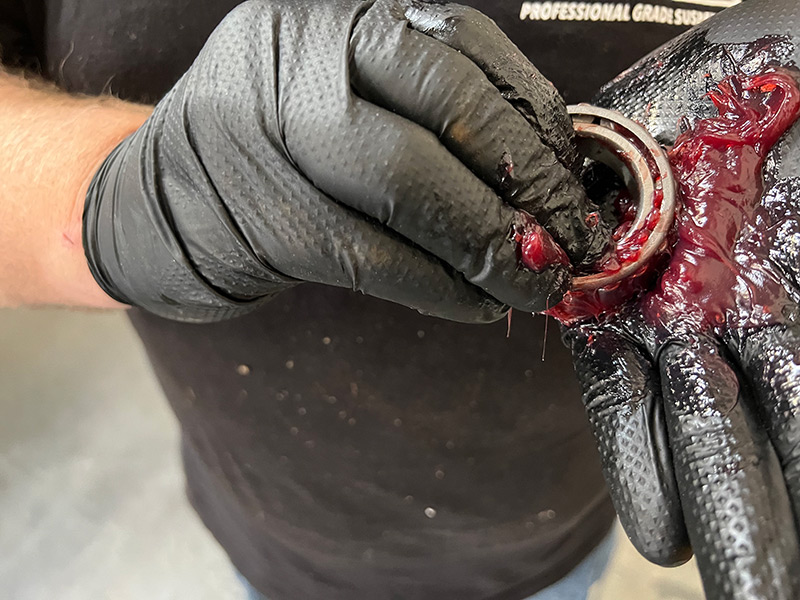
The new POL rotors are ready to go, but first you have to pack the wheel bearings with grease. The key with this messy operation is to press the grease through the bottom of bearing until it pops through the top of the bearing race. There should be no air pockets in the bearing grease when you are finished.
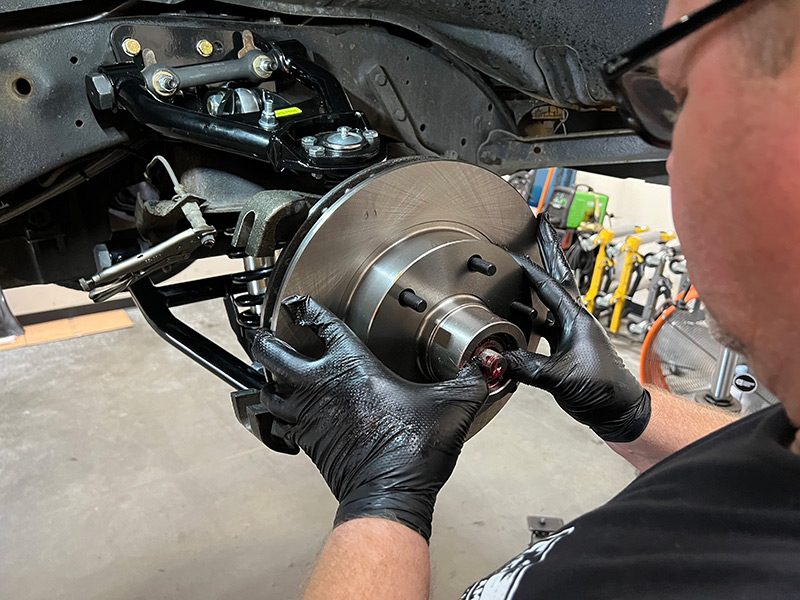
Install the new POL rotor on the spindle with the freshly packed inner and outer bearings (a six lug bolt pattern was used here to match the truck’s six lug wheel pattern, however five lug rotors are also available from POL). Install the retaining washer and then snug the retaining nut until there is light drag on the rotor when you spin it by hand (a GM Shop Guide can be helpful with other details here). Finally install the retainer and cotter pin along with the dust cover.
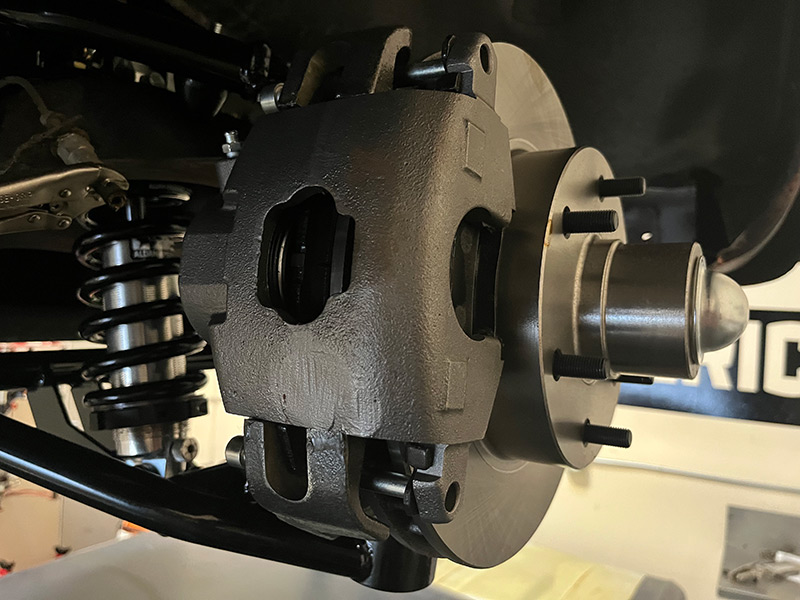
POL also offers this caliper and brake pad set up to go with the rest of these front-end components including new brake lines. Bleed the brakes to rid the system of air before driving. Check your work before proceeding or brake failure can occur. If the brake pedal feels spongy after you are done, the system is NOT right. Enlist the help of a professional to get it right.
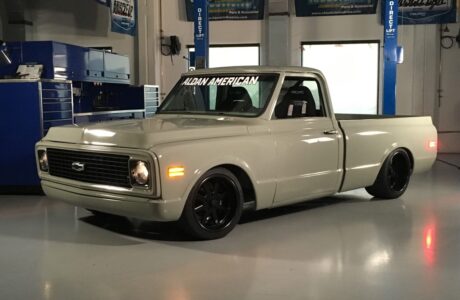
Our freshly upgraded 1969 Chevy C10 pick up now looks the part with new front disc brakes, all new POL suspension and high tech Aldan American coilovers. We now have the ability to adjust, shock rebound and compression attitude along with overall ride height.
Shop Chevy C10 1963-1970: Browse Packages Here
TOP C-10 KITS
-

Coilover Conversion Kit – Chevrolet C10 1963-1970 Front
Price range: $3,330.99 through $3,711.99 This product has multiple variants. The options may be chosen on the product page -
Coilover Conversion Kit – Chevrolet C10 1963-1970 Front
Price range: $2,714.99 through $2,726.99 This product has multiple variants. The options may be chosen on the product page